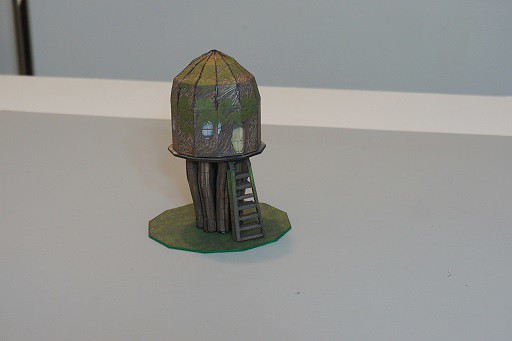
Inspired mod of Dave Graffam's Observatory.
Jul 12, 2015 1:56:02 GMT -9
Vermin King, mproteau (Paper Realms), and 3 more like this
Post by berneart76 on Jul 12, 2015 1:56:02 GMT -9
So, getting a bit brain tired of working on low flat things, and by my find posted in Inspirational and refernece websites, I decided to try something with a little more height to it, and thought that Dave Graffam's Observatory would work well for a living tree type structure. So i started by doing my usual 12 step process to make some textures to use, and then got to work on applying them to the Observatory. I thought it would look interesting raised as well, so decided to make a base using 8 of my prototype curved logs/pilings/tree trunks.
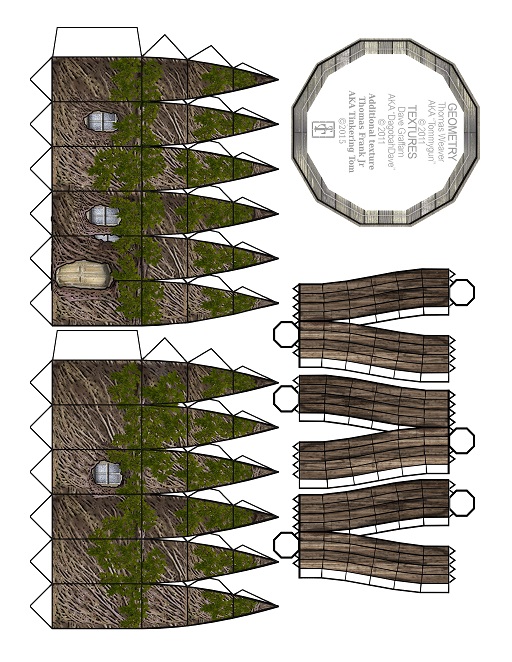
It ended up taking 2 pages ( full size .png links at the end of the thread) and while I'm happy with the result, It might need some modifications still. it gave me a chance to work on some leafy branch textures, and to sue my grassy field tile as well.
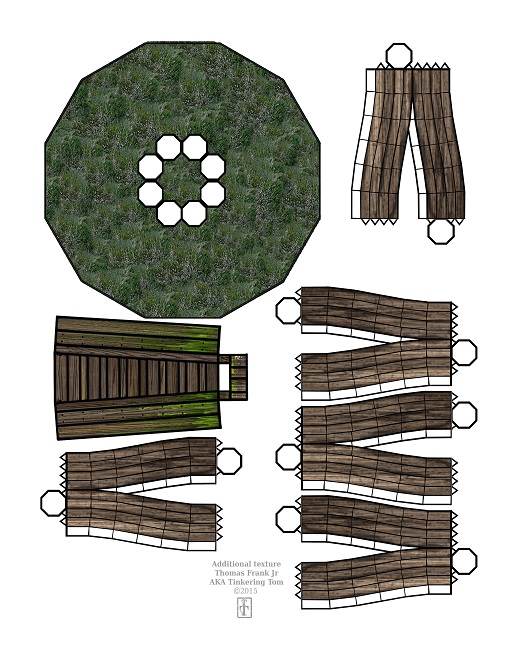
page one- Hut, base and 3 of the 8 supporting trunks, page 2 has the base, the remaining 5 supporting trunks, and a ladder.


The first issue I ran into was my wireless link to my printer hung up on me again, took 5 tries and 3 full resets of my laptop and the printer to re-establish a working link again, and then I discovered that my most recent purchase of 110lb index stock is a grayish white, not a pure white like my previous purchases. Annoying since it took some time to figure it out, at first I thought there was an issue with the background for the .psd and ,png files...
( White normal paper on left, 110 lb stock on the right, on a black matte board )

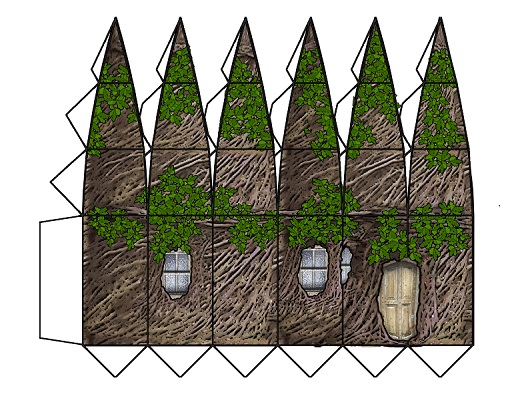
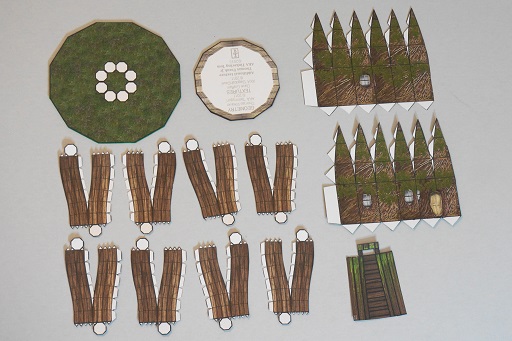
Get all the parts cut out and scored ( I need to do some work on my leafy branch texturing, and possibly lightening up the Hut twisted branch texture, although my printer seams to print things quite a bit darker than what I see on the laptop)

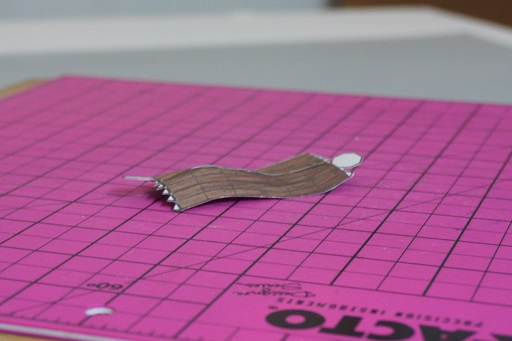
Forming the Curved trunks/posts/pilings works best if you start with the inside section, and work 2-3 tabs at a time, when you get done with the inside it should form a lightly curved shape :

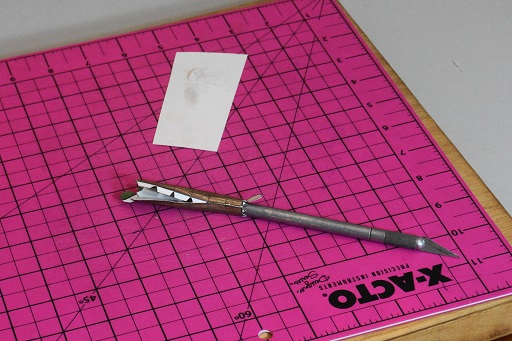
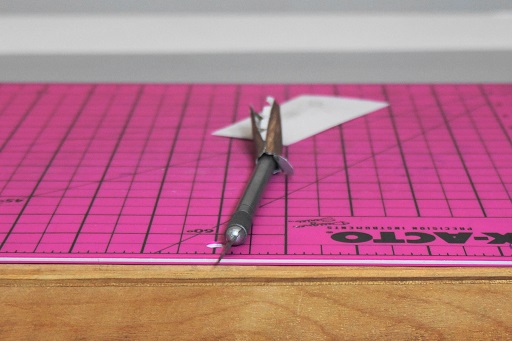
To glue the outer seam I start at one end, working with 2 tabs at a time, forming it around a slightly smaller cylinder, in this case an x-acto knife blade handle works well: the smaller diameter of the forming allows you to work it through the curves Line the edges up the best you can, do the 2 end tabs then the third tab, then work from the other side from the center to the other end:


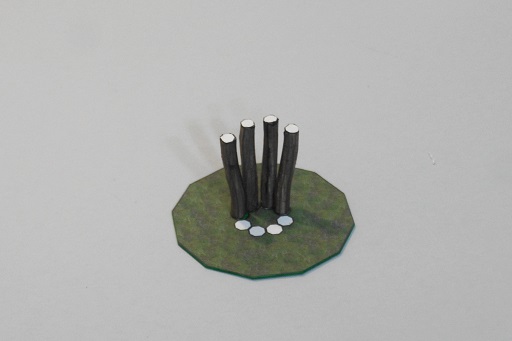
Form the tree trunks and put them on the base with the upper curve pointing out, one of the seams pointing towards the center ( as you get further along you can make sure the inner seams on opposite trunks point towards each other across the center:


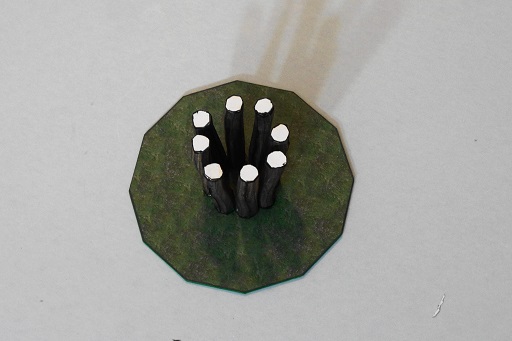
I tend to cut my end caps a little over sized and then trim them after being glued down, since these curved trunks don't always end up perfectly round or octagonal. If you cut them on the INSIDE of the black outline, they should be a pretty close fit.
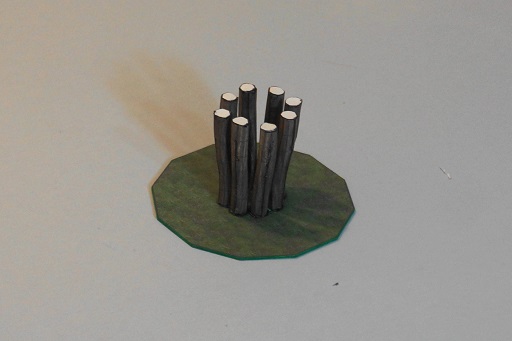
When you are done, you should have a fairly close to circular arrangement of tree trunks:


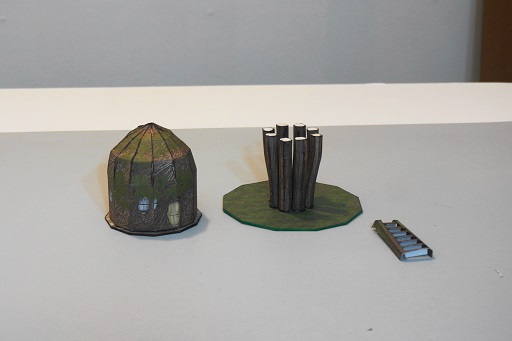
You can then assemble the hut and ladder:

Put some glue on the tops of the tree trunks and put the hut on top o them, you can try to center it as close as you want, or let it be slightly off center:

Add figures and play! ( need to find my fine tipped brown marker and work on my edging skills a bit more as well...)

I'll probably rework this again, make it a little larger and also work on an interior for it as well.
Here are the .png files if you want to sue this yourself:
Living tree Hut page 1
Living tree Hut page 2
Now back to my regularly scheduled work on Sandbars ( for the July People of the Sand Hoard) and my Breakwaters/Sandbars/Coral Reefs set..
It ended up taking 2 pages ( full size .png links at the end of the thread) and while I'm happy with the result, It might need some modifications still. it gave me a chance to work on some leafy branch textures, and to sue my grassy field tile as well.
page one- Hut, base and 3 of the 8 supporting trunks, page 2 has the base, the remaining 5 supporting trunks, and a ladder.
The first issue I ran into was my wireless link to my printer hung up on me again, took 5 tries and 3 full resets of my laptop and the printer to re-establish a working link again, and then I discovered that my most recent purchase of 110lb index stock is a grayish white, not a pure white like my previous purchases. Annoying since it took some time to figure it out, at first I thought there was an issue with the background for the .psd and ,png files...
( White normal paper on left, 110 lb stock on the right, on a black matte board )
Get all the parts cut out and scored ( I need to do some work on my leafy branch texturing, and possibly lightening up the Hut twisted branch texture, although my printer seams to print things quite a bit darker than what I see on the laptop)
Forming the Curved trunks/posts/pilings works best if you start with the inside section, and work 2-3 tabs at a time, when you get done with the inside it should form a lightly curved shape :
To glue the outer seam I start at one end, working with 2 tabs at a time, forming it around a slightly smaller cylinder, in this case an x-acto knife blade handle works well: the smaller diameter of the forming allows you to work it through the curves Line the edges up the best you can, do the 2 end tabs then the third tab, then work from the other side from the center to the other end:
Form the tree trunks and put them on the base with the upper curve pointing out, one of the seams pointing towards the center ( as you get further along you can make sure the inner seams on opposite trunks point towards each other across the center:
I tend to cut my end caps a little over sized and then trim them after being glued down, since these curved trunks don't always end up perfectly round or octagonal. If you cut them on the INSIDE of the black outline, they should be a pretty close fit.
When you are done, you should have a fairly close to circular arrangement of tree trunks:
You can then assemble the hut and ladder:
Put some glue on the tops of the tree trunks and put the hut on top o them, you can try to center it as close as you want, or let it be slightly off center:
Add figures and play! ( need to find my fine tipped brown marker and work on my edging skills a bit more as well...)
I'll probably rework this again, make it a little larger and also work on an interior for it as well.
Here are the .png files if you want to sue this yourself:
Living tree Hut page 1
Living tree Hut page 2
Now back to my regularly scheduled work on Sandbars ( for the July People of the Sand Hoard) and my Breakwaters/Sandbars/Coral Reefs set..


 ) or any of libkneht celtic buildings...