|
|
Post by oldschooldm on Nov 30, 2015 11:48:15 GMT -9
www.silhouetteamerica.com/blackfriday#anchorSince they've got $149.00 off at the Silhouette site, and I really, really want to try embossing instead of dashed-cuts for scores, I'm giving it at go. I'm a little nervous that the default cutting mats are 8.5' x 6" - but it says that the larger "Scan and Cut" thingydoo will fit, so I think we'll be ok. Assmuning it works for me, I'l have my workhorse SD for sale after that - I'll offer it here before going to eBay or anything like that.
|
|
|
|
Post by rattokan on Dec 1, 2015 2:11:42 GMT -9
Really looking forward to your first reports.
I am concerned though that loading of a sheet will be much more complicated and using homebrew cutting mats (like mylar foil sprayed with post-it glue) might also not work.
On the other hand it can load up to 5mm materials. Probably we could load foamcore and make ultraprecise pre-cuts (i.e. for WWG TLX) on it.
|
|
|
|
Post by oldschooldm on Dec 11, 2015 12:04:29 GMT -9
OK. I got it, and tried to record an uboxing video. Unfortunately, my phone stopped recording 3 minutes in and I didn't know - so no video.
Here's what I found out:
1) The Curio Looks like it's going to do everything I want it to BUT....
2) DON'T JUST ORDER THE DEFAULT PACKAGE for doing what we do: 8.5"x11" registration cutting. There are many option sets, and most of them only got up to 8.5" x 6"
You want something like the special package: "Silhouette Curio Digital Crafting Machine with Large 12 Inch X 8.5 Inch Base and Embossing Bundle"
I'm keeping mine and adding the "Silhouette Curio Base for Craftwork, Large" a $50 add-on.
Here's why: One of the key upgrades is moving to a high-torque gear-based tracking feed (replacing the old friction-feed mechanism). The requires a feed tray that is made of sturdy plastic with teeth underneath. You then "clip" the other kinds of cut/embossing sheets to that - and by default the base supports only 8.5" x 6" workspaces. All of the materials max out at that size, ans there is no way to cheat it larger.
So - check that it says 8.5" x 12" in the spec sheet of what you order.
Despite all this, I think I'm going to be very happy with the Curio, all the features deal with annoyances I've always had with the "1st generation-ness" of the SD (things slip, alignment is spotty, etc.) have been improved.
So - I'm now waiting for my expansion and will report in again after I have finally cut/embossed something with it.
|
|
|
|
Post by mproteau (Paper Realms) on Dec 11, 2015 12:30:28 GMT -9
Thanks, early adopter! Great information!
|
|
|
|
Post by oldschooldm on Dec 17, 2015 14:57:42 GMT -9
My large bed for my Curio came today. 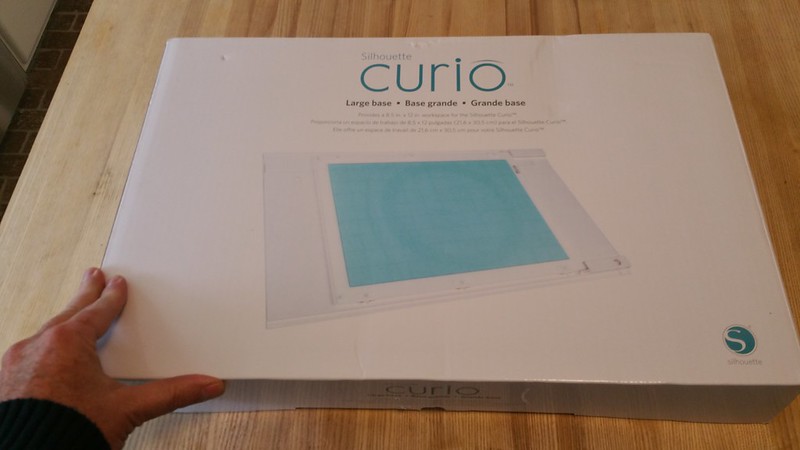 Silouhette Curio Silouhette Curio by Oracle Omega, on Flickr Here's some immediate thoughts after building some of my popup staircases with it... TL;DR: I love this machine and am so happy I upgraded. It changed the way I'll build (eliminating perforations in favor of embossing) going forward and I can't wait to try cutting heaver materials when the appropriate deep blade arrives in a few days... [There are a few things that are different - read on.] 1) It's QUIET compared to the SD - and not just because of the elimination of the "chugga-chugga-chugga" from no longer using perforations for score lines. It's actually quieter. 2) It's sturdy (see photos below) - the bed is now over-sized and stiff, because of the new gear-drive... 3) Which gives you much more accurate cuts! 4) Most importantly, you can have two tools in place. My standard setup is going to be: Bed depth 6 with embossing carrier, Knife on 3, thin embossing head (thinner paper setting, cut twice) 5) When I want to embossing-as-scoring, I have to change the perforation lines to cut lines (there is a seperate "material" setting for embossing) so cutfiles that have different line-colors for cut/perforate are very helpful with this step. This bed is HUGE! 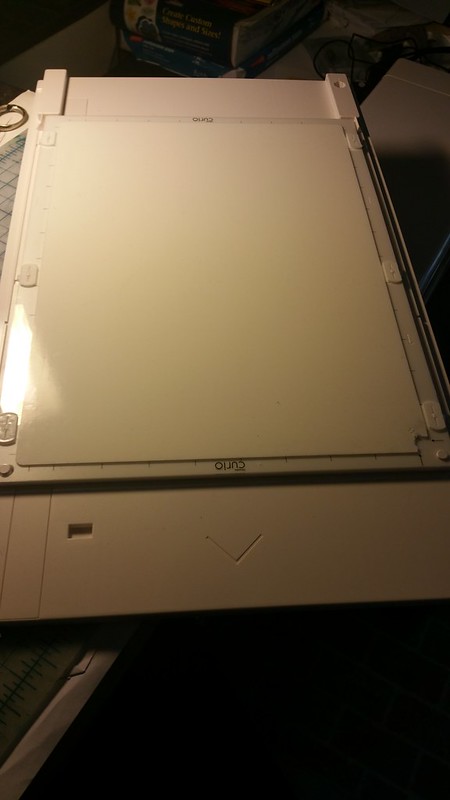 Silouhette Curio Silouhette Curio by Oracle Omega, on Flickr You clip down the a carrier sheet (cut or emboss) plus vertical spacers. 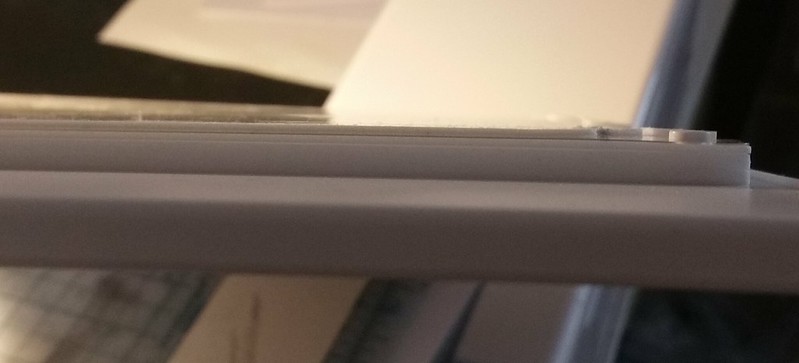 Silouhette Curio Silouhette Curio by Oracle Omega, on Flickr And rigid with gear drive (no more friction slippage.) 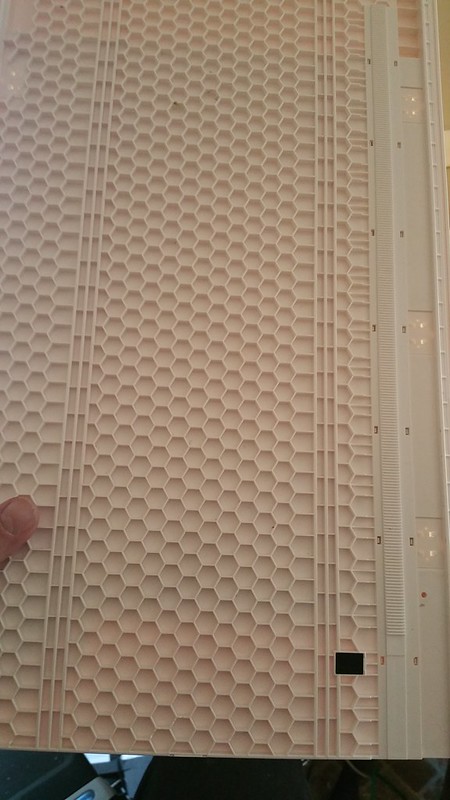 Silouhette Curio Silouhette Curio by Oracle Omega, on Flickr Notes: A) You really, really have to buy the larger bed, either as a separate item or just get the right package version in the first place. Make sure it says 8"x12" - don't just go based on the apparent size if the bed. the larger bed is around 18" total length. You might have to find a different place to fit your cutter to get it in and out. I did. B) Use the default cut settings to start , not your favorite ones. On the SD I used to cut 100lb cardstock on cut-setting-5. That caused the Curio to slip because of digging into the carrier. C) My previous method for post-cut model removal was to flex the carrier sheet. You won't be doing that with Curio as locking down the carrier sheet to the bed is very time consuming. I've set my bed to being "6" deep in foam (you'll see what that means when you get one) and bot cut and emboss/score directly on the embossing sheet. This means tweaking the cut settings a little bit. D) It takes awhile to understand how to assign lines to the two different tools. It's model for the lines selected, so sometimes I got confused at first. E) It uses the newer registration marks - just something to note with older kits that only have SD regmarks. This is not new to Cameo/Portrait users. --- I've become bit of a power-builder, so I'm probably more sensitive about the perforation/embossing issue than is important, but here's my thoughts on the tradeoff: 1) Emboss is quieter. 2) Emboss extends cutting blade life 3) Emboss doesn't cut the texture, reducing the time and ink for edging. 4) BUT, Emboss increases fold-time by adding a bone-fold/burnishing step (Perfs fold easily) 5) Emboss folds are much stronger (sometimes Perf cuts tear) 5.1) Emboss folds can be smaller (small perf cuts act like cuts) 6) BUT, Emboss is often on the "wrong" side for a perfectly clean fold (Perfs are just the same both ways.) 7) Emboss makes a clean textured edge instead of an alternating cut/texture/cut/texture line that never edges completely away. (This irritates me most in my close-up photos.) 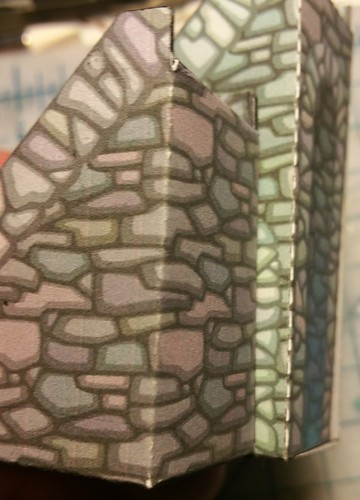 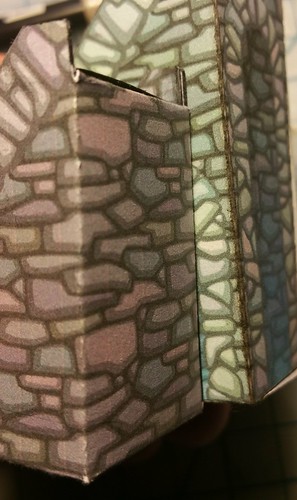 Silhouette Curio Silhouette Curio by Oracle Omega, on Flickr So - Should you get one? Not if you're happy with what you have. If you're new to the hobby and on a budget, any used Silhouette model is great! Even the SD is a workhorse that did me well through 100s of models and even prize winning builds! If you're replacing an old one and can afford it, by all means, upgrade to the Curio. It rocks. I'll post more stuff here as I figure it out - but I'll be doing it on your real models... Who's first? |
|
|
|
Post by Vermin King on Dec 17, 2015 17:16:13 GMT -9
This would have come in handy on Garrick Inn v2. After I worked out the geometry of the dormer roofs, which I had to print out after doing the geometry on the roof texture patches on the original pages, I had to print them off to make sure they worked. This gave me an extra page to cut out timber framing for lamination. A robo-cutter would have helped.  Luckily, I'm only layering the front |
|
|
|
Post by rattokan on Dec 22, 2015 3:18:15 GMT -9
So how is the whole carrier-sheet thing working with the Curio? The first thing I did when I got the Portrait was throwing away the mat that came with it as it was way to sticky and having only one slowed down the workflow a lot. With my homebrew sticky foils I can mount like 10 pages in advance and then let the machine run and do something else. Whenever a page is done (i can hear that from every room in the house  i just go there and put in the next sheet. Does the setup time increase a lot with the Curio? |
|
|
|
Post by oldschooldm on Dec 22, 2015 8:11:14 GMT -9
So how is the whole carrier-sheet thing working with the Curio? Whenever a page is done (i can hear that from every room in the house i just go there and put in the next sheet. Does the setup time increase a lot with the Curio? The new bed is a mixed bag from a speed perspective. There is now depth to the bed - so if you want to change between major projects: Say stippling and deep-cutting and embossing with various materials, you have to disassemble and reassemble the bed - very time consuming even compared to loading up a classic carrier sheet. On the other hand, I've got it configured (at the moment) for one job: Cutting and Embossing model cutfiles - so I don't adjust the depth at all. Also, I'm using the embossing carrier, which is thick VERY slightly-sticky foam. You see, it doesn't need to be very sticky, since the all-gear drive means no rollers coming down on the material to hold it in place. The only pressure on the face of the paper is the cut/embossing head. This is a godsend for quick loading/unloading. I pick up the cut model from the bed while it is still in the cutter, quickly orient the next page to cut - while it is still loaded in the cutter - and then press the load button and send the model to the cutter. Repeat. There is a too-sticky-at-the-start carrier bed, but I don't use it for much - just pure cuts for stuff like sticker paper. Fixing the overstickyness is easy with a sheet of scrap paper placed and removed about a half dozen times. Since I can't do the "remove while in the cutter" hack (above) it's much slower to load/unload then an older flexible carrier sheet. I really like the new Curio (especially the embossing vs. perforation) and it's gear-drive accuracy - so the change in workflow is OK with me. I never did the multi-cutting-sheet thing, so my new workflow is just as fast. BTW, the new noise level is much lower, so you might not hear it finish anyway. :-) I *AM* having some odd behavior though - looks like early version bugs with Studio and Curio - I've had the entire cut skew about 30% (turning a rectangular shape into a parallelagram) and one cut 90% out of phase. I'm trying to isolate the cause and submit a bug report or two. A Curio/Studio hard reboot clears the problem up, so beware! I got the DEEP CUT knife. No, you can't use it to cut dense cardstock (like backing boards, multisheet glued cardstock, etc.) I think it's only for stuff like foam. Not in a hurry to cut any of that, but thought I'd share what I know so far. |
|
|
|
Post by rattokan on Dec 22, 2015 14:23:46 GMT -9
Thnx for all the information oldschooldm, sounds very cool! So basically you do not need a carrier anymore? I really consider getting one, when I find the cash  Do you think putting foamcore in there using the deep blade would work? I mean just cutting through the top paper and maybe one or two mm into the foam? I think for TLX tiles it would be great to have some precutting done for increased precision so that i just have to cut through the foam later using the precut line as a guide... *justdreaming* |
|
|
|
Post by oldschooldm on Dec 22, 2015 17:00:52 GMT -9
Thnx for all the information oldschooldm, sounds very cool! So basically you do not need a carrier anymore? I really consider getting one, when I find the cash Do you think putting foamcore in there using the deep blade would work? I mean just cutting through the top paper and maybe one or two mm into the foam? I think for TLX tiles it would be great to have some precutting done for increased precision so that i just have to cut through the foam later using the precut line as a guide... *justdreaming* There is still carriers - a soft-foam one for embossing (what I'm using) and a more classical plastic one for just-plain-cutting. These are part of a large rigid bed, which you really do need. So far I can't see a way to cleanly separate either carrier from the bed. The deep blade (separate purchase) cuts foam as deep as 2mm officially. I haven't tried it, or what will happen when the foam is thicker (it might be decent to partially cut foam, I don't know.) |
|
|
|
Post by zack1bt on Jan 13, 2016 16:56:28 GMT -9
Hello, I've got a Curio that my wife and I have been using for a few months now.
I'm running into an issue where I'm trying to cut the Dave Graffam Inventor's House files, but the sharp corners on like the "Main Roof Reinforcer" cause the paper to snag around the blade, causing the blade to get stuck and then that throws off the rest of the cut path.
I've tried reducing the speed and depth at which the blade cuts, but it still does it. I'm also using a new rachet blade and mat.
Also, let me know if I should post into a new thread, rather than here.
Thanks!
Brandon
|
|
|
|
Post by mproteau (Paper Realms) on Jan 13, 2016 17:09:45 GMT -9
Welcome to the forums! I use a Cameo, not a Curio. I typically cut with my blade depth at 3 I think, I set my speed anywhere from 4 to 10 depending on my mood, and pressure is set at maximum. I have this for both 110lb cardstock and heavy matte photo paper. Now, I've not used a Curio - maybe oldschooldm can point to differences between it and the Cameo/Portrait/SD cutters. If I win the powerball drawing tonight, I'll buy one and play around with it. Is the blade slipping? Or is the paper slipping out from under the blade? Not sure if it's adhered well enough to the cutting mat. If the blade is slipping, does it make a grinding noise of any sort at the point where it goes wrong? If the blade depth is too great, you may find that it's actually cutting into the mat. I used to set my blade depth at 5, and found I was cutting WAY too deep and had problems with that. Try cutting at depth 1 (no need to print anything out - just see if it'll cut). What material are you cutting? You can try cutting lighter copy paper (plain paper) rather than photo or card stock. Just use a low cut depth. Hopefully we can get the kinks worked out! |
|
|
|
Post by zack1bt on Jan 13, 2016 18:52:02 GMT -9
It seems like on a sharp point turn, the paper gets bunched up under the blade and causes it to "stutter", then when it moves on (changes angle) it is then in the wrong position. I'm using a blade depth of 2 for 110 Cardstock, which seems to cut the paper fine and not cut into the mat. I also tried to reduce both the speed and the pressure, which helped for a little bit but then it happened again later in the page. Hopefully the picture helps? 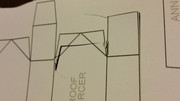 |
|
|
|
Post by lightning on Jan 14, 2016 0:03:25 GMT -9
I don't think this is an issue just for the Curio but for all cutters. I am using a Portrait and I am not sure how "sharp" parts I have cut but I remember esp when the glue of the mat starts to wear off, I had problems with small fine detail parts. I then applied a coat of spray on adhesive glue to make the paper stick better to the mat. You have to find the right balance. If you have too much sticking going on then you wont be able to get the cut parts off without tearing.
Another option could be to setup the cut lines in silhouette studio software so that they don't cut in one go. You could color the different cut sections in various colors and then tell studio to cut only one direction first and then the other.
Maybe one of these can help? Good luck!
|
|
|
|
Post by oldschooldm on Jan 14, 2016 8:21:26 GMT -9
This can happen with all mats, especially if you cut too deep. BUT, I am seeing some of the same problem as you zack1bt. I'm using the embossing mat for both cutting and embossing, and it is much more sensitive to too-much/too-little adhesive. If the paper can slip at all, this can happen, and if it's too sticky, the mat itself (soft foam) can tear. So I came up with this solution for that mat: 1) When stickiness drops to 0, apply a very, very light (a single less than 1 second spray) coat of Easy-Tack and test with a scrap sheet. Should come up without damaging the mat. 2) Always emboss (score lines) before cutting. This improves stickyness to the mat before the knife cutting wants to drag it around. 3) Always cut/emboss at speed 1 Recently I tried to hurry some cut-only sheets by cutting at speed 6, and regretted it as it bound again, even though the model was not complex, perpendicular lines. So - the Curio, using the embossing mat, is a bit tetchy. I haven't done much cutting with the cutting mat, perhaps other owners can chip in here if that mat can cut faster without binding. |
|
|
|
Post by zack1bt on Jan 14, 2016 8:45:09 GMT -9
I ended up just editing those points out, and I'll cut them by hand (leaving some un-cut triangles). The other weird thing that is happening is that it seems to be getting sloppy? The cut lines in Studio are crisp, but the Curio seems to be rounding some corners. Could be that it bunched up again somewhere, just not as pronounced? I'll keep playing around with it.
|
|
|
|
Post by oldschooldm on Mar 4, 2016 12:29:52 GMT -9
My curio had a very irritating habit when I was cutting using the cutting sheet (not when I was using the emossing sheet)... It would "catch" on sharp angle changes. I'd seen this before on my old Sillouette whenever I was cutting things that were too thick, or if it cut into the cutting mat.
But this was when all the settings were correct and I wasn't cutting too deep.
Today I think I figured out why - and a tip that every Curio owner should know:
The multi-depth cutting mat system slips, causing trips like this.
Curio uses a stack of foam mats under the cutting mat to push the paper up to the print heads. These are held in place with peg holes at the top, and 3-per-side peg clips.
Most notably, the side pegs are significantly smaller than the holes they go in, and there are NO PEGS at the far end of the cutting area. I was watching a cut and noticed that the stack of matts was moving left-and-right with the torque of the cutting blade. This is bad - it makes the cut inaccurate, and causes the blade to stick.
BUT I HAVE A SOLUTION! Easy Tack!
I've sprayed a few spots of easy-tack on the back of each layer of the mat stack, and now it doesn't move! And, so far, no more sticking/grinding!
Ugh. That was really whizing me off, but I think I'm all good now.
Lets just say that Curio 1.0 still has a few bugs we need to work around. :-)
|
|


 i just go there and put in the next sheet. Does the setup time increase a lot with the Curio?


