


DGM's Pump House Fold Flat with Interior - going too far?
Jun 24, 2016 14:08:07 GMT -9
Vermin King likes this
Post by oldschooldm on Jun 24, 2016 14:08:07 GMT -9
Y'all should know by now that I'm kinda obsessive about making models store flat. Here's a great little model that I tried several ways to make fold flat - WAY more hours than I should have.
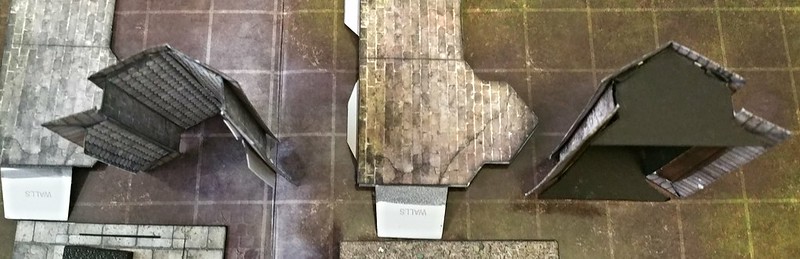
The two smaller models to the right are the one's I'm talking about today. The $.095 Pump House by Dave Graffam Models.
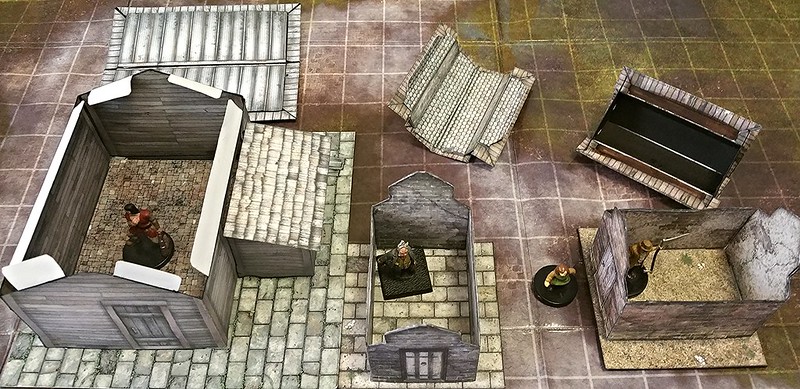
Pump House Fold-Flat Variations by Oracle Omega, on Flickr
Pump House Fold-Flat Variations by Oracle Omega, on Flickr
I'd like to share what I learned.
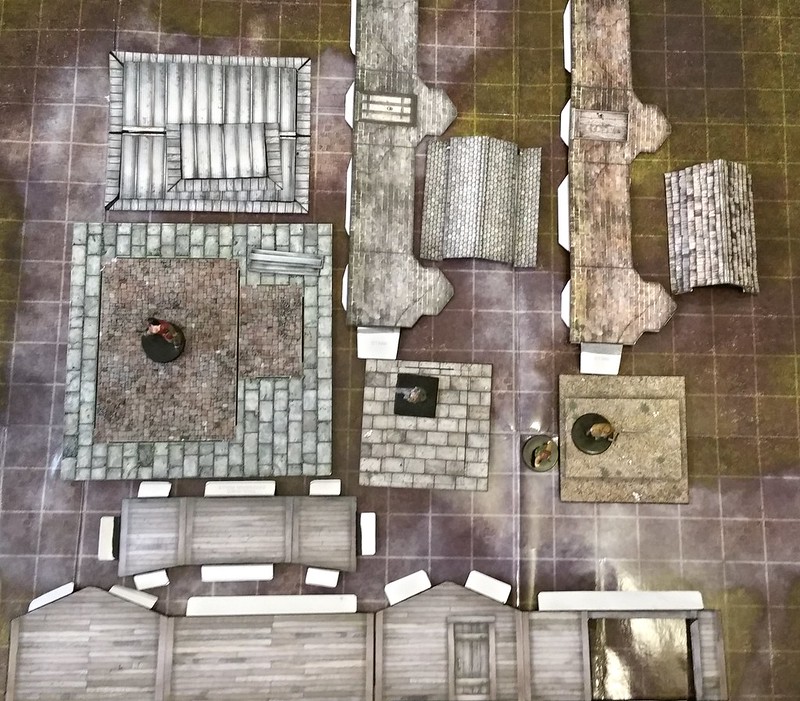
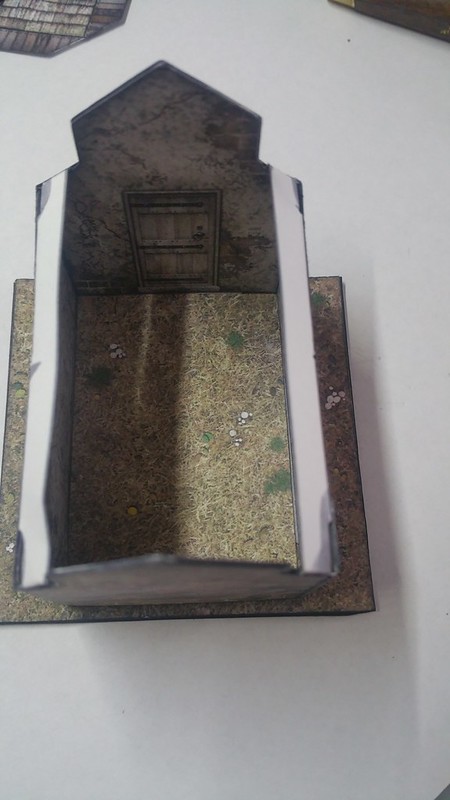
This model has 5 pieces. Walls, 3 for the roof, and 1 for the file/floor. It should assemble about as fast as any other one-page model with 5 pieces.
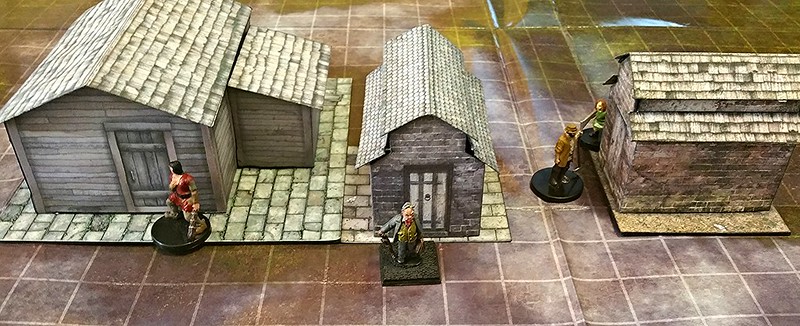
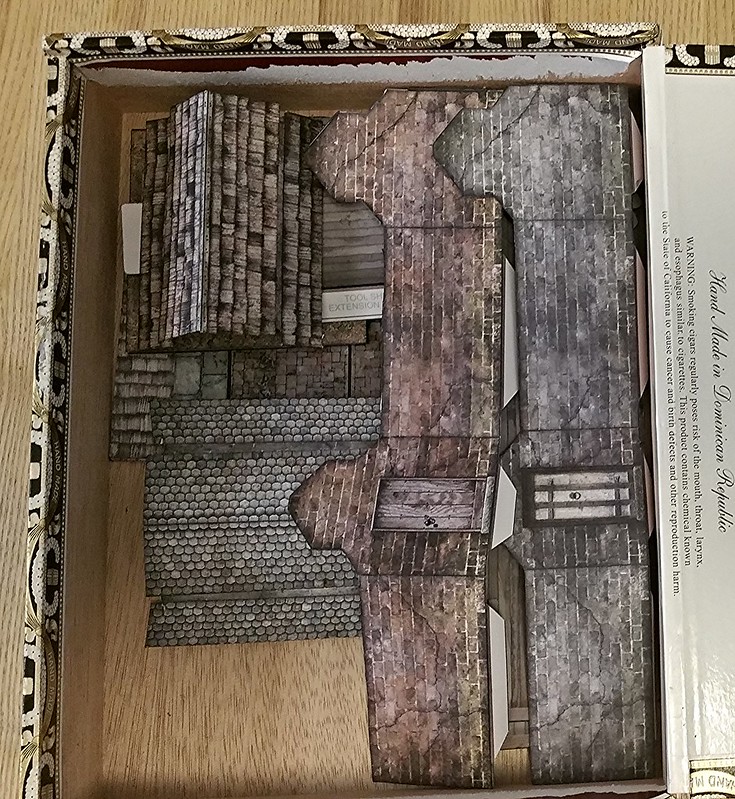
I wanted to make something that stored 100% flat. I'm now convinced that is way more complex than warranted by the effort to achieve that effect completely. Here's how they store now (one is flat, the other is partially flat):
The interior wall and floors with slots and tabs were a no-brainer - that portion is easy and works great.
I ran into problems with the multi-surface roof. I tried two 100% fold-flat versions:
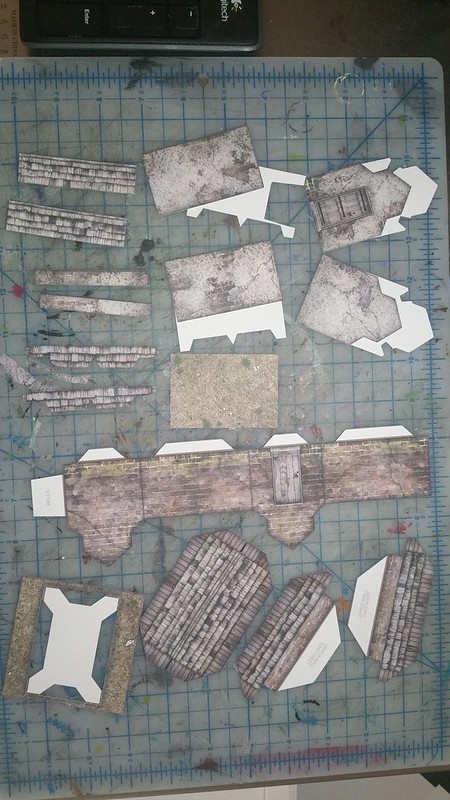
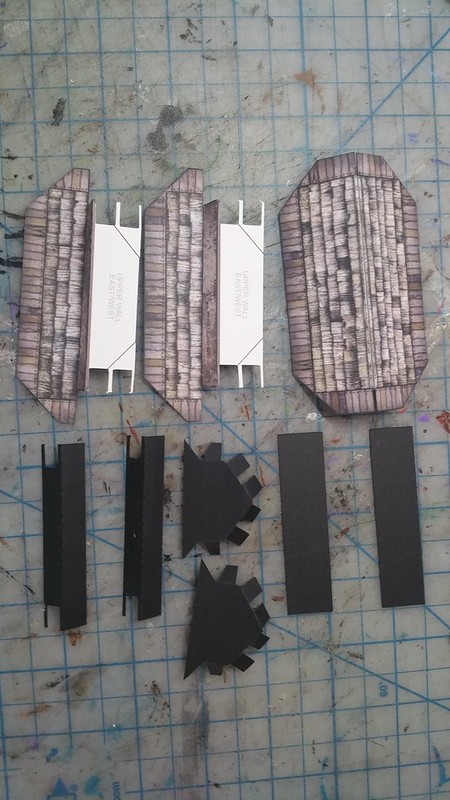
The first attempt was on the left. Including the walls and tiles it took all these pieces:
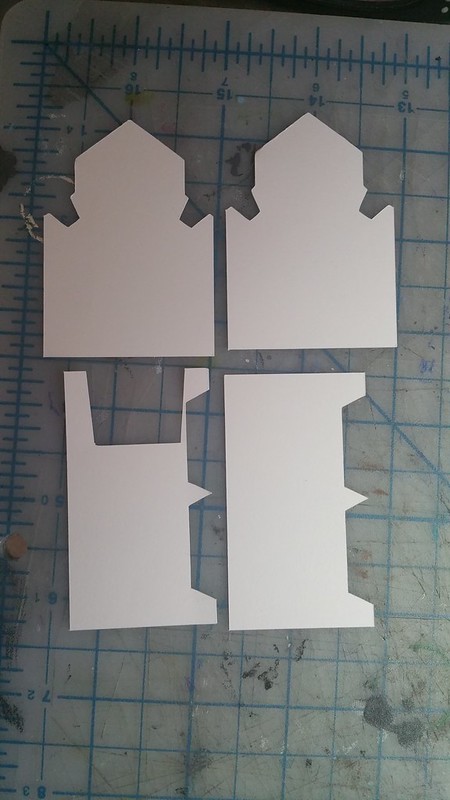
I took inspiration from @lightening's latest models and made insert-layers to make the slots clear and strengthen the walls:
Here's the "underside" of the roof in place with the tabs in the slots showing how it is supposed to friction-fit together:
Trust me, that looks WAY better than in works in practice. The paper tabs are just to small and therefore not stiff enough to go into the slots at assembly time without a LOT of fiddling. The shape of the roof just makes it tricky to get the shape right. (Look closely at the first photo's roof line for the Grey Pump House.)
Unhappy with pain of construction (but more unhappy with assembly) I tried again.
This time just four tabs in the one place they seemed to be needed most, at the very ends of the lower roofing panels - skipping the long tabs that, though strong, were just too fiddly to take the stress of the shape of the roof:
Then, the roof would hold it's own shape by adding slide-in end caps:
This had the effect I wanted, the roof now popped-on-and-off easily, but getting those end caps' tiny tabs inserted properly into the roof to hold it's shape was again, way too fiddly! Also, the end tabs were still too small as well.
UGH!
In the end I decided to glue the roof shape together rigid - much simpler, works, better, and still fits in the box. You only need simple end-caps (the black pieces above, with tabs) glued inside the original 3-part roof. No roof interior pieces required as no one can see it. 2 additional pieces for the roof and it's removable and hold it's shape.
Sometimes 100% fold-flat isn't worth it.
Recommended fold flat approach:
Use the cutfile I provide to cut page 1 (the exterior) of your model.
Pick a compatible "interior" texture set for the interior of your model (and choose the floor texture - it does not have to be the same as the exterior and import (merge) it the second cutfile, move it to the back layer, and reduce it to 99% using the scaling tool (it should align), print from Silhouette and cut.
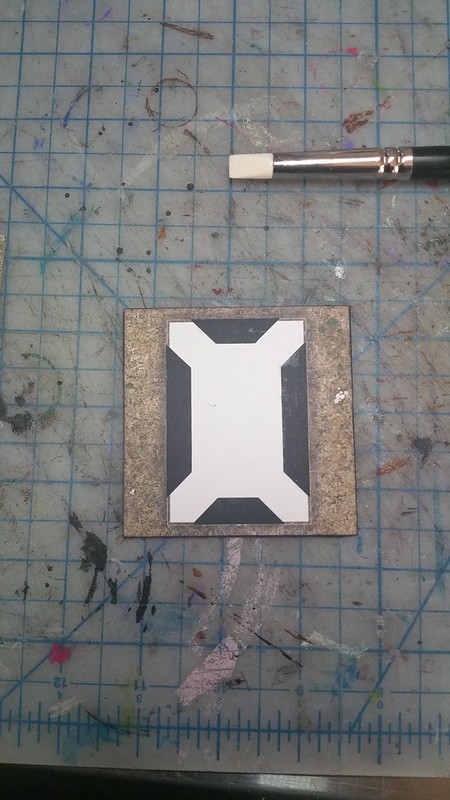
Create a slit-tabbed base by cutting the first copy (exterior) of the ground and gluing to your tile:
Then glue your "floor" texture to the white portions of the tile only. (creating side-slits to insert the floor tiles.)
Test fold the exterior and trace the wall-tab location onto the inside of the exterior wall. Glue all the interior pieces to their corresponding exterior ones - but do NOT glue inside the tab tracing. That is where the tab will friction fit when assembled.
You are done with the main building.
Glue the exterior roof together as instructed. Pre-fold aggressively to allow you to fit the roof to the walls.
Glue the endcaps from the second page so that the hold the roof in shape and fit INSIDE the walls when the roof is placed on top.
Forget about the middle-layer, forget about the bits giving the roof an interior. Your players will love that you can put minis and props inside and interact in there. The roof will be off the whole time.
Files are archived here: dl.dropboxusercontent.com/u/3838990/Pump%20House%20with%20Interior%20Cutfiles.zip
And on the site:
Pump House with Interior Cutfiles.zip (24.57 KB)
The two smaller models to the right are the one's I'm talking about today. The $.095 Pump House by Dave Graffam Models.
Pump House Fold-Flat Variations by Oracle Omega, on Flickr
Pump House Fold-Flat Variations by Oracle Omega, on Flickr
I'd like to share what I learned.
This model has 5 pieces. Walls, 3 for the roof, and 1 for the file/floor. It should assemble about as fast as any other one-page model with 5 pieces.
I wanted to make something that stored 100% flat. I'm now convinced that is way more complex than warranted by the effort to achieve that effect completely. Here's how they store now (one is flat, the other is partially flat):
The interior wall and floors with slots and tabs were a no-brainer - that portion is easy and works great.
I ran into problems with the multi-surface roof. I tried two 100% fold-flat versions:
The first attempt was on the left. Including the walls and tiles it took all these pieces:
I took inspiration from @lightening's latest models and made insert-layers to make the slots clear and strengthen the walls:
Here's the "underside" of the roof in place with the tabs in the slots showing how it is supposed to friction-fit together:
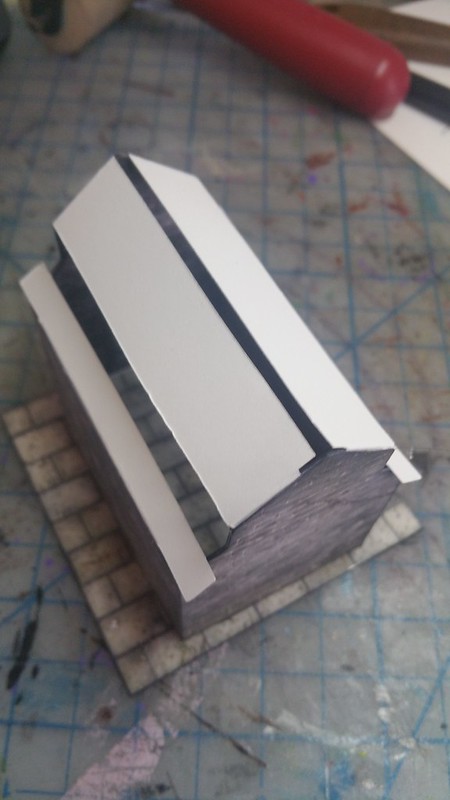
Trust me, that looks WAY better than in works in practice. The paper tabs are just to small and therefore not stiff enough to go into the slots at assembly time without a LOT of fiddling. The shape of the roof just makes it tricky to get the shape right. (Look closely at the first photo's roof line for the Grey Pump House.)
Unhappy with pain of construction (but more unhappy with assembly) I tried again.
This time just four tabs in the one place they seemed to be needed most, at the very ends of the lower roofing panels - skipping the long tabs that, though strong, were just too fiddly to take the stress of the shape of the roof:
Then, the roof would hold it's own shape by adding slide-in end caps:
This had the effect I wanted, the roof now popped-on-and-off easily, but getting those end caps' tiny tabs inserted properly into the roof to hold it's shape was again, way too fiddly! Also, the end tabs were still too small as well.
UGH!
In the end I decided to glue the roof shape together rigid - much simpler, works, better, and still fits in the box. You only need simple end-caps (the black pieces above, with tabs) glued inside the original 3-part roof. No roof interior pieces required as no one can see it. 2 additional pieces for the roof and it's removable and hold it's shape.
Sometimes 100% fold-flat isn't worth it.
Recommended fold flat approach:
Use the cutfile I provide to cut page 1 (the exterior) of your model.
Pick a compatible "interior" texture set for the interior of your model (and choose the floor texture - it does not have to be the same as the exterior and import (merge) it the second cutfile, move it to the back layer, and reduce it to 99% using the scaling tool (it should align), print from Silhouette and cut.
Create a slit-tabbed base by cutting the first copy (exterior) of the ground and gluing to your tile:
Then glue your "floor" texture to the white portions of the tile only. (creating side-slits to insert the floor tiles.)
Test fold the exterior and trace the wall-tab location onto the inside of the exterior wall. Glue all the interior pieces to their corresponding exterior ones - but do NOT glue inside the tab tracing. That is where the tab will friction fit when assembled.
You are done with the main building.
Glue the exterior roof together as instructed. Pre-fold aggressively to allow you to fit the roof to the walls.
Glue the endcaps from the second page so that the hold the roof in shape and fit INSIDE the walls when the roof is placed on top.
Forget about the middle-layer, forget about the bits giving the roof an interior. Your players will love that you can put minis and props inside and interact in there. The roof will be off the whole time.
Files are archived here: dl.dropboxusercontent.com/u/3838990/Pump%20House%20with%20Interior%20Cutfiles.zip
And on the site:
Pump House with Interior Cutfiles.zip (24.57 KB)

