Here's my workflow for the
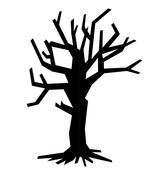
Gallows Tree I posted for Halloween Wars.
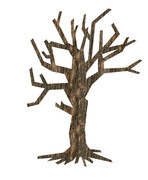
First I did a rough sketch of the branches for the tree in Photoshop with my graphics tablet. Since this was just intended to be a rough sketch, I could have also prototyped the tree's appearance by drawing with the mouse before moving on -- a graphic tablet was not required equipment for this project. I knew I wanted to make the tree three-sided, so I made three different branch sections on separate layers, paint one over the next so I knew that the edges would pretty much line up.

Next I used the polygonal selection tool to re-make the tree with simpler straight lines that would be easier to cut. I suppose this ste could also be used to take the design into a vector format, but I was fine just sticking with what I had.
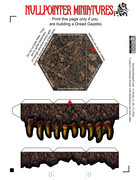
I found a public domain bark texture online and made it into a seamless repeating pattern (I can write a tutorial for this process if you're interested). I then tiled the texture over the tree and made a Layer Mask out of the tree outline I had.
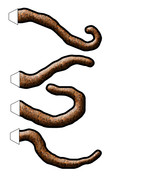
Whenever I move from one phase of work to the next I try to copy what I have and the hide the old stuff while I continue on working with the duplicate layers. I use layer folders to make this quick and easy. For the tree I wanted some embellishment, but when I added a bevel to the half of a tree at a time (remember I made three different tree-halves) I would see the back side of the bevel running up the middle of the tree.
To solve this I did something I do a lot when I want layer styles to be separate from the layer itself -- I duplicated the tree layer and added the styles I wanted and set the Layer Fill to 0% which hid the layer itself but left the layer style visible, plus I added on a big block to the side so that the back end of the bevel style would be away from the treetrunk and I could crop it off later when the layers got simplified.
Also you'll notice that there is a green highlight as well as a tan highlight -- to do this I made the highlight on the bevel style green (and changed the blending mode to linear light or something), and then I added an Inner Shadow too, but I changed the color from black to light tan and the blending mode for that from darken to screen -- thus I was able to get two different highlights on the same layer.
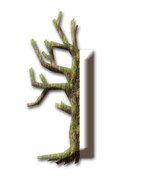
I made a little ground tussock with some public domain grass texture and did the inner-shadow trick to add a highlight to that shape too.

I reordered the layers and merged the bark texture with the highlights (thus simplyfying the bevel and applying all layer masks in the process), and then added a drop shadow to the tree so it would cast a little shadow onto the grass. However, it also made a dropshadow on all the other edges too, and I had to still deal with that escaping bevel. So remember how I said to save your intermediate steps? I went back to the original shapes I first made for the straight lined tree shapes and converted those to layer masks which clipped off the unwanted shadows and bevel stuff, but I painted back in on the bottom part of the mask so the shadow
would show up on the grass.

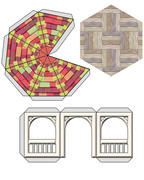
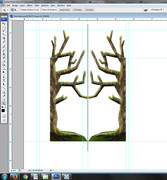
From there it was just a matter of adding some tabs, instructions, outlines, and folding guidelines. I make heavy use of Guides and snapping to easily make everything line up. Sometimes if I have guides in the right places I can slide around objects without holding SHIFT at all to keep things level.
Another trick: To make a guide that goes right down the center of an object (or canvas), first make sure your rulers and snap are on, select the layer and hit CTRL+T or Edit>Free Transform to bring up the transform bounding box. Now, without doing any other actions, find the little "Bullseye" in the center of the bounding box that is usually the pivot for rotating, drag from your ruler to this bullseye and it should snap to it if your snapping is on, and you've now got a guide running perfectly through the middle of the object. This works to make a guide through the center of the canvas -- make a new layer and fill it with a color before performing the above steps and now you have center-lines on your canvas.
Let me know if you have questions about any of this process or if you want to know more tricks for improving your workflow in Photoshop (lots of these tricks can be reproduced in GIMP too).