|
|
Post by Vermin King on Oct 18, 2017 16:33:37 GMT -9
This little guy has so many possibilities. It was mentioned earlier for a nacelle mod to be posted here. I personally think I need to do a tracked mod, if you are interested. So many forums have group projects that evolve over time. This little guy sure seems to have a lot of potential for that type of thing. Didn't someone say it resembled the Lost in Space Chariot? I also picture a stubby delta wing version with a tail, looking NASA shuttle-like. And I can see an A-10 version, narrower with an elongated nose.
Just a thought.
|
|
|
|
Post by squirmydad on Oct 18, 2017 18:55:31 GMT -9
Cool thoughts.  I had an idea for an open-topped version, which was why the first version I did a test-build on was much bigger as I thought it would need the extra volume to allow for miniatures. I ended up shelving that idea as it looked like project creep at the time and I wanted this first iteration to be clean and done. Once it's done, like now, I can start considering add-ons, like a weapons pack, which I did. I still need to upload the .psd file for the diy crowd, tomorrow for that. |
|
|
|
Post by Vermin King on Oct 18, 2017 19:07:54 GMT -9
Got a bit of fuzz-brain tonight. You wouldn't happen to have the cross-section on this guy, would you? Whole thing open-topped? Or open cab? Or open bed? It could be any or all I was trying to figure out implements to go with it. Dozer blade or something. Remember the V ships? So many ships based off the same general design. I really think the Air Raft could have that kind of flexibility. 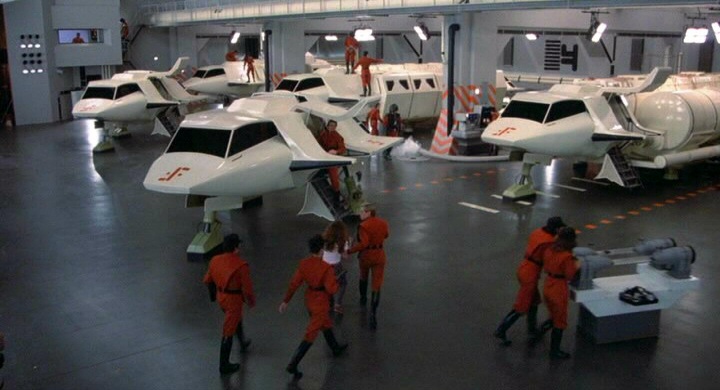 |
|
shep
Eternal Member
Red Alert! Shields up! LENS FLARE!!!
Posts: 1,260
|
Post by shep on Oct 18, 2017 23:44:48 GMT -9
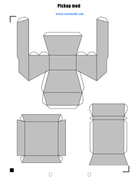
Okay, so I really did it... Put the mod into the Lost Era between the TOS movies and TNG. USS Zhukov is an Ambassador Class ship, and this would be its shuttle #4: 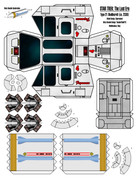 Picture is in 100% scale. I'll upload the PDF to my Mediafire, later, and I also still need to build the shuttle. However, I wanted to share asap... |
|
|
|
Post by Vermin King on Oct 19, 2017 4:12:35 GMT -9
Shouldn't be an issue on the build.
I wish I could remember where I got the front grill. I didn't design it on my own. It sure looked like it belonged there
Should the attach points on the legs match the body and nacelles? I think a 'real' Trek shuttle would have them the same color, but I don't know
|
|
|
|
Post by Vermin King on Oct 19, 2017 4:38:34 GMT -9
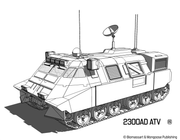
Well, the easiest way to get cross-section and profile is ... 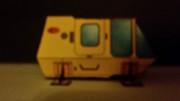 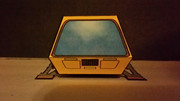 Quick poor photos, but gives me what I needed Needed to know the slope of the lower side wall to get the tracks straight. Needed the profile to be able to do a nose and tail |
|
|
|
Post by squirmydad on Oct 19, 2017 6:49:34 GMT -9
|
|
|
|
Post by Vermin King on Oct 19, 2017 7:30:44 GMT -9
Very similar to what I was thinking, only with the treads and fenders extending away from the body somewhat. With a side view similar to the top one, with cutouts in the plates to use as ladders for access (graphically, not actually cut out). With fenders over the tracks to give a ledge to stand on while entering, exiting or loading
I started modifying some tank geometry so it would just be a box that glues onto the two sides
|
|
shep
Eternal Member
Red Alert! Shields up! LENS FLARE!!!
Posts: 1,260
|
Post by shep on Oct 19, 2017 7:45:37 GMT -9
Shouldn't be an issue on the build. I wish I could remember where I got the front grill. I didn't design it on my own. It sure looked like it belonged there Should the attach points on the legs match the body and nacelles? I think a 'real' Trek shuttle would have them the same color, but I don't know The issue lies in available time, not in the difficulty of the build. And you're right, the entire struts would be in the same color as the hull and nacelles. However, I did not want to lose the texture. |
|
|
|
Post by Vermin King on Oct 19, 2017 8:25:51 GMT -9
Well maybe not the suspension part. I always thought that in the Trek-verse, having no suspension on the nacelles was asking for problems. You are landing on the drives basically. Hit a rock when you land or take off and you will have to call a wrecker to tow you in.
I just realized, there is no Desert pattern for the Air Raft
|
|
|
|
Post by squirmydad on Oct 19, 2017 9:39:06 GMT -9
|
|
|
|
Post by Vermin King on Oct 19, 2017 9:41:53 GMT -9
If you are doing that, please have the treads extend out from the body a bit. Having a fender to stand on should be helpful on a utilitarian vehicle like this
|
|
|
|
Post by squirmydad on Oct 19, 2017 11:10:22 GMT -9
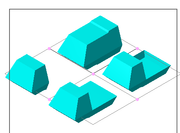
How about this - 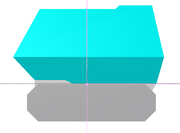 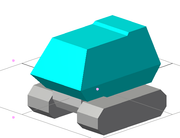 |
|
|
|
Post by squirmydad on Oct 19, 2017 11:53:54 GMT -9
Treads layout, have fun. 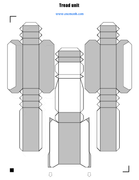 |
|
|
|
Post by squirmydad on Oct 19, 2017 11:56:25 GMT -9
 the Lost in Space Chariot, I should have looked that up earlier. I never saw the show as it wasn't on one of the two channels that we sometimes received when I was growing up. |
|
|
|
Post by Vermin King on Oct 19, 2017 12:03:31 GMT -9
Dave Winfield has done that one already 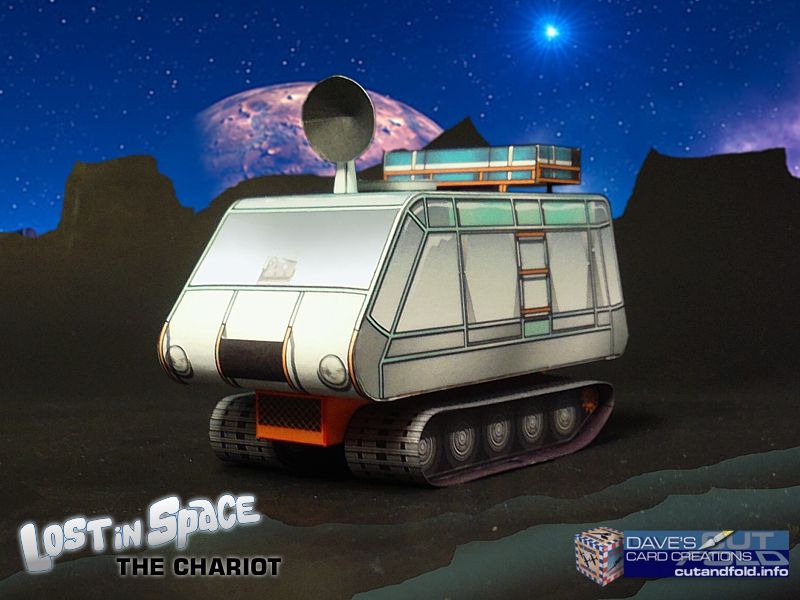 This is why I was thinking of a wider stance with fenders to aid in loading and unloading. It sits too stinking tall, too. Can't be a very stable vehicle |
|
|
|
Post by Papercraft Warrior on Oct 19, 2017 13:05:57 GMT -9
If you desire physical fenders (not just a texture on top of the tracks shape), I can whip out the geometry pieces.
You would need to texture it though.
|
|
|
|
Post by squirmydad on Oct 19, 2017 13:40:30 GMT -9
If you desire physical fenders (not just a texture on top of the tracks shape), I can whip out the geometry pieces. You would need to texture it though. That would be grand, thank you. I don't plan to texture these though, except for the open-bed version, which I do want to create a swmpy rusty look for;  Here is the photoshop files for both the craft and the gun add-ons. Air-Raft Photoshop This is very much how I texture my models, have fun with it. |
|
|
|
Post by Vermin King on Oct 19, 2017 13:50:49 GMT -9
I'm hoping to get this whipped out tonight, but thanks for the offer
|
|
|
|
Post by Papercraft Warrior on Oct 19, 2017 15:07:16 GMT -9
I'm hoping to get this whipped out tonight, but thanks for the offer I tried to finish today, but as often happens, it dragged out. If you menage to make it tonight, put some texturing on top of tracks. Otherwise, you gonna have the fenders available tomorrow. |
|
shep
Eternal Member
Red Alert! Shields up! LENS FLARE!!!
Posts: 1,260
|
Post by shep on Oct 20, 2017 2:04:16 GMT -9
How about this - That somehow reminds me of the mobiles from UFO... |
|
|
|
Post by Vermin King on Oct 20, 2017 3:41:43 GMT -9
The one I did doesn't sit so high. Got printed and scored, but not built yet
|
|
|
|
Post by squirmydad on Oct 20, 2017 6:09:56 GMT -9
That somehow reminds me of the mobiles from UFO...  Another show I've never watched.  |
|
|
|
Post by Papercraft Warrior on Oct 20, 2017 6:13:55 GMT -9
Seems to me the design has good rough terrain mobility when going in reverse...
|
|
|
|
Post by Papercraft Warrior on Oct 20, 2017 7:39:15 GMT -9
Quick status update, fenders might be finished in an hour or two.
|
|
|
|
Post by Vermin King on Oct 20, 2017 9:28:13 GMT -9
My version with fenders and guards looks 'good', but they are difficult to build due to tab location, and I didn't get the angles quite right, so the treads don't sit squarely on the ground. I'll work on fixing it tonight.
|
|
|
|
Post by Papercraft Warrior on Oct 20, 2017 9:35:12 GMT -9
My version with fenders and guards looks 'good', but they are difficult to build due to tab location, and I didn't get the angles quite right, so the treads don't sit squarely on the ground. I'll work on fixing it tonight. Hoping it turns out well. In the meantime, here are the fender assemblies. ![]()  |
|
|
|
Post by Papercraft Warrior on Oct 20, 2017 9:41:13 GMT -9
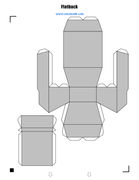
Big pieces are the fenders themselves. The ones with lots of scoring are securing attachments.
Glue the backs of the triangle strips to each other, so they are two sided.
The white block on the attachments should be covered with the colored one on the opposite side. They form the strong block that is glued to the body.
The center block on the attachment should be glued to the fender itself.
I hope it is clear how to assemble it.
|
|
|
|
Post by Papercraft Warrior on Oct 20, 2017 11:11:39 GMT -9
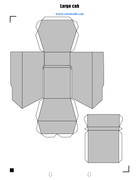
Picture speaks a thousand words:  With texturing suitable to the model, it has the potential to look great. I do not have a printer, so I can not test it out. If anyone is feeling brave and reckless, he/she/it is free to print away. If anyone wants to include it in any mod/model/kitbash he has the permission, just put me somewhere in the credits. A link to this forum would be nice too. And to the onemonk site. If squirmydad has some other contribution text suggestion, it is auto-approved. Since the gray zones suggest where to put nice textures, here is plain version, to save up ink in case someone prints without the texturing.  P.S. I probably should have specified at the top of the post, the page provides enough parts for two sets of fenders. That is for four (4) fenders, suitable for two (2) tracked vehicles. Drive safe, Drive with fenders! |
|
|
|
Post by Vermin King on Oct 20, 2017 13:45:50 GMT -9
I think my concept is good, but like I said, the angle of the attachment panel is off slightly, and by changing the tabs, it should be an easier build. I'll play with it tonight 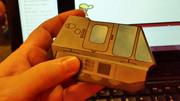 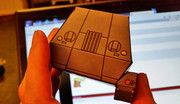 I do like the look. Just need to fix the files |
|