|
|
Post by lightning on Dec 2, 2017 5:58:58 GMT -9
For the larger version I need to convert some parts into split assembly as they will not fit onto a single page. So here I tested how the split parts work out. 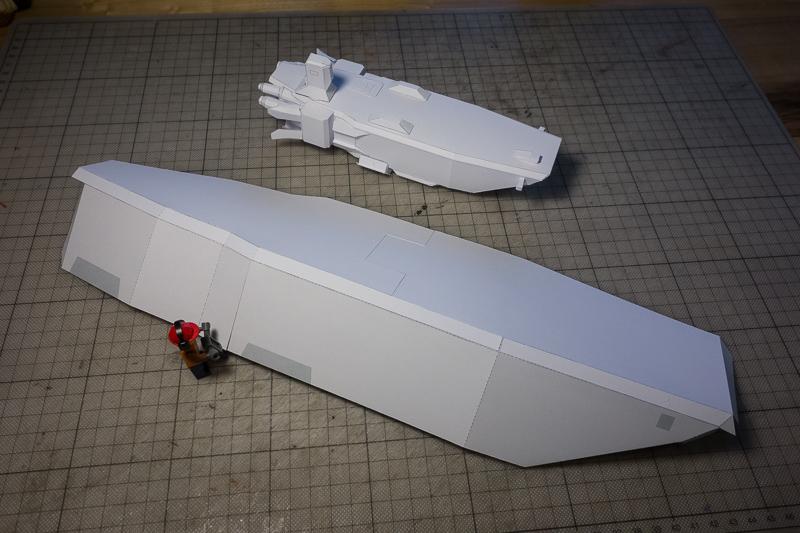 Once I was happy with that I went on to texturing. Using the 3D model and making renders of each side without the details I painstakingly recreated the patterns. Also added a little dirt for used look and voila ... this is how far I got! 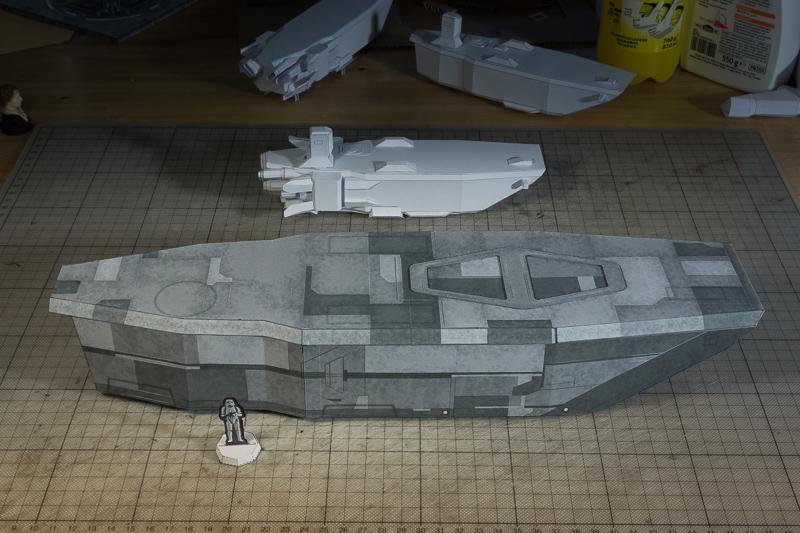 Here is a detail view of the front and back panel (will probably not be very visible once assembled) but still made it as close as I could. 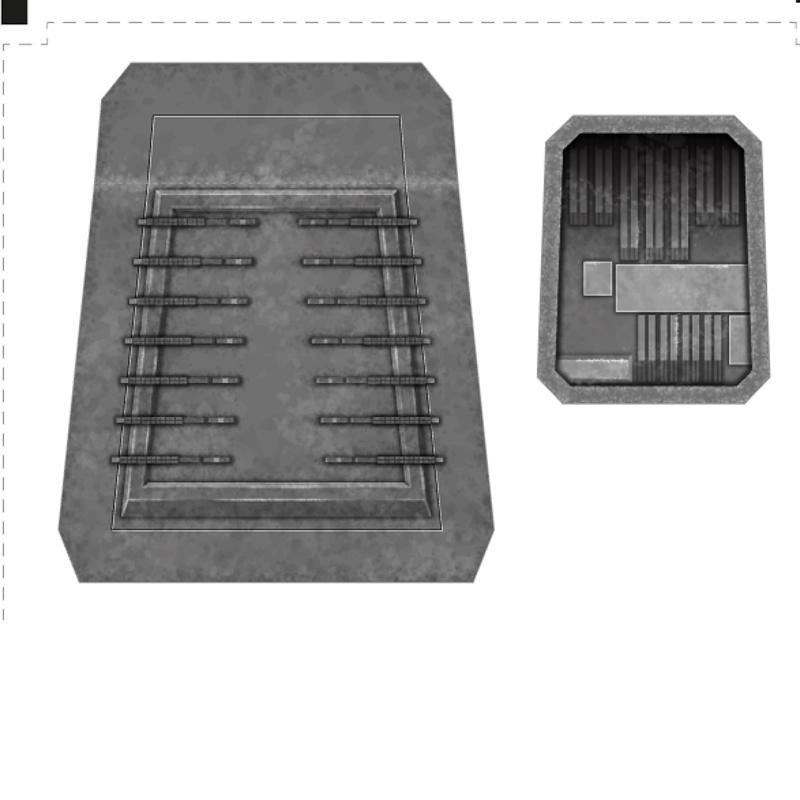 |
|
|
|
Post by lightning on Nov 29, 2017 1:08:07 GMT -9
Completed the finalizing parts stage ... Made some 15mm Stormtroopers :-) 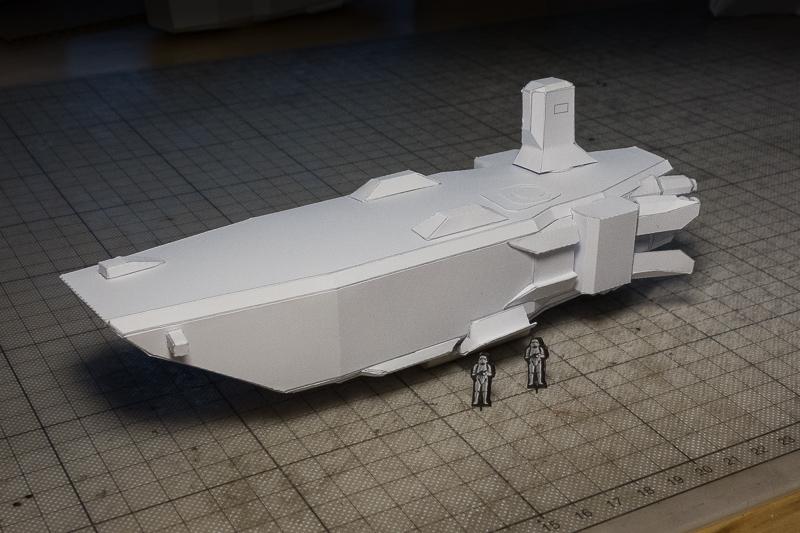 Add some former parts to make the rear engine tubes more sturdy and align better. 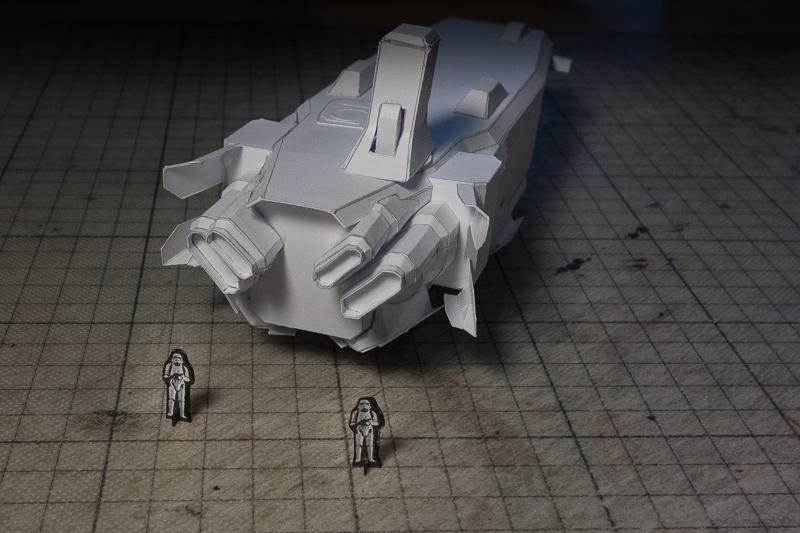 Comparison of the AAL to last years U-Wing (15mm) 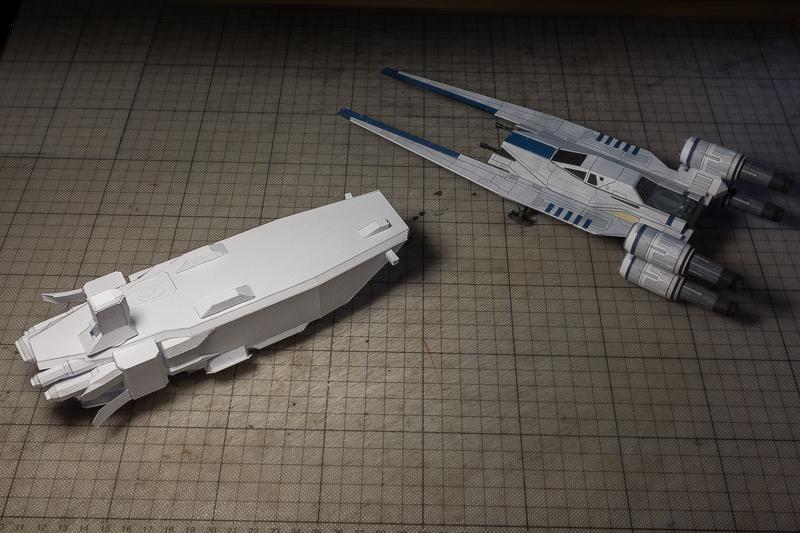 |
|
|
|
Post by lightning on Nov 23, 2017 23:25:59 GMT -9
The large of the two engine tubes. One in 30mm scale and the other for 15mm scale. The smaller requires a little bit more fidgeting that I am used to :-) 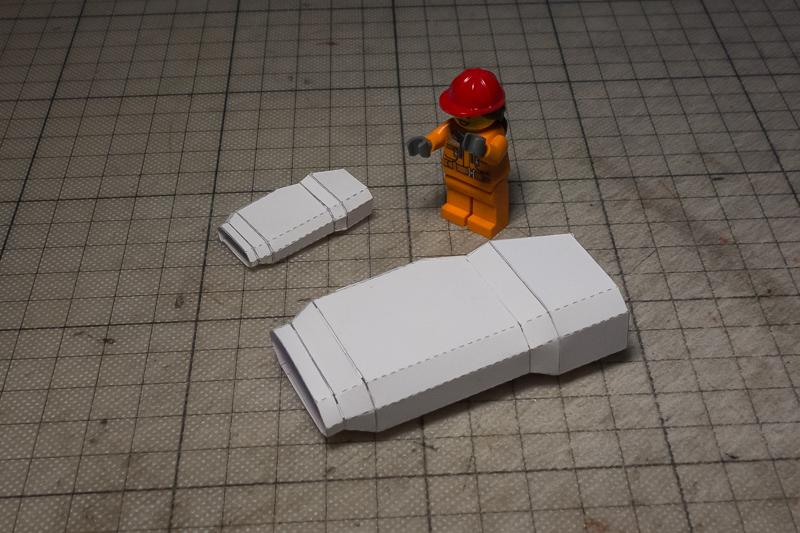  I have cut one side along the rings and one side longitudinal. I have a feeling that the rings will work better (also texture wise). 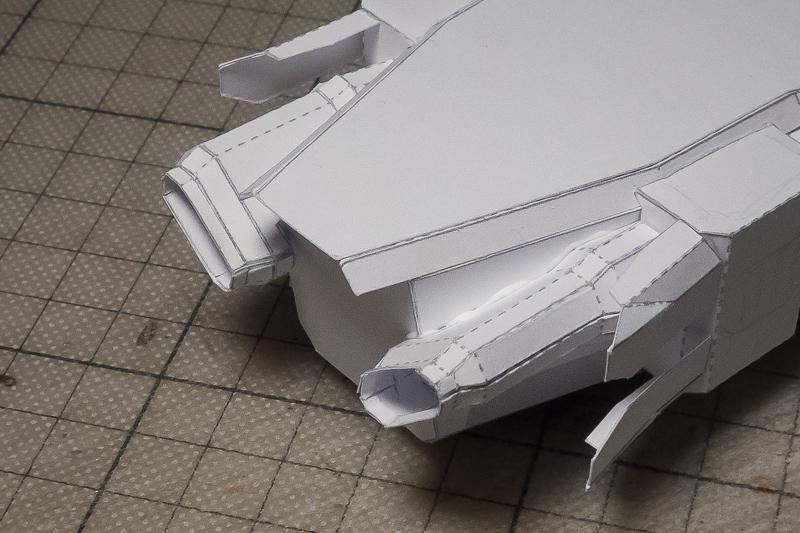 On to the smaller engine! |
|
|
|
Post by lightning on Nov 22, 2017 5:38:40 GMT -9
Now I have more time for this project :-) So here are a couple of WIP pics. Redone the main hull one last time (I hope  ) to accomodate the landing gear boxes better. Also decoupled the belly so that I can assemble the hull more controlled. ) 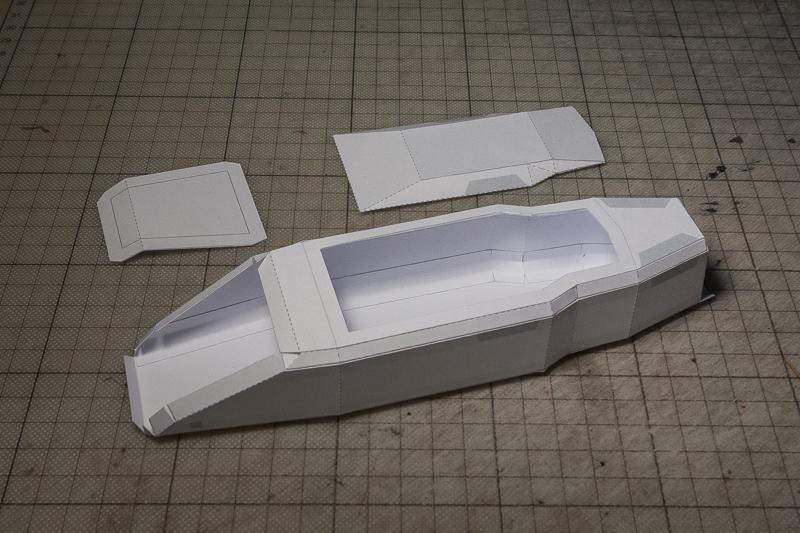 And here I have started with the sides. For the 15mm version they are quite small but manageable. I am trying my best to make the unfold so one can mess up as little as possible. 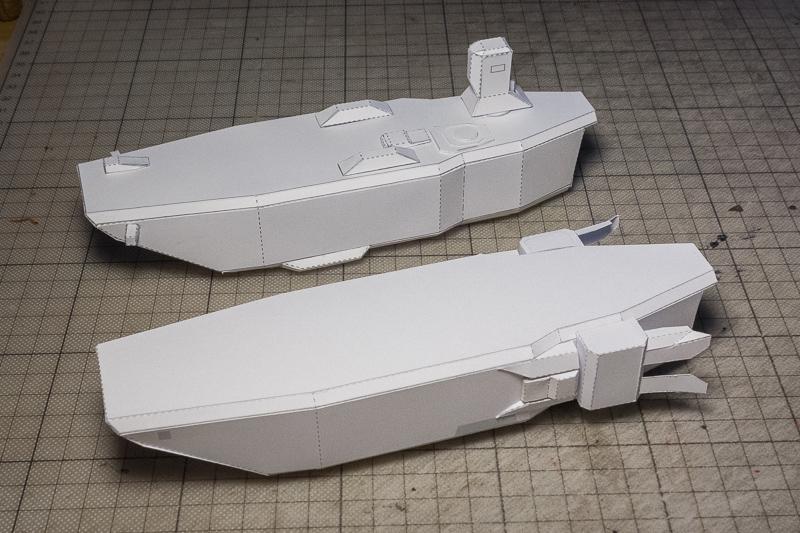 |
|
|
|
Post by lightning on Nov 19, 2017 23:35:18 GMT -9
|
|
|
|
Post by lightning on Nov 18, 2017 21:42:14 GMT -9
We want more rickshaws! |
|
|
|
Post by lightning on Nov 15, 2017 21:47:36 GMT -9
I built a rickshaw. It looks a little large next to my 28mm models, so I think I may build another scaled at 75%, and possibly narrowed. From the earlier picture, it looks fine with 30mm papercraft standees; with 28mm that are on the small side, well, I meed it just a wee bit smaller  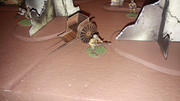 [/quote] They actually come in different sizes. Some are really big. But I was designing it with some 30mm minis, so it would make sense that it looks more compatible with them. |
|
|
|
Post by lightning on Nov 14, 2017 6:16:33 GMT -9
After receiving some more research material I updated my geometry to better reflect the original. You probably will not notice the changes, but at least I know the geometry is no much closer to the original :-) So here I have started building another prototype. I am working on the smaller (15mm figures) version now. It will be easy to enlarge later. This is the upper hull upside down with some ribs. 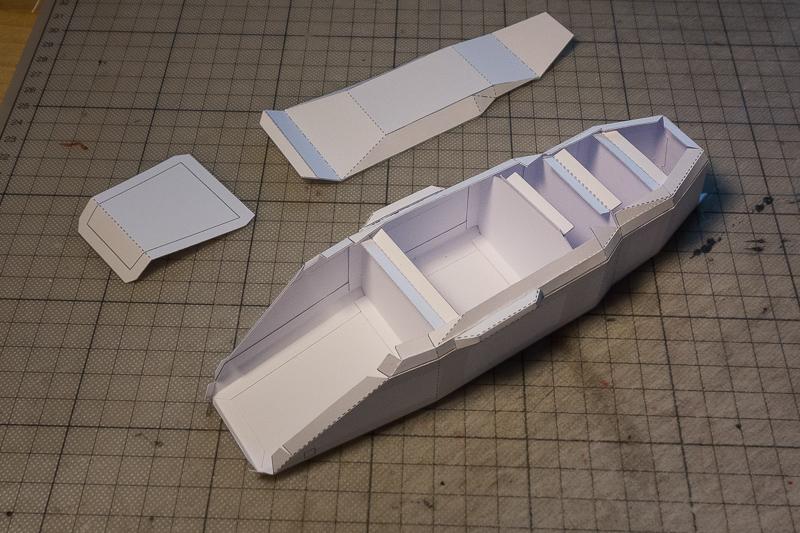 And this are the first structures put on the top.  Next will be the side structures with the engines. Looking forward to that challenge! |
|
|
|
Post by lightning on Nov 13, 2017 7:03:24 GMT -9
Have added the gong bar and the bell mount ...  Now on to instructions and go live!!! |
|
|
|
Post by lightning on Nov 9, 2017 21:49:10 GMT -9
A sort of closing it off plane? Or just the bars and it stays open? I was thinking more simply: Layer Option for the white in those photos to be textured - so the framework can stand by itself. Otherwise I'd just kitbash it for my build for flexibility of reuse. With the top textured, I can put anything I want up there at table-play time and it'll look like it belongs. OK, I'll add it then And some more progress pics .... Changed the roof mounting setup. With this I can also add the "old" Samurai Castle roof. 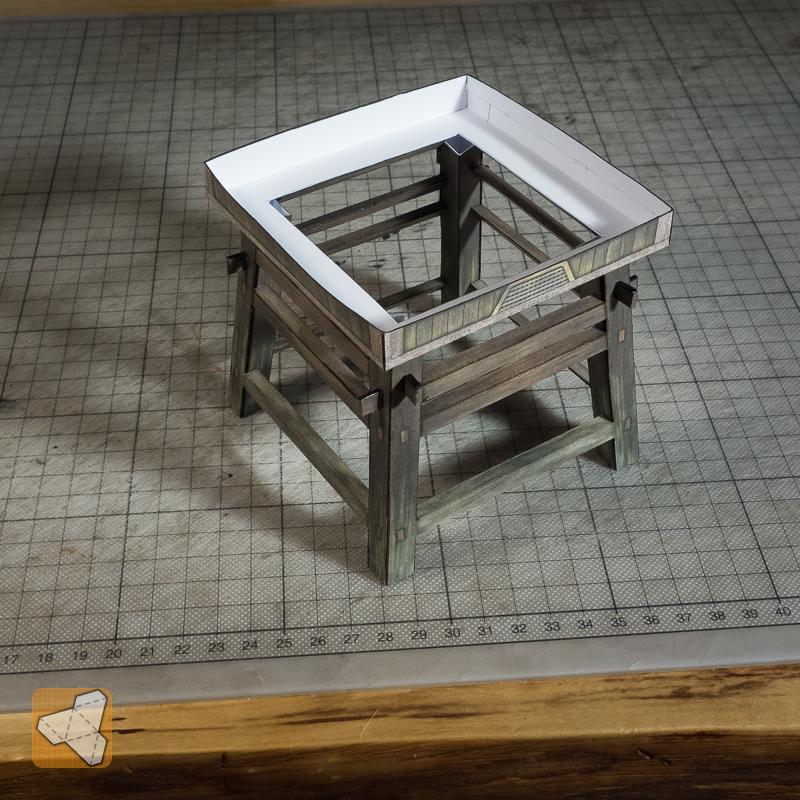 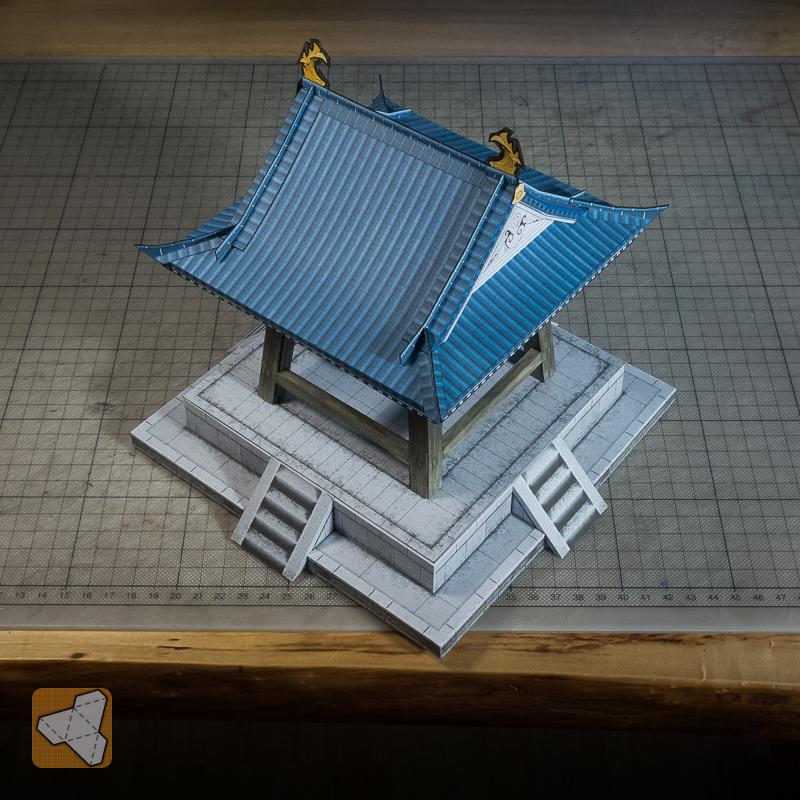 And the weathering of the roof module is done. You can choose moss and lichen layer! And this time I have used the lighter wood color option.  Front detail.  Now I only need to make the gong bar and I want to make a little mounting piece for the bell "axle". |
|
|
|
Post by lightning on Nov 8, 2017 21:28:17 GMT -9
Could you offer a layer option to texture the white "top" of the framework? These structures would be useful for many things in many genres. A sort of closing it off plane? Or just the bars and it stays open? |
|
|
|
Post by lightning on Nov 7, 2017 22:37:26 GMT -9
Weathering the framework. I have a separate dirt and moss layers, so you can choose. This build has both! 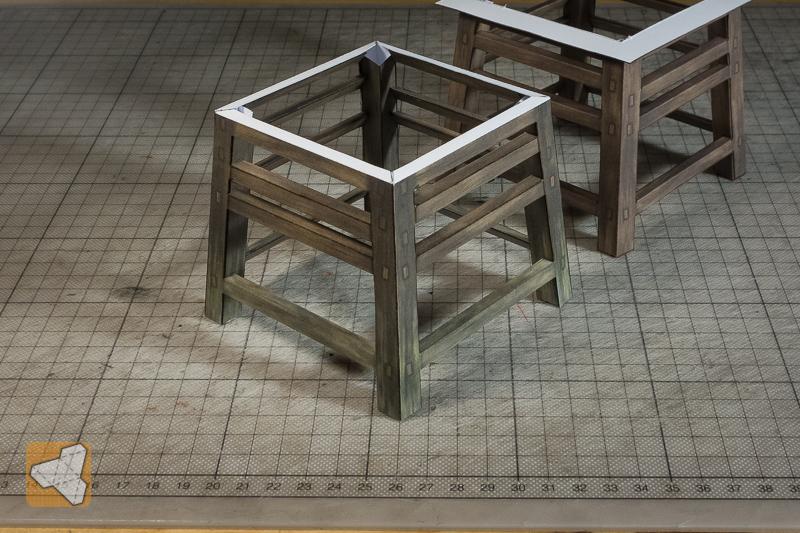 |
|
|
|
Post by lightning on Nov 6, 2017 5:43:14 GMT -9
I agree Coyote Now that I am back again I have started completing the bells. I've added the lotus detail and also made the simple bell version. It's just a cylinder, so it's much easier to build, but it still looks good in the tower (as you don't see that much of it anyway :-) ) 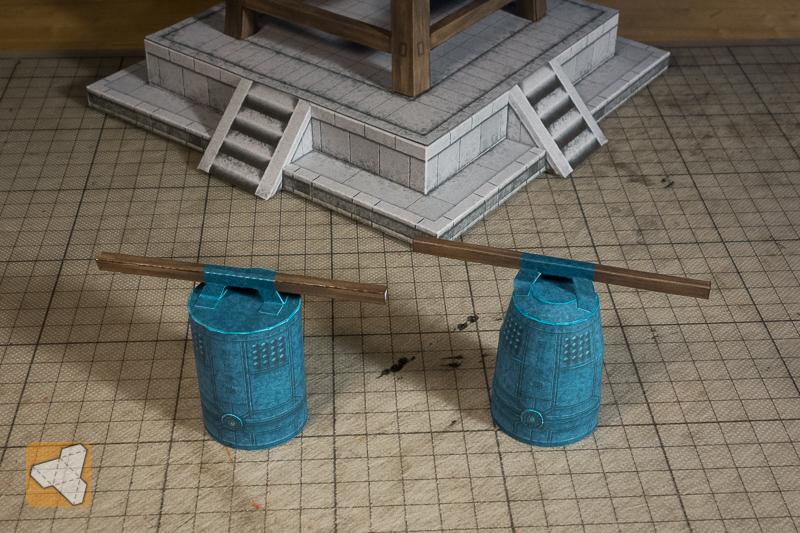 This is the simple bell inside the tower ... 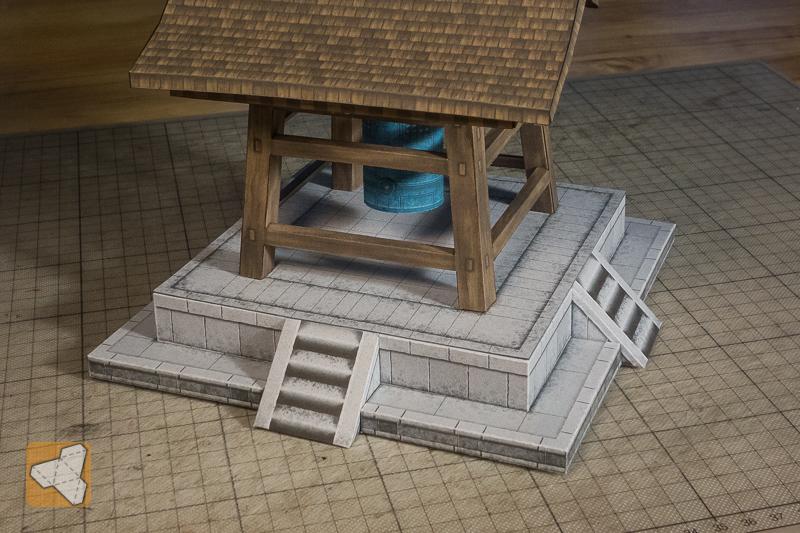 |
|
|
|
Post by lightning on Nov 5, 2017 5:53:01 GMT -9
Very nice. Welcome back from the trip. Have you built any of AirDave's Koolwheelz? Some of those have rounded 'edges', and how he illustrates those seems to work. The Man from UNCLE car has that and several of the others. I think beveling would be better for the average builder, though Great idea. Will do that. Better to learn from the pros! |
|
|
|
Post by lightning on Nov 5, 2017 4:54:41 GMT -9
First view of my first attempt of unfolding the geometry. It just the main hull so far, but I want to get that right, before I add all the other stuff. 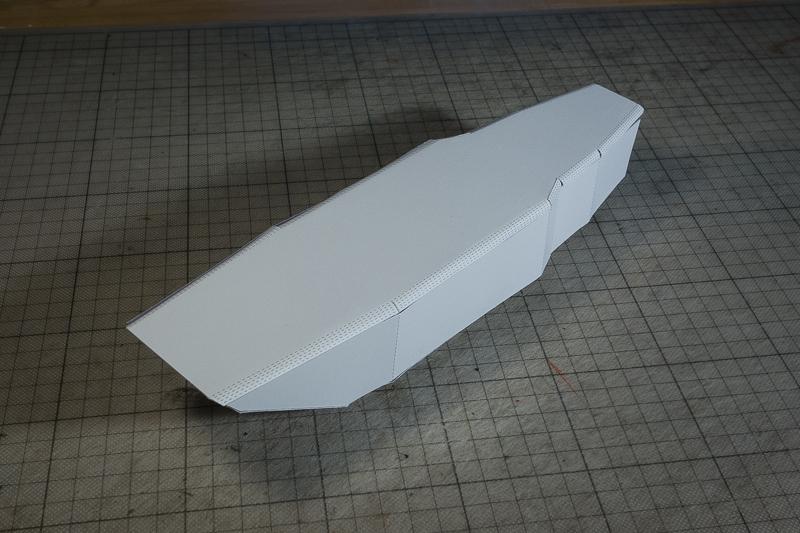 Not sure if I will keep the rounded edges on the top. Sure looks cool but might be a real mess assembling and probably something for advanced to pro paper modellers (unlike me!). I think I will bevel these edges for ease of assembly (esp with the small version). The underside 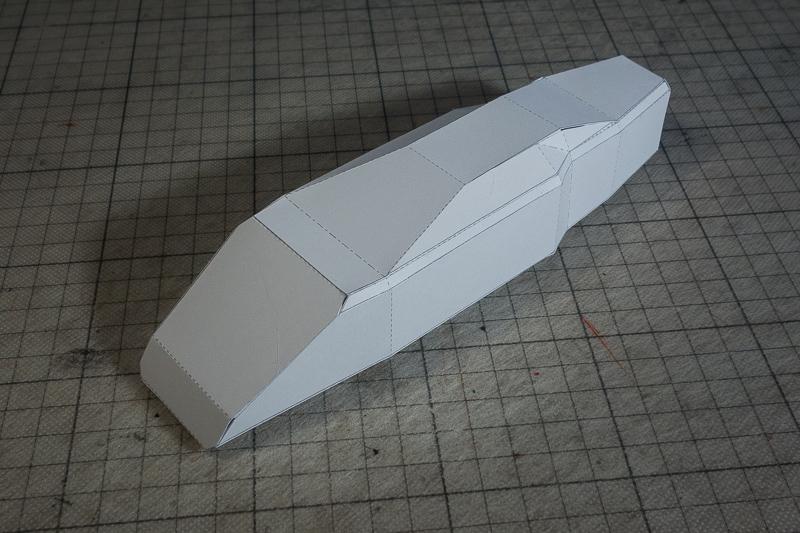 |
|
|
|
Post by lightning on Nov 4, 2017 23:04:06 GMT -9
And a side note on drawing, I need more practice... We all do. The only thing standing between me and a successful illustration career is twenty years of daily practice... |
|
|
|
Post by lightning on Oct 25, 2017 23:43:20 GMT -9
Final WIP before I am taking a little break. Made the part to hang up the bell into position. Now all that is left is the bar gonging the bell on the side and the weathering and then I can move towards instructions and release!  |
|
|
|
Post by lightning on Oct 25, 2017 6:13:16 GMT -9
Update on the roof. Here are the modules the roof is made out of. Wanted to show before assembly as you can better see all the texture details.  |
|
|
|
Post by lightning on Oct 23, 2017 22:21:24 GMT -9
Wasn't so happy with the free style interpretations I found on the web so I re-collected images from the movie and made a little reference sheet ... old school cut and paste! 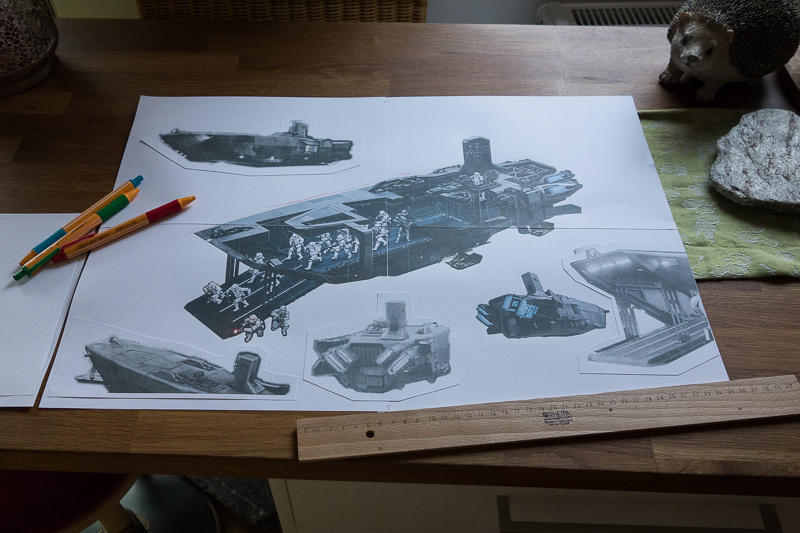 |
|
|
|
Post by lightning on Oct 22, 2017 7:41:33 GMT -9
Looking nice. Are we talking 'bout 25/28/30/32/35mm scale, or some smaller for "greater" games? Like the U-Wing I plan to do a "big" 25-30mm version and a small 15mm version. |
|
|
|
Post by lightning on Oct 22, 2017 2:29:56 GMT -9
When I found out that the next Star Wars movie in 2018 will be the Han Solo movie, I thought that it will be a good time to aim for finishing the Millenium Falcon then. So for this years release, I decided to make the First Order AAL from SW VII. After the U-Wing I guess, we all need an Imperial troop transport on the gaming table  I did some quick 3D sketches to get a feel of the geometry. 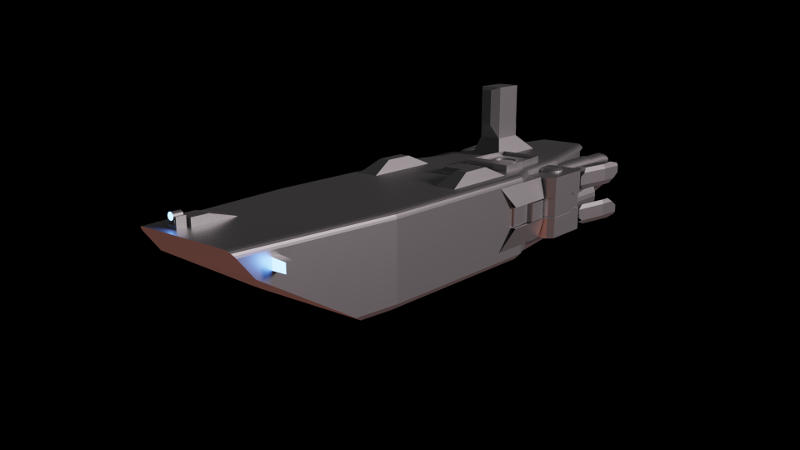 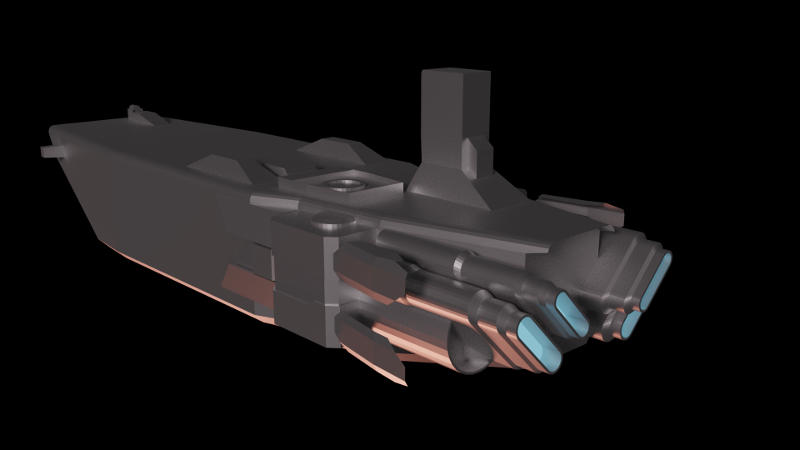 The rear engine section I had to guess pretty much as I did not find a lot of detailed references. I think this will be quite a challenge to build. For the gaming table I want to build it in landing positions, so something like this. 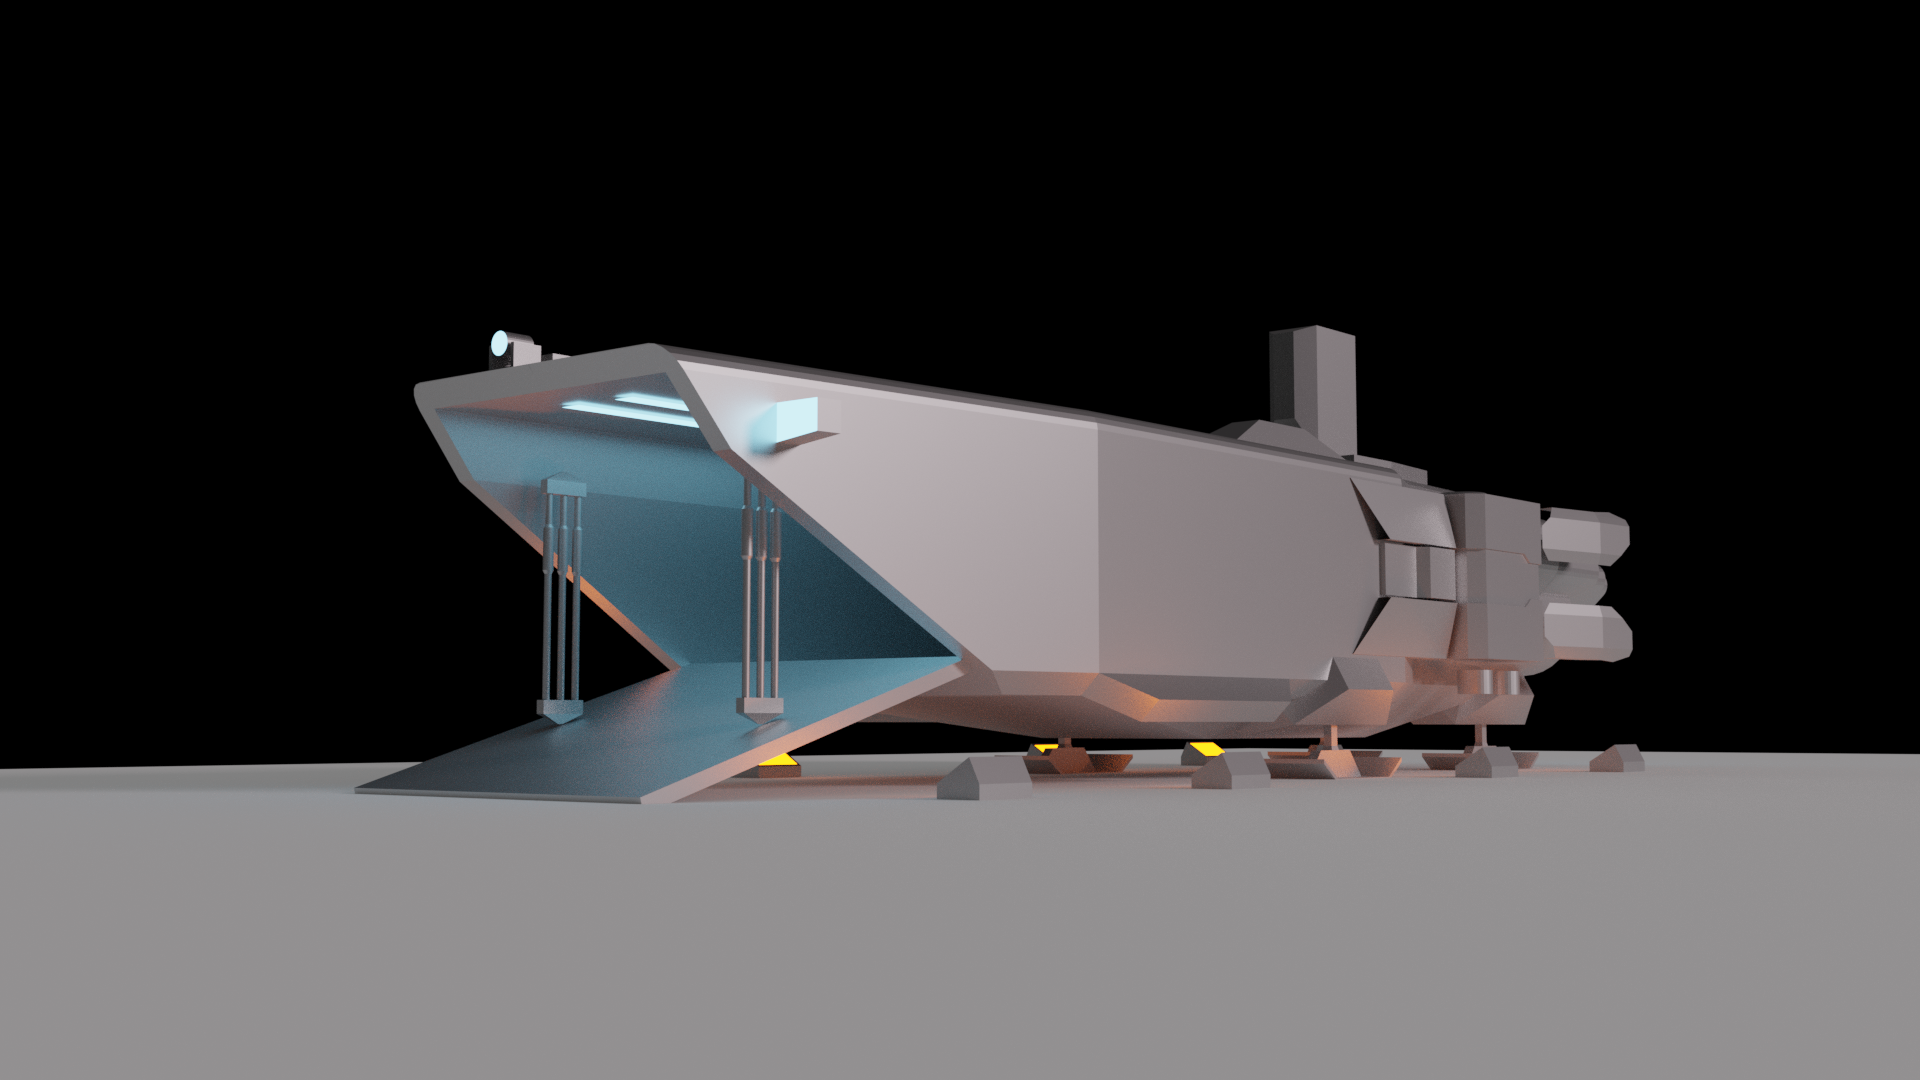 After lots of feedback on other sites and also going through the relevant parts in the DVD frame by frame, I found some more and very helpful frames which led me to this. 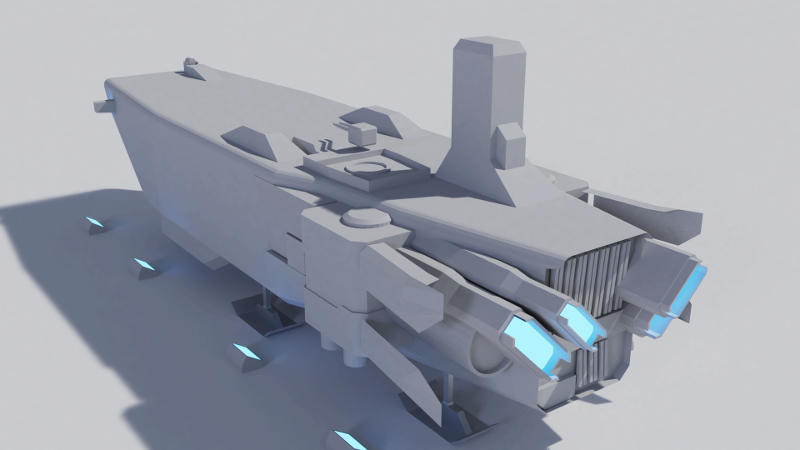 The engine tubes originally are rounded but I think for ease of assembly I will go this route. I will test the rounded version when I start building prototypes. If it's not a complete mess to build I might change it then. |
|
|
|
Post by lightning on Oct 22, 2017 2:21:07 GMT -9
You would only need a table when you want to go for direct digital painting. If you draw your stuff old school and then scan it, that works fine too. It depends on what you draw too. If you will only do hull panels of space ships you can work with your line art software of your choice. I have a tablet and have rarely used it because I did not need the "painting" tools so far. I do hope to get there one day. I would say for organic topics (humans, clothing, plants?) the tablet will help more. Of course you could also 3D model all these things and then use a rendered view and something like Illustrators trace option to get to editable drawing shapes.
I do believe that learning to draw first on paper is very helpful but on the other hand from my own experience and what I have heard from others, drawing on a table need a new layer of muscle training. I imagine digital drawing on a screen tablet would be more easy (or similar to paper drawing) as you are "configured" the same way.
But in the end trust your instincts and need (and available resources!) There are always many ways leading to Rome :-)
|
|
|
|
Post by lightning on Oct 21, 2017 20:32:47 GMT -9
Am I the only one who keeps hearing that bell chime every time an updated new image gets posted here?  Haha, I really enjoyed that one |
|
|
|
Post by lightning on Oct 21, 2017 8:59:14 GMT -9
Worked on the texturing of the wooden framework. Maybe some more small changes but the overall look is very promising. 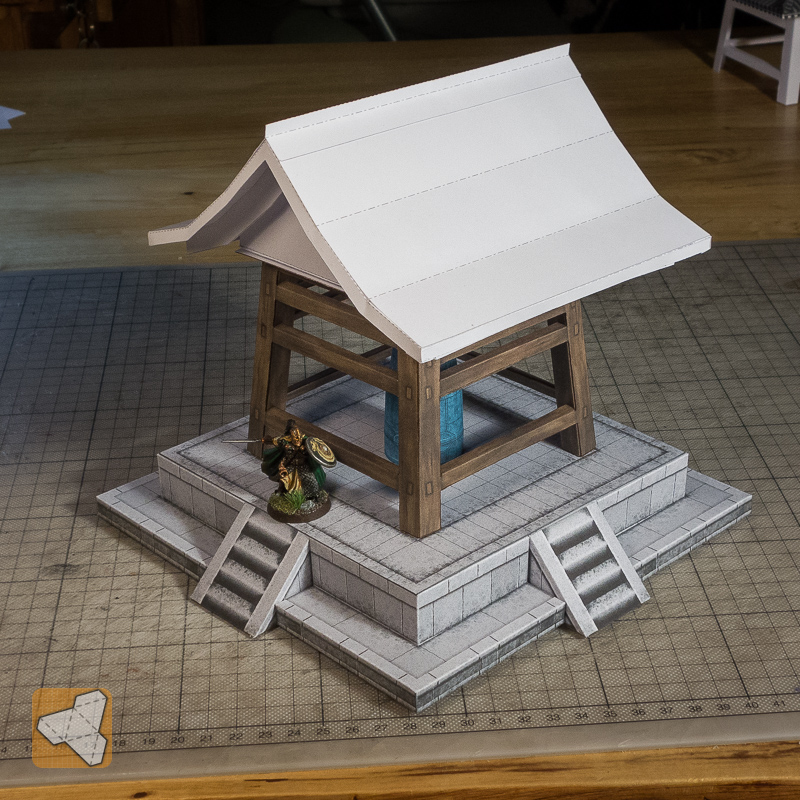 This is what the interior looks like from bottom up. As usual I build with 160gsm paper, so I prefer to have some doubling up to make it really sturdy. If going with stronger paper and not so much time, the outside should do fine too.  |
|
|
|
Post by lightning on Oct 18, 2017 8:18:15 GMT -9
I know you are going for a square shape based on 16th century designs, but here's an octagonal bell tower structure that was built in the mid-twentieth century in Cowra, Australia - 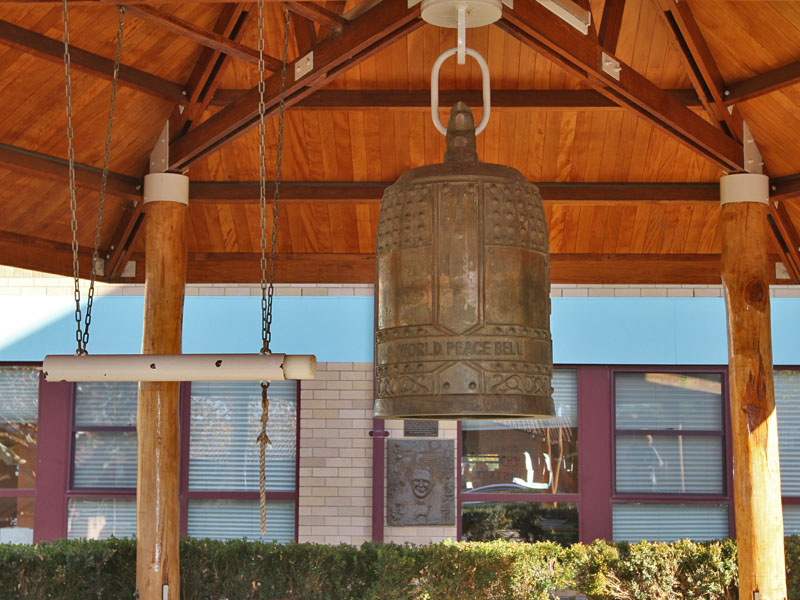 It was built in the mid-twentieth century with many modern materials but they kept a great deal of the traditional design elements. It sounds nice too. Would love to hear that one! I actually have an octogonal building in the pipeline ( Yumedono (Hall of Dreams) of the Horyu-Ji) |
|
|
|
Post by lightning on Oct 18, 2017 4:39:18 GMT -9
Making the framwork sturdier. Both the vertical and horizontal bars now have optional parts to make them stronger and 3D. Not sure about the extruding parts. Might make them 3D too. They are a little fragile now.   |
|
|
|
Post by lightning on Oct 16, 2017 21:02:31 GMT -9
A first try of the simple wooden roof for the temple bell tower. 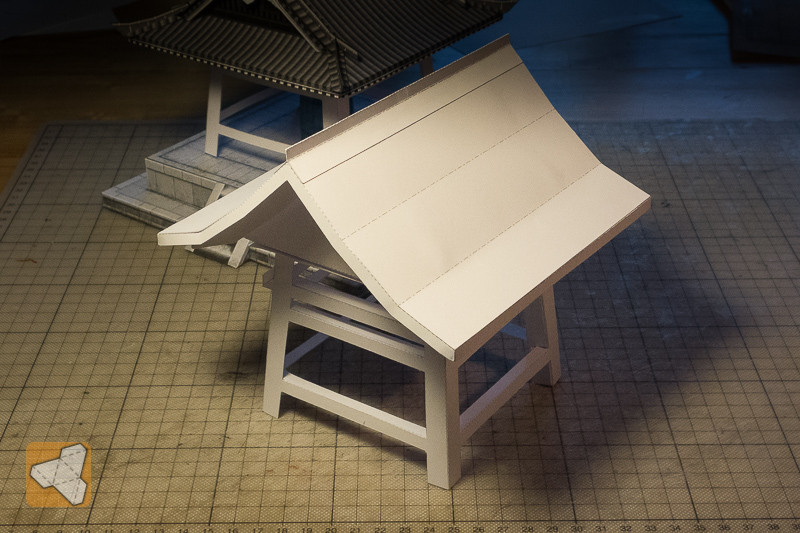 And a first sketch of the bell striking panel (tsukiza).  |
|
|
|
Post by lightning on Oct 16, 2017 21:00:45 GMT -9
That is looking good so far! Hope to see it finished! It will, just very slowly. Labour of love |
|
|
|
Post by lightning on Oct 12, 2017 23:07:40 GMT -9
Blocked in the basic shape of the bonsho tower framework. Reused a castle roof but will make a new simple wood one for this set. Now I need to think about making this beauty a little more stable!  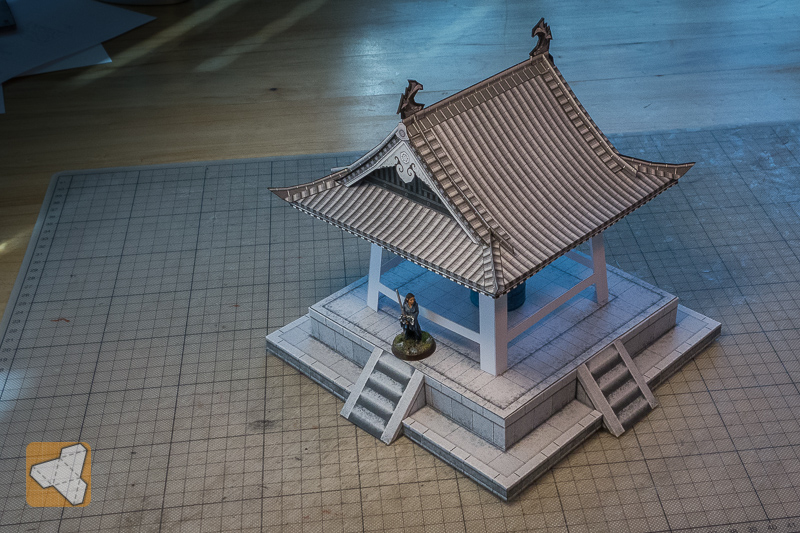 |
|
|
|
Post by lightning on Oct 11, 2017 20:56:15 GMT -9
New Star Wars movie coming... That brings the question. When this is finished, is it going to have the classic round reflector dish or the new fancy square one? It will def have the original round one. But an alternative part should be the least of challenges! BTW that is where I am now. I have redone the hull. With cutfiles it comes together so precise! It now is in proper scale for 15mm figures. I hope to make it so that it all will be vectorized so you could simply print it on A3 or even A0 paper and built it for your 30mm, lego mini figs, playmobil figures etc. Stuck with the cockpit arm. The bend connection is giving me headaches. I am trying to make it come together without any possibility of errors but so far it has remained a challenge. And with everything else going on it wont be finished for this movie release! :-) 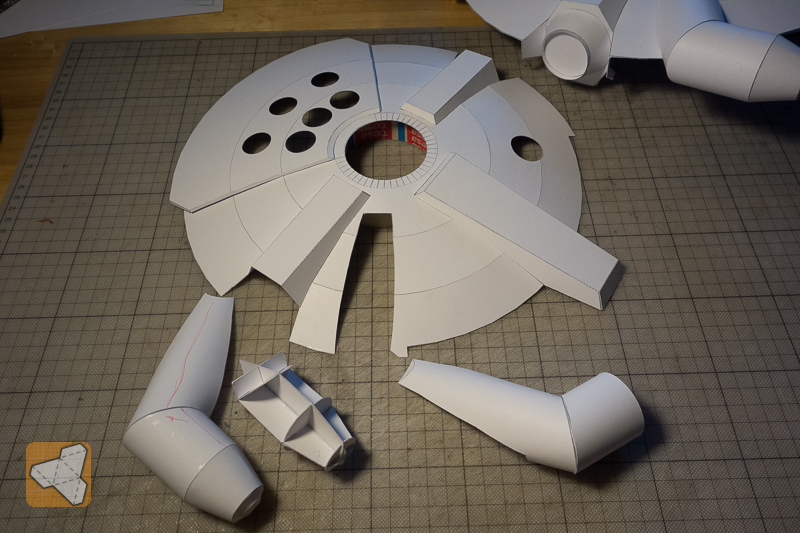 |
|


 ) to accomodate the landing gear boxes better. Also decoupled the belly so that I can assemble the hull more controlled.