|
|
Post by tirick on Nov 22, 2010 18:25:58 GMT -9
I've aluded to this project in other threads, but as it is very close to completion I think it a great time to show some teaser build shots. This (like most of my models) will be available in 1:50 and 1:35 scale, and will eventually be accompanied by an appropriate British Naval crew. The title says it all, but the cannon will be made of detailed components and will feature a pivoting (elevation) assembly, potentially moving wheels and chock-block wedges for elevation support. I've not decided yet (although if I do it will extend release probably until Christmas) but I may include a second bore size with a shorter barrel. (I'd estimate this at the standard 32 lb shot, although at this scale it is really impossible to notice minor variations). This is the first of my builds that was fully textured before I printed any part of it, with only minor component details (rivets, etc) missing from the final wood carriage textures. It might be hard to tell from the pictures, but the detail on the cannon is laminate build-up, a feature which worked better than I hoped. Note that the second shot is showing the barrel assembly, which fits into the cannon exterior tube. I intend to work on the carriage tomorrow, and will likely have it complete (sans wheels) for more shots then. Enjoy! Tirick 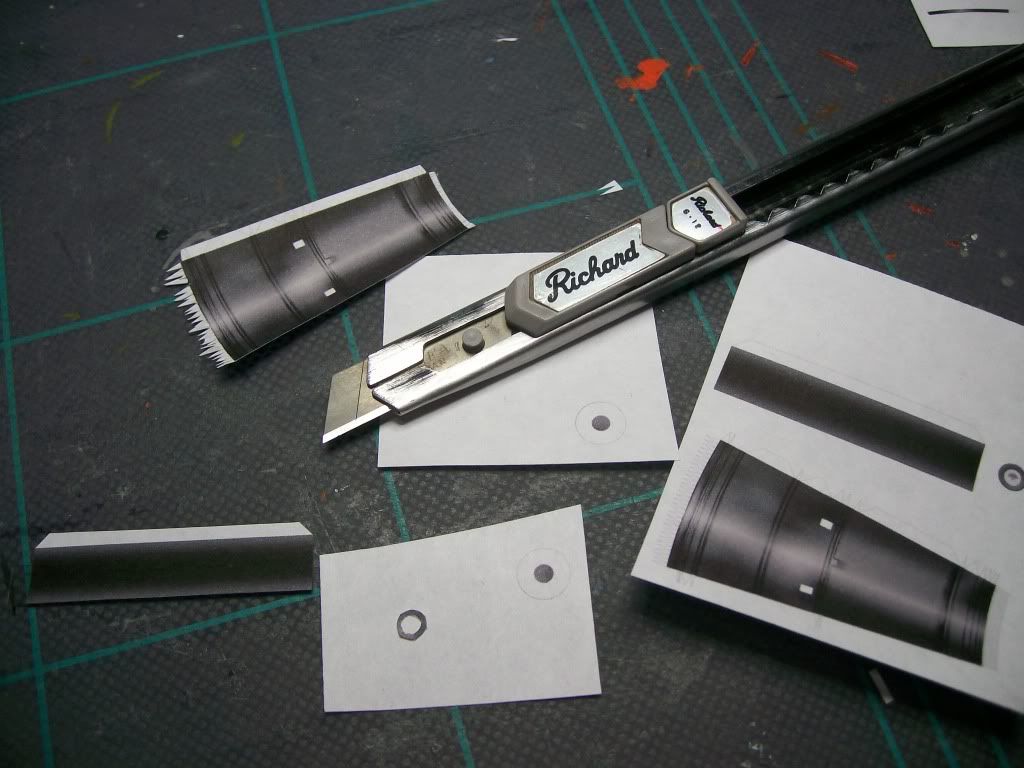 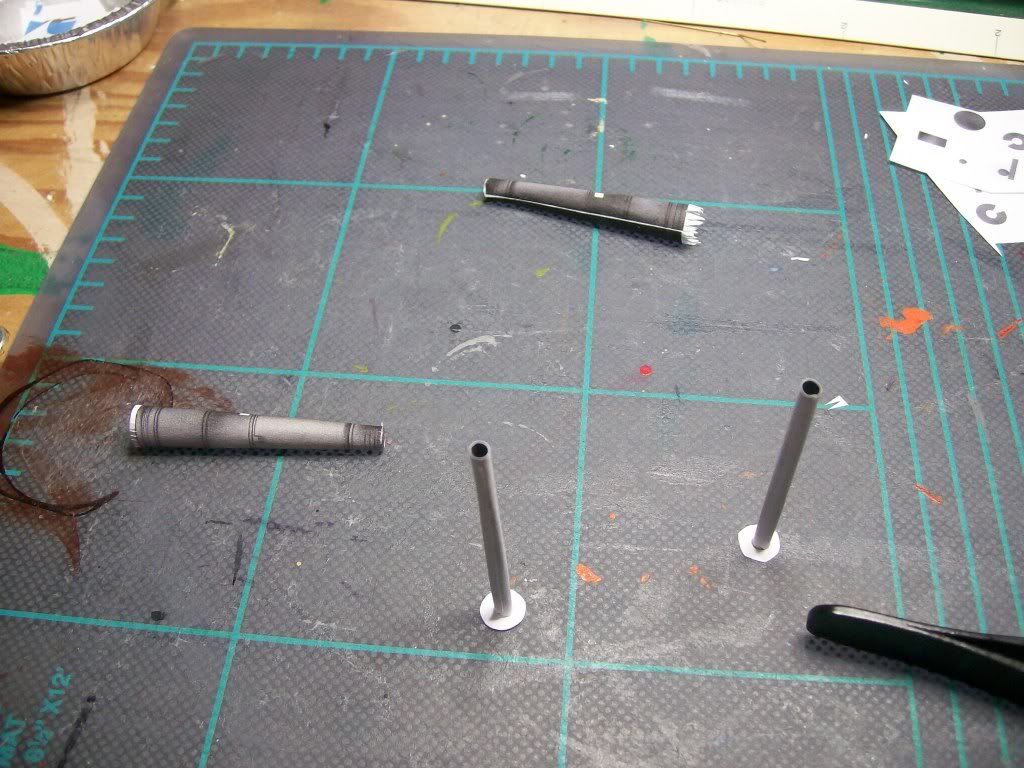 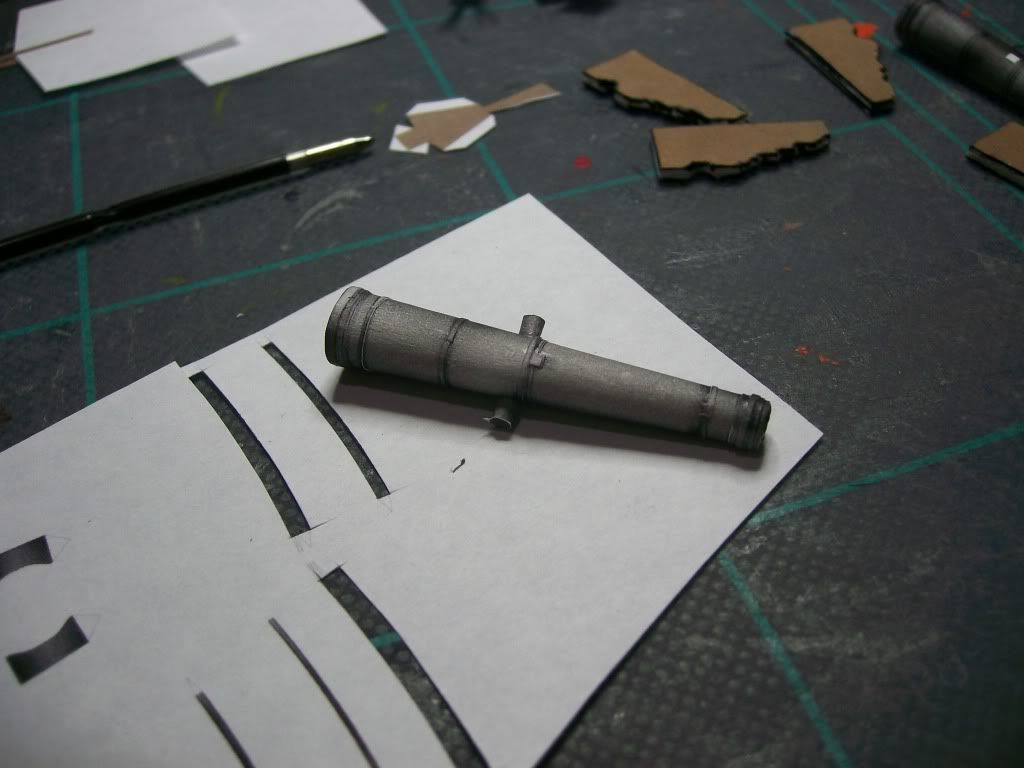 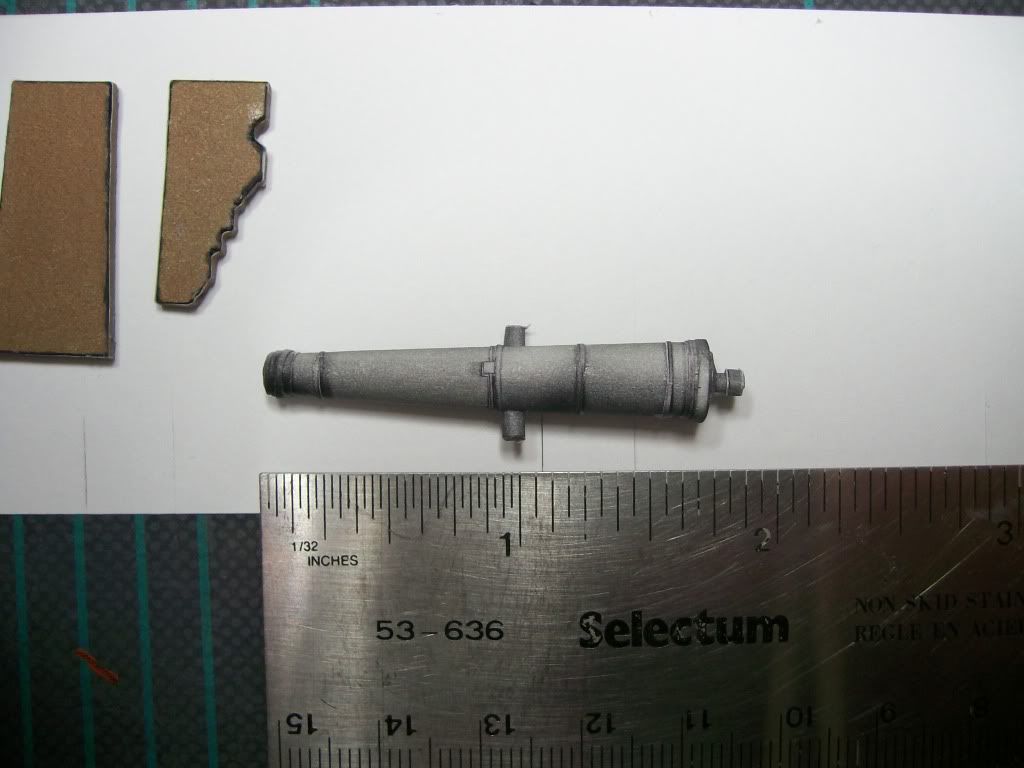 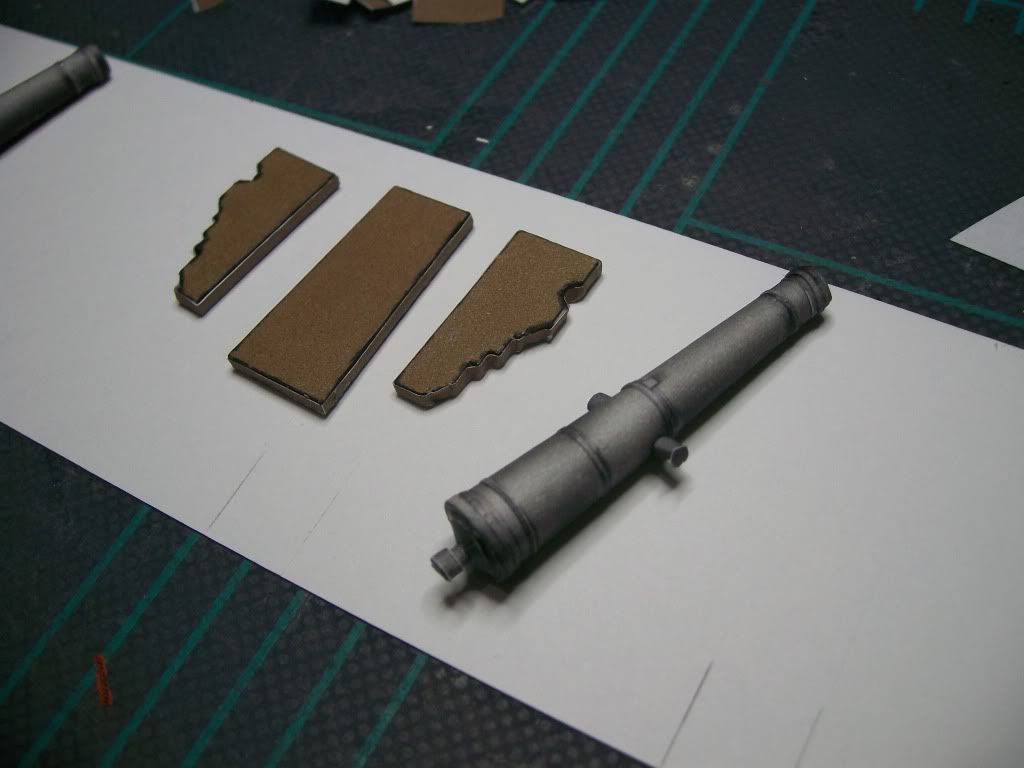 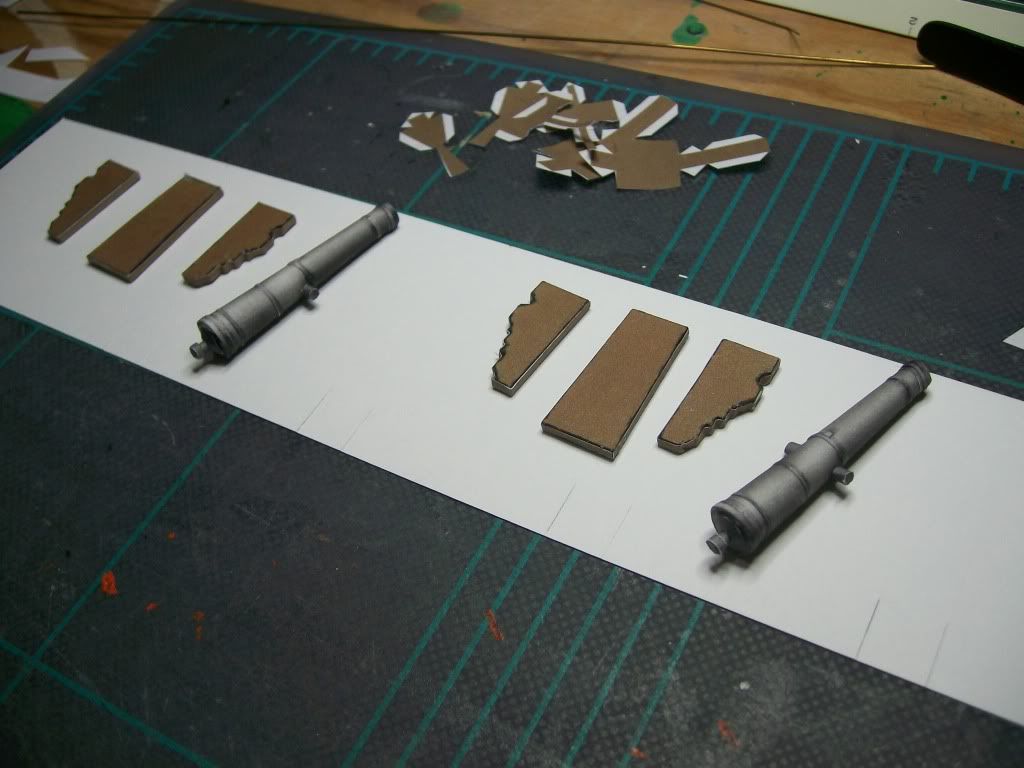 (yes, I'm building two; as two fit on a page currently) |
|
|
|
Post by mruseless on Nov 22, 2010 20:04:48 GMT -9
Again, insane. But awesomely insane.
|
|
|
|
Post by roguetrader on Nov 23, 2010 0:26:34 GMT -9
nice artillery piece... and big... It's ideal for siege campaigns
|
|
|
|
Post by tirick on Nov 23, 2010 17:47:09 GMT -9
I've finished the carriage assembly, and all that awaits are the wheels and struts. Sadly the carriage alone puts the guns to high to mount in the Maiden but they still look fantastic. This has been one of the easiest of my prototypes to assemble, and comes close to the top in my list of favorites thus far (of my own models). Two component sets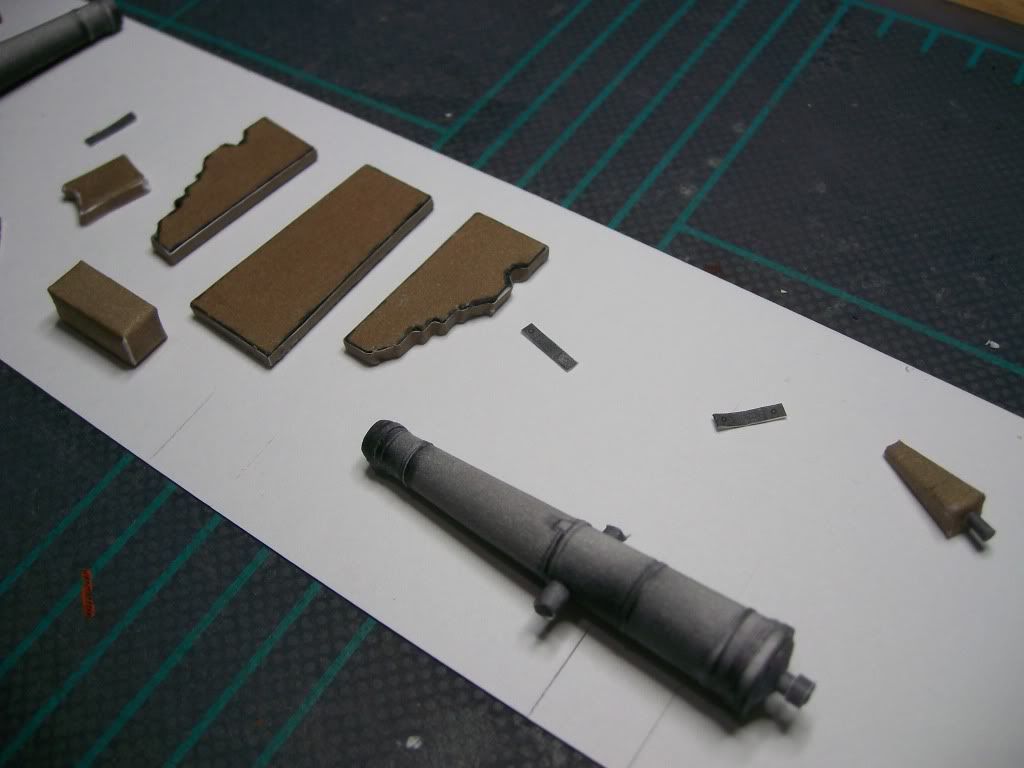 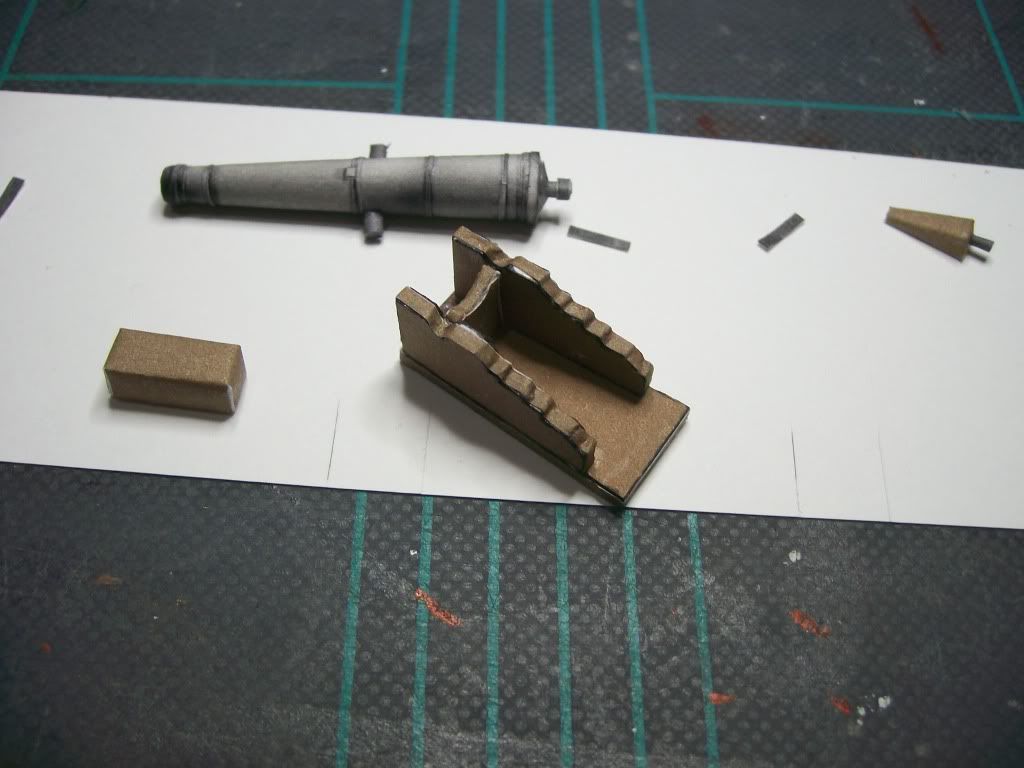 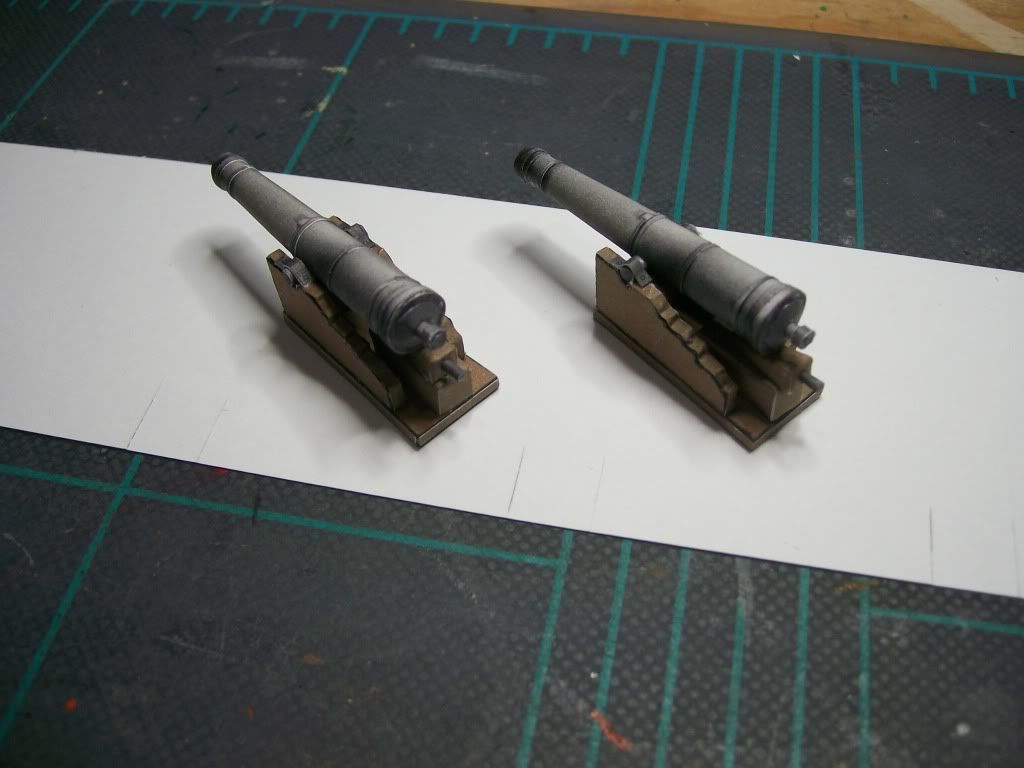 Top ViewTop and Side Top ViewTop and Side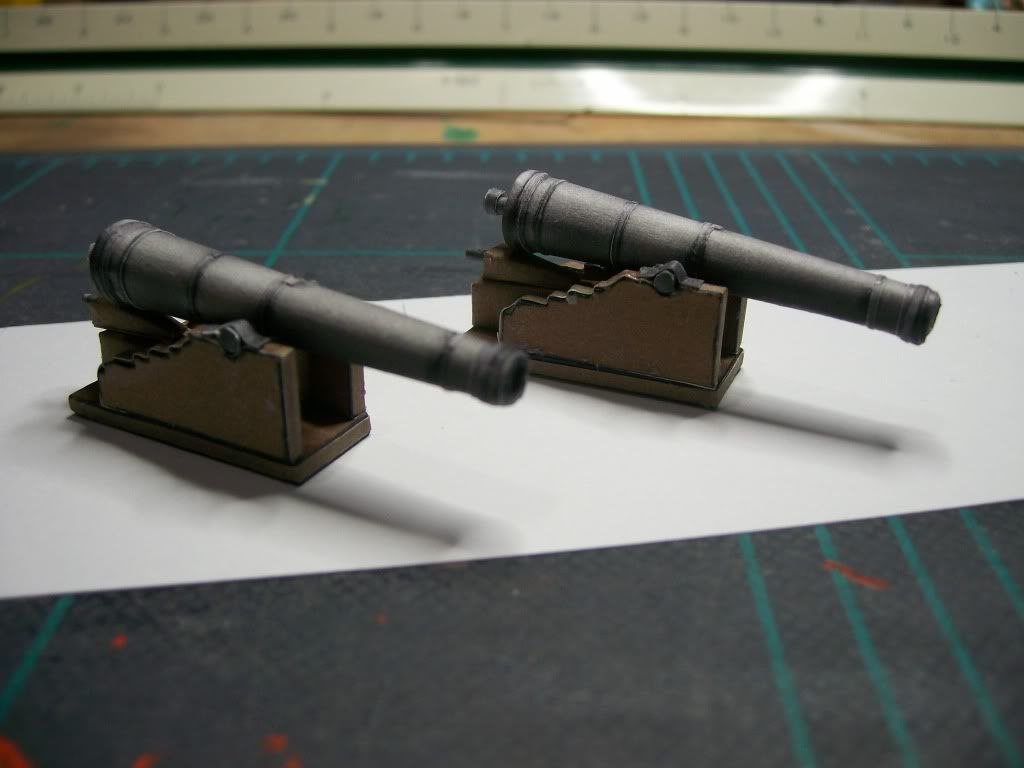 Barrel view Barrel viewEnjoy! Tirick |
|
|
|
Post by roguetrader on Nov 23, 2010 23:32:41 GMT -9
fantastic pieces. I like it.
|
|
|
|
Post by Sirrob01 on Nov 23, 2010 23:41:54 GMT -9
Great cannon  any plans to add a carriage? edit I should be more specific a shipboard carriage |
|
|
|
Post by tirick on Nov 24, 2010 1:50:16 GMT -9
It is a shipboard carriage. I just have to add the wheels. ;D
I don't have plans to make a field carriage for it though, although I might consider a field gun in the future.
Thank you!
Tirick
|
|
|
|
Post by Sirrob01 on Nov 24, 2010 2:08:05 GMT -9
ahh wasn't sure if you were going to add wheels or just mount as it was  |
|
|
|
Post by mruseless on Nov 24, 2010 5:04:58 GMT -9
Can you post a photo of the cannon next to a 30mm paper mini?
I would definitely buy this model, even if it is fiddly to build!
|
|
|
|
Post by tirick on Nov 24, 2010 6:10:06 GMT -9
There is a more advanced mount, came out late in the 1700's (now that I think about it, this is an 18th Century gun (changed the title to match), hate how those numbers are offset) that was more of a rail/transverse rotation mount rather than wheels, but I've no good pictures of one, so I've not tried to model it.
The wheels just have to be cut and glued at least, so I hope to have pics tonight (alongside a 1:50 scale miniature and a 35mm Reaper for scaling/size referencing). When I have final textures/components ready I'll make a 1:35 alongside a 1:50 as well.
Thank you,
Tirick
|
|
|
|
Post by tirick on Nov 24, 2010 18:27:10 GMT -9
I've finished the full assembly (of the modeled components), and aside from some minor tweaks, I think it works quite well. I've included some pictures with a 35mm Reaper miniature for scaling. As 35mm is very close to 1:50, I'm certain you'll get the idea. The entire model is about 5cm long, or 2.5 m (8 ft, 2 inches (or so)) to scale. I've built it with freely rotating wheels and a loose wedge (although the little blighter does keep falling out when shifted). Easy enough to tack them in place if you prefer. I hope to finish the modifications (and blocks/tools) and instructions within a few weeks, so easily before Christmas. Little bitsComponents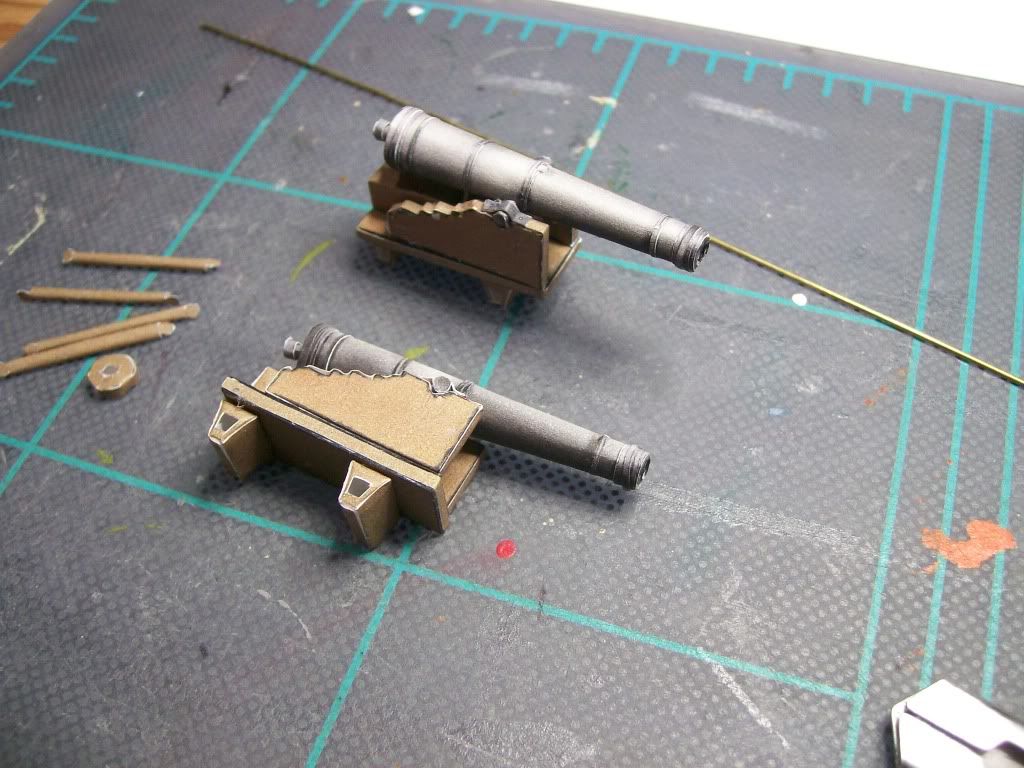 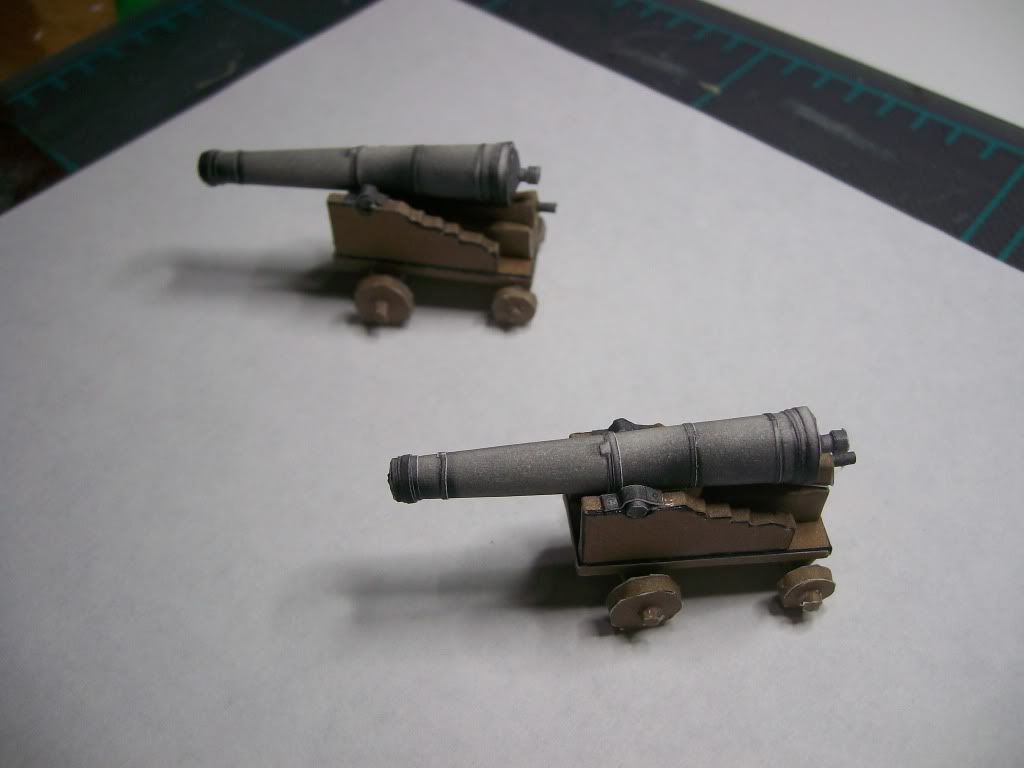 Another shotTop View Another shotTop View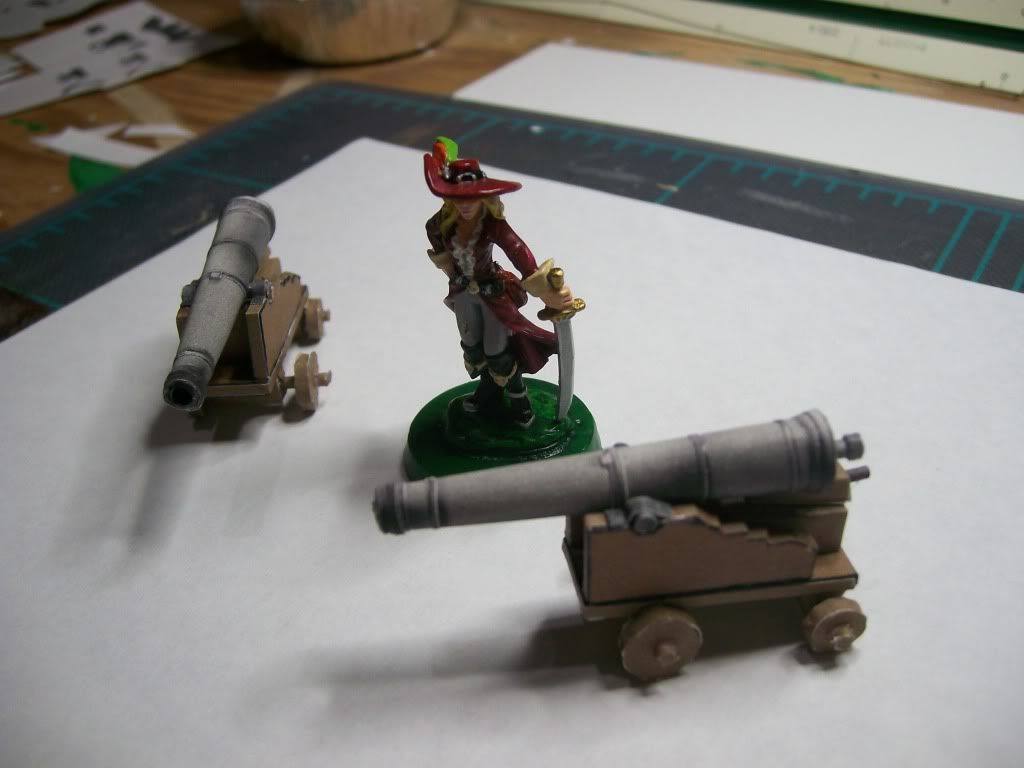 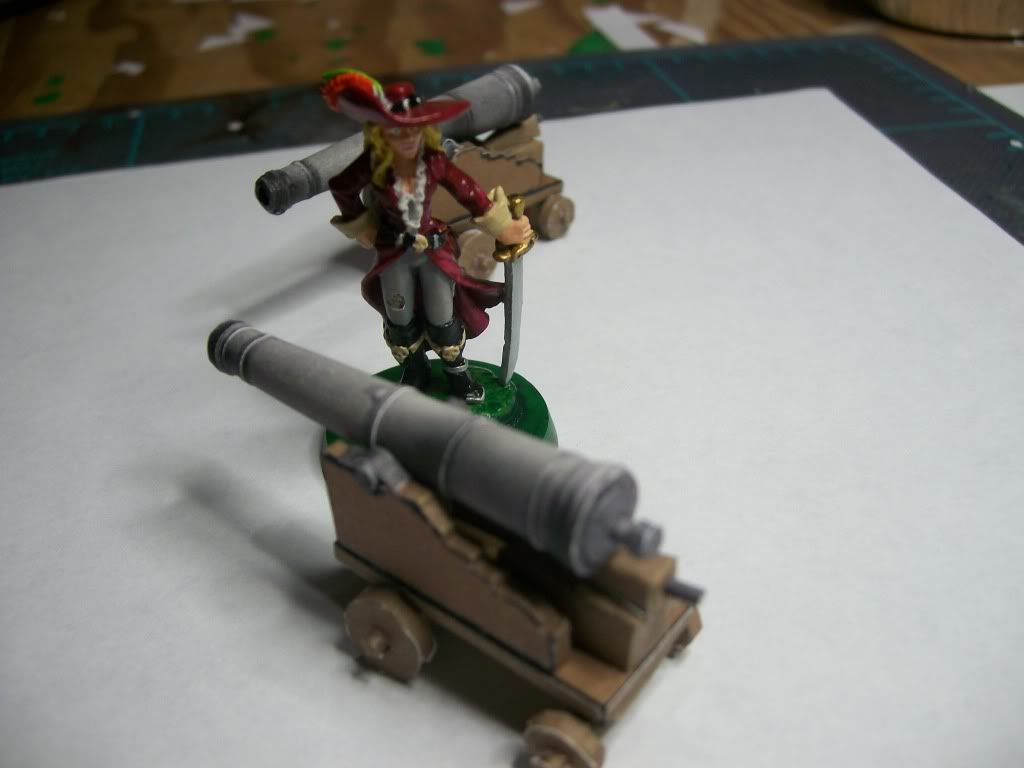 Enjoy! Tirick |
|
|
|
Post by Dominic on Nov 24, 2010 21:31:40 GMT -9
Nof if you tell me that the reference mini is made from paper, too...  The cannons look great, with the usual "you are (positively) insane" attached. |
|
|
|
Post by roguetrader on Nov 25, 2010 23:51:20 GMT -9
Fantastic pieces...
field ones in the future, perhaps?
|
|
|
|
Post by tirick on Nov 26, 2010 4:51:07 GMT -9
I am thinking it yes. Have a lot in the queue, but I don't doubt once I make redcoat marines (to compliment the planned Navy crew), its really not much of a step to make field guns.
Just starting to rough in a diorama set for the gun emplacement. More right now so I can mock up the blocks and other gear, but I plan to release a mock-up ship battery set eventually.
|
|
|
|
Post by tirick on Nov 26, 2010 6:40:56 GMT -9
I've been playing around a little this morning, and I have a rough mock-up now for the cannon emplacement. It's not textured, but will serve as a good tool to showcase the gun and the blocks/tools that will be included (not yet modeled). I'll eventually clean it up and texture it, perhaps detailing better the upper deck. I know that the deck is probably a little tall (I've use a touch more than 6 ft from the deck to the beams), but it will show a little better this way I suspect. I also did some closer examinations of my measurements. This bore is closer to an 18 lb shot, rather that the 32 I'd assumed. As such it is more suited to an upper deck, or 'castle, although some frigates still carried 18-24 pounders on their main gun deck. Off to model the bits... 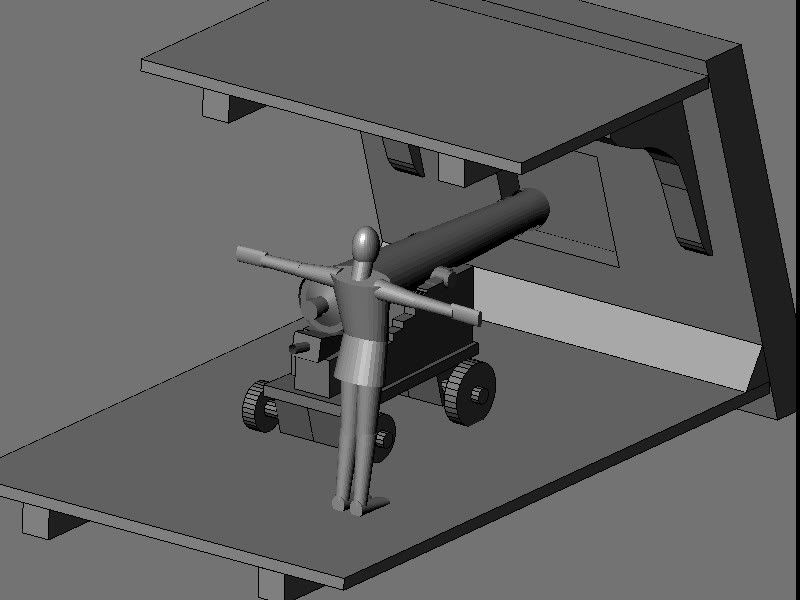 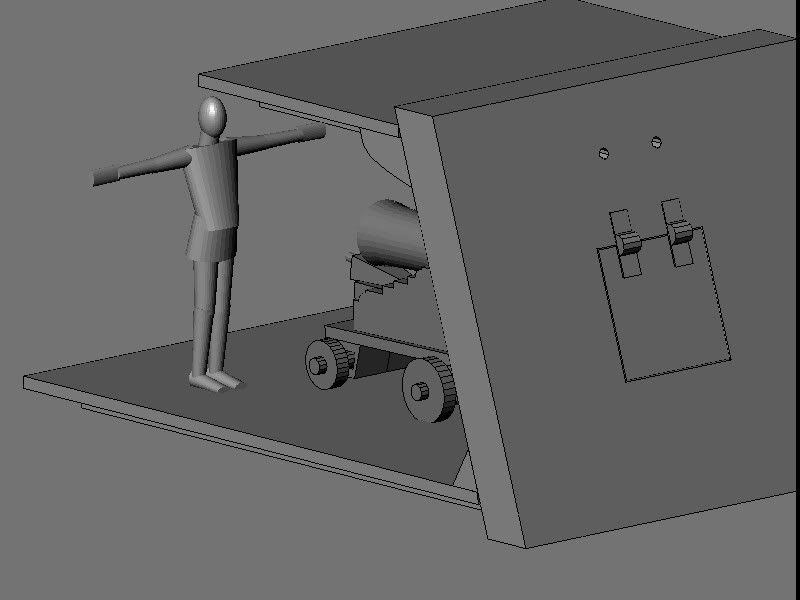 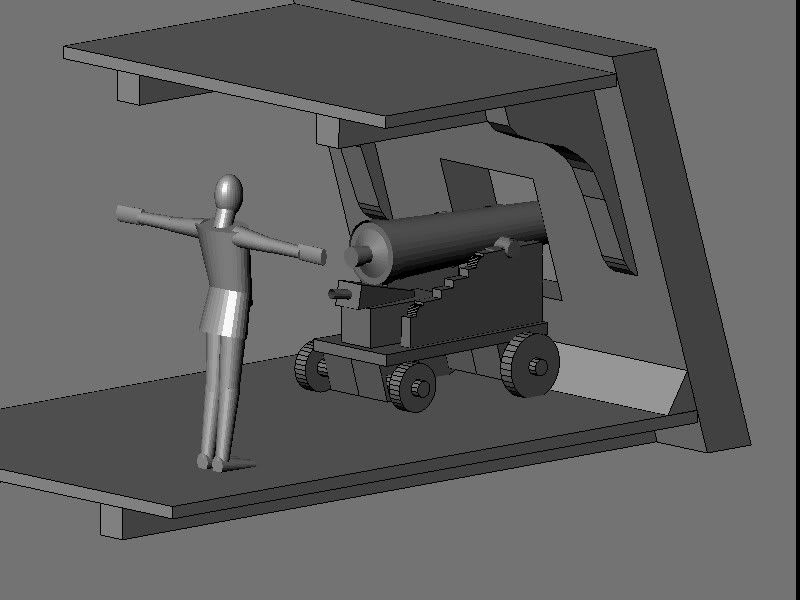 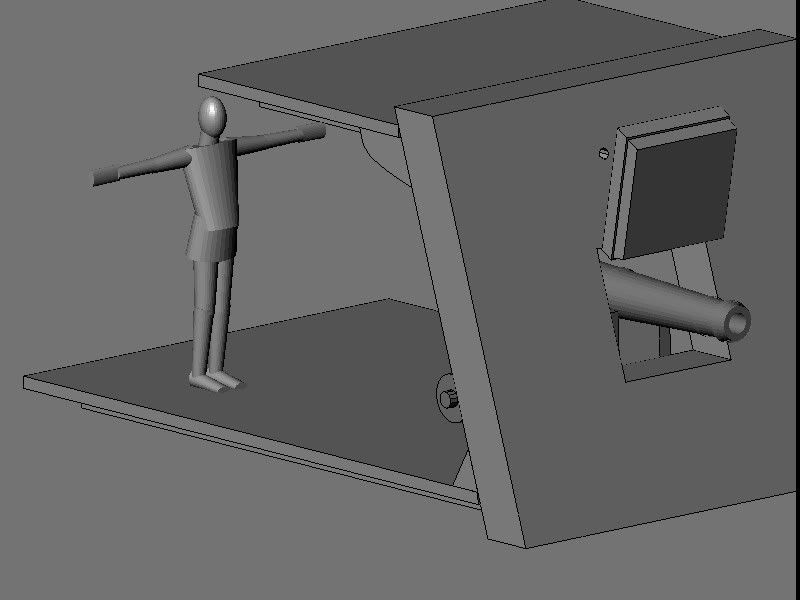 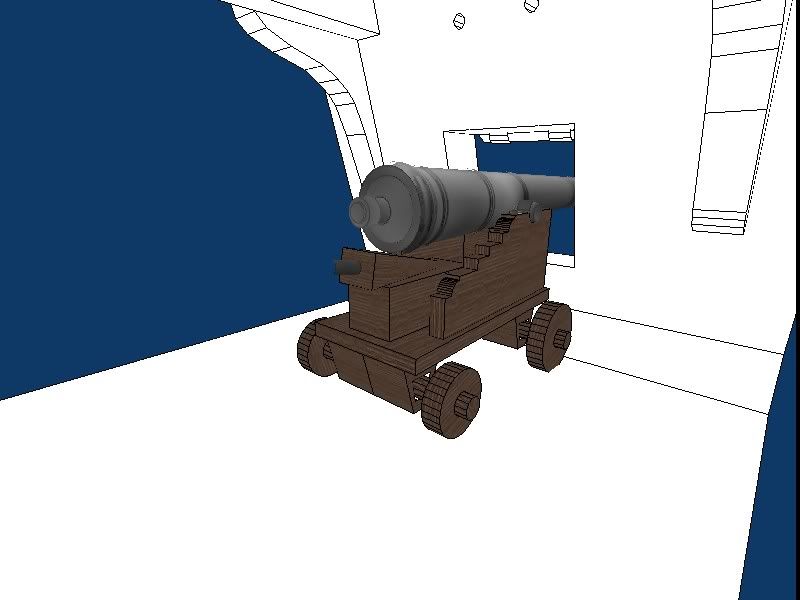 Enjoy! Tirick |
|
|
|
Post by tirick on Dec 1, 2010 18:09:09 GMT -9
I have some texture tweaking to do (I'm not happy with the carriage), but all of the modeling is now complete. I've attached some pictures so that you can see what to expect with regards to the parts that will be included. While I will not be texturing it anytime soon, I will make available the 'set' parts for posing and display purposes. I imagine I will just bundle it in with the cannon itself. 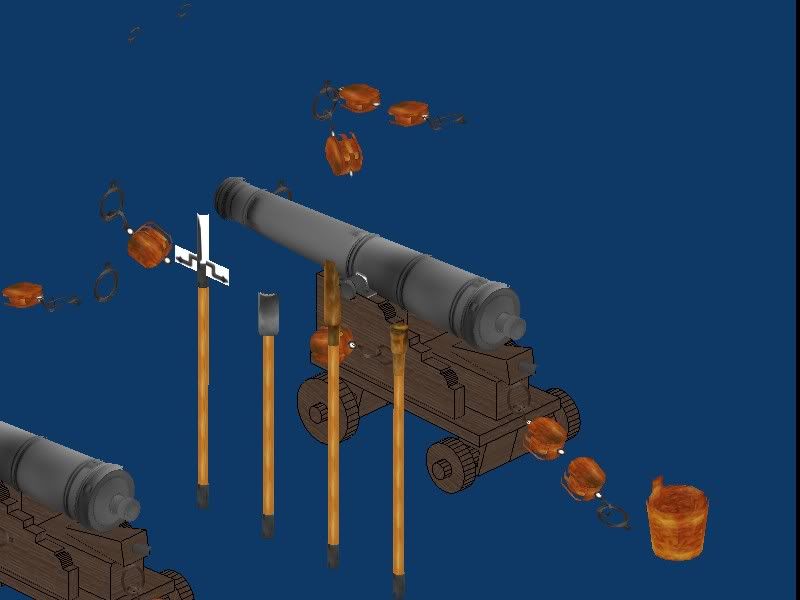 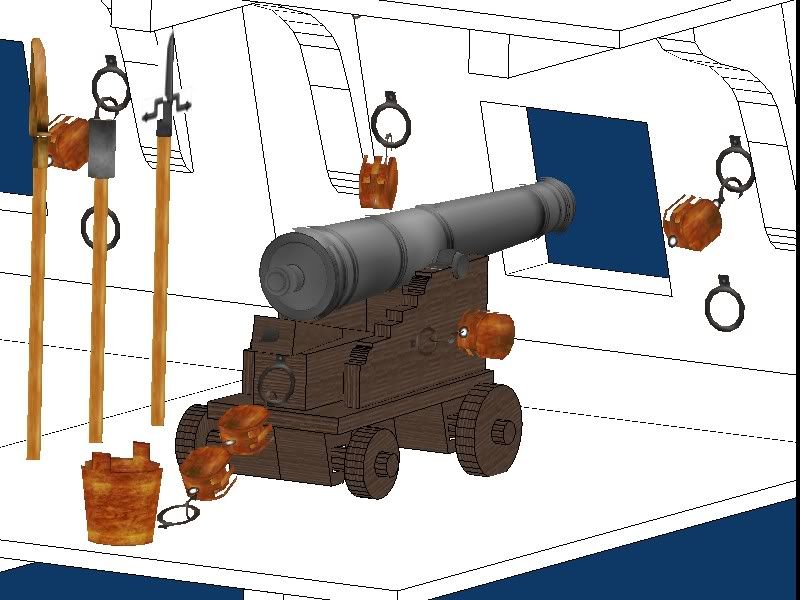 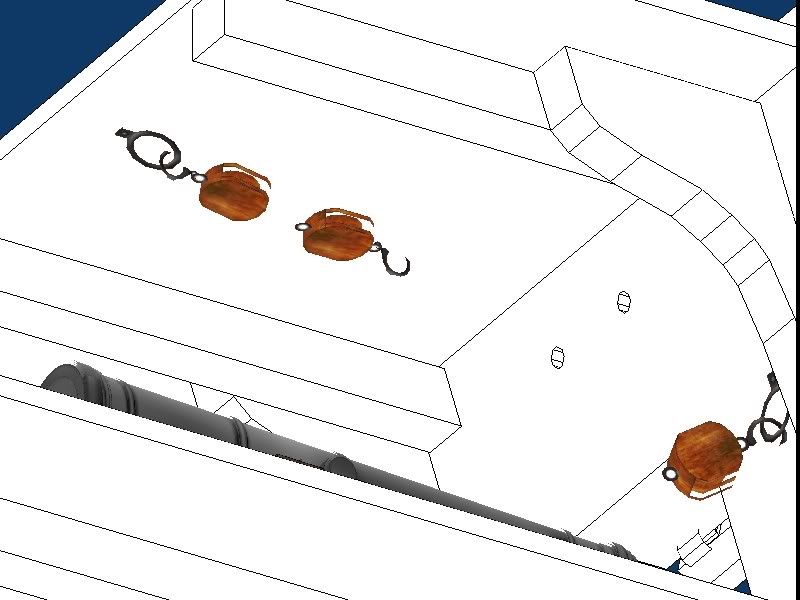 Note that the third image shows the blocks that open the gunport. There are also little ring-bolts that will be included to attach to the gunport door. I have the 'set' parts printed and I hope to have (assuming I can find thread/twine in the right sizes) a display put together within a week or so. Enjoy! Tirick |
|
|
|
Post by Tommygun on Dec 1, 2010 22:35:39 GMT -9
I can see it now Tirick, you are going to build an entire ship with every single part modeled in multi part 3D paper.
|
|
|
|
Post by tirick on Dec 2, 2010 6:18:58 GMT -9
Hehe... it's on the list.
Would love to have the room for a 1:50 scale frigate (would be something like 80 cm long) to the level of detail I enjoy in a model, with every deck modeled, but that would be the work of years (at least at my rate). We'll see how much I enjoy finishing the emplacement section. Might be convinced to do a more substantial portion.
|
|
|
|
Post by WaffleM on Dec 8, 2010 9:26:15 GMT -9
Wow! What a great cannon! With a little change of scale and a skeletal corpse, I could see this becoming a Commodore Cannon from Warmachine:  Regardless of that, it's a great model and could make any pirate crew shake in their boots! |
|
|
|
Post by tirick on Dec 12, 2010 17:26:19 GMT -9
That looks like a little larger bore mate... Still, very cool looking! Emplacement rough-ins are now built. I have an upper deck section, but for display I may use a clear acetate panel. Aside from some minor adjustments to the door, I'm nearly done. All of the components are modeled and printed, I hope to build those over the next few days. 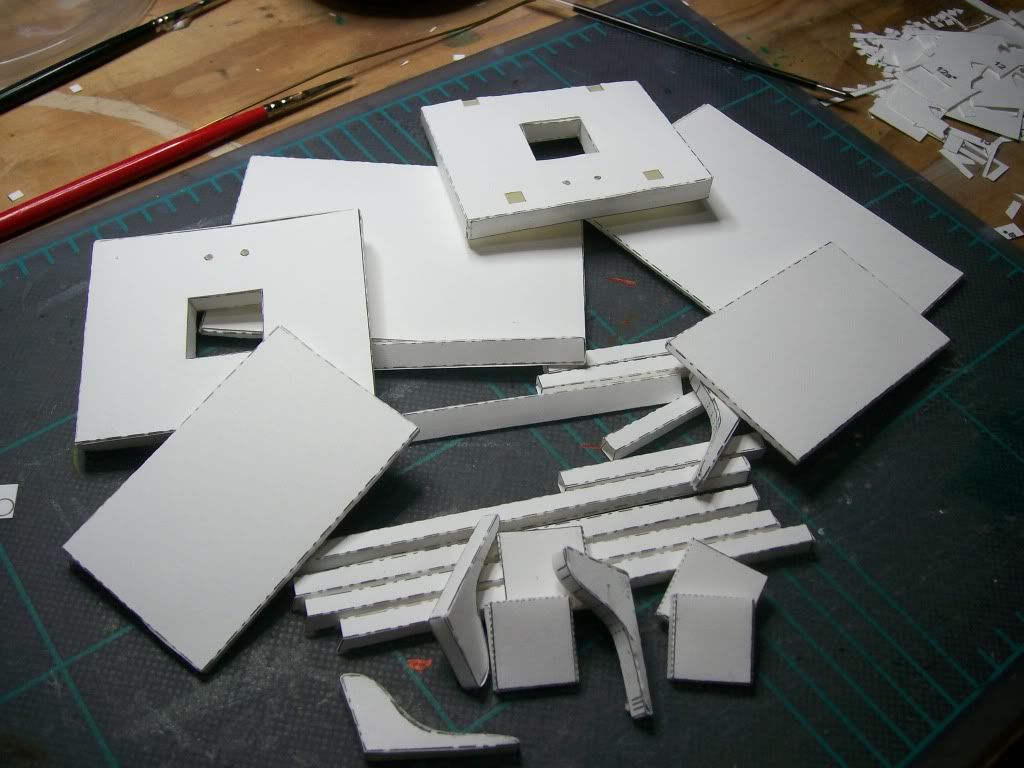 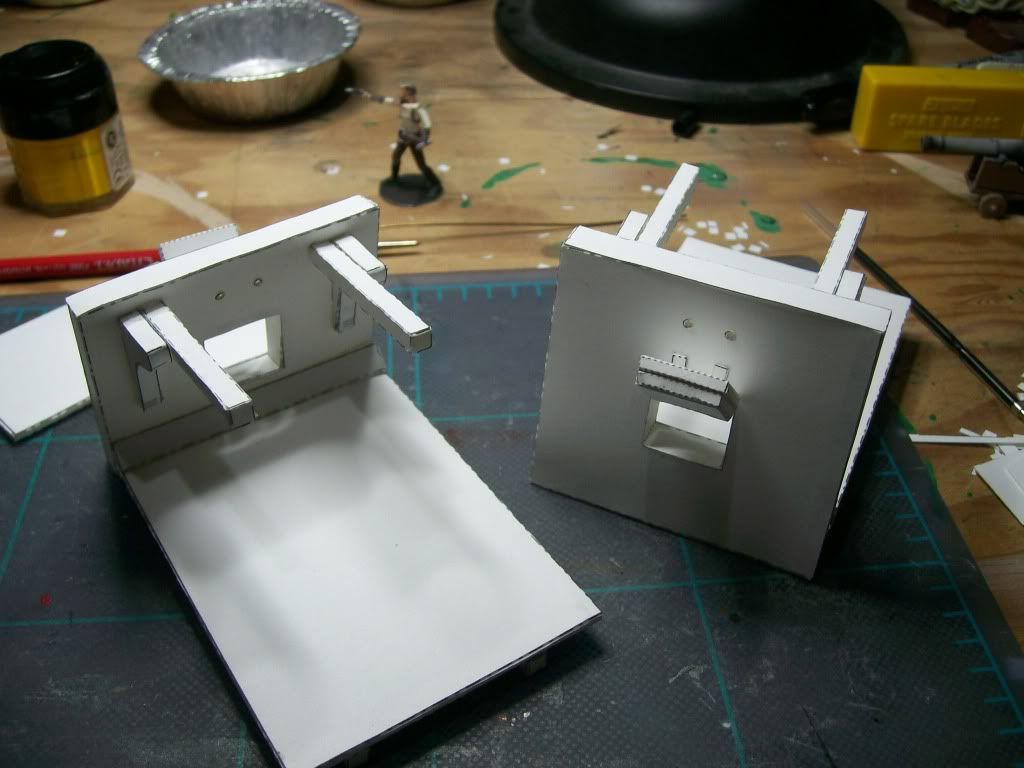 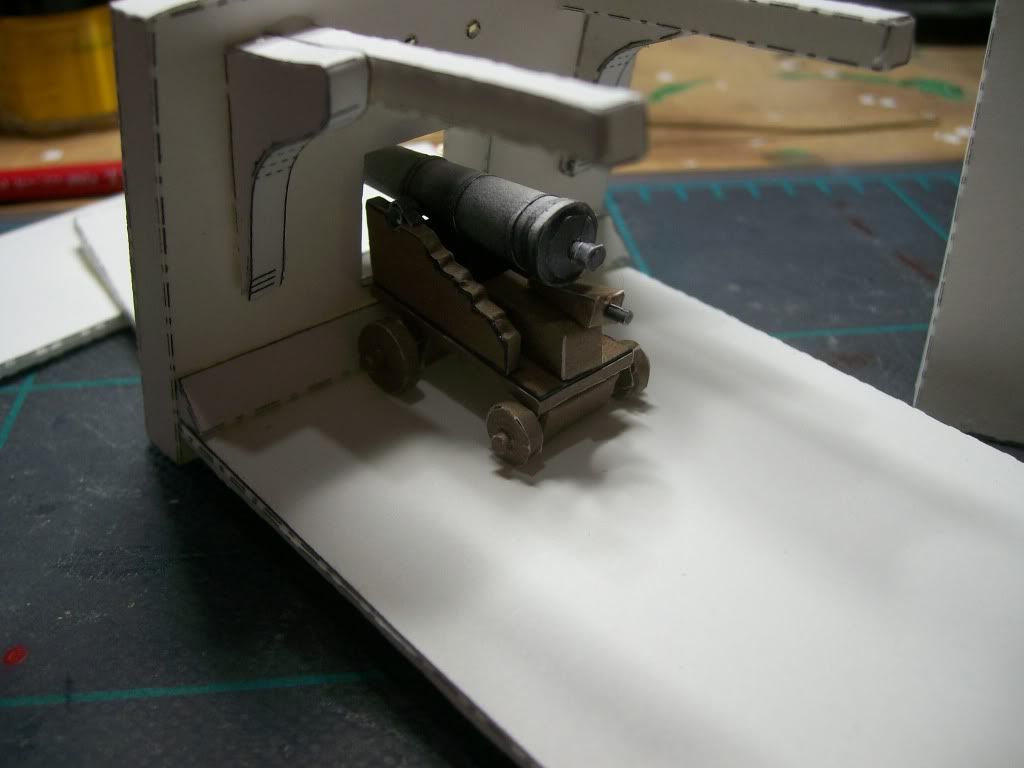 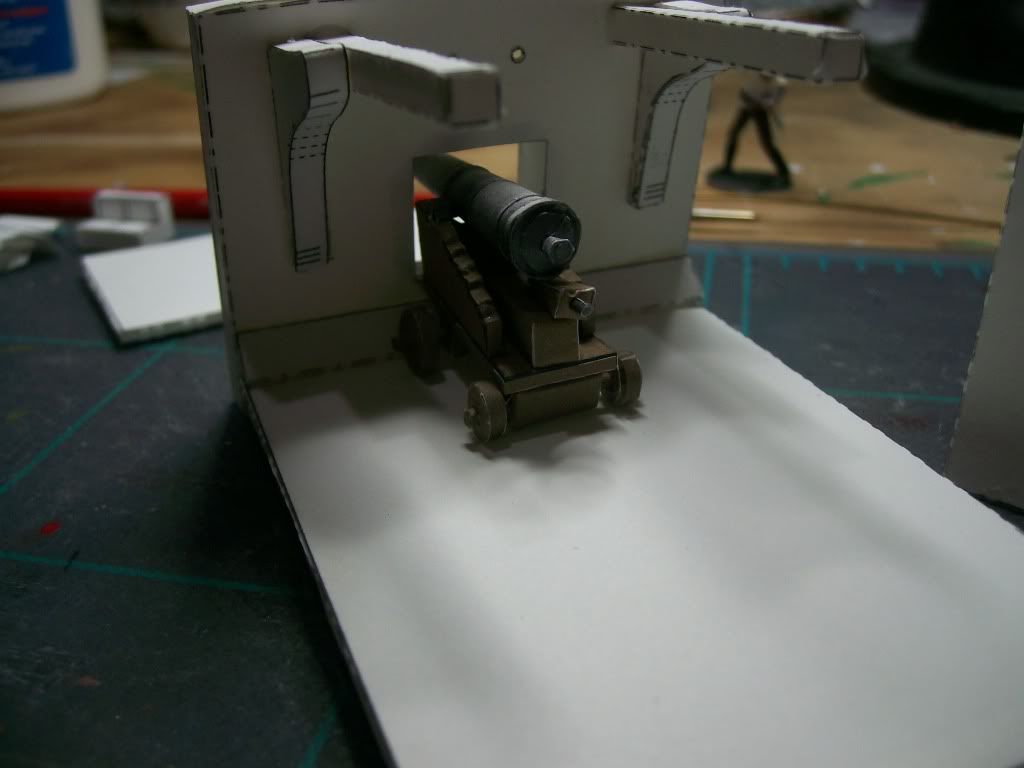 With instructions and the holidays I imagine this will drift into a new-year release. Enjoy! Tirick |
|
|
|
Post by tirick on Feb 11, 2011 3:36:52 GMT -9
The Naval cannon, complete with fittings, tools and emplacement, is now available in the TCF Gaming store. In the next week or so I plan to put together a proper diorama with some of the display options. I don't have 'duck' trousers modeled yet to show figurines with, but I imagine the tunic and trousers of the Man at Arms set might serve for a sans culottes seaman. Enjoy! Tirick |
|
|
|
Post by Floyd on Feb 11, 2011 7:36:49 GMT -9
Great job!
Excellent model and diorama!
I just picked up your Man at Arms & Expansion... good stuff!
~F
|
|
|
|
Post by tirick on Feb 11, 2011 8:13:45 GMT -9
I just picked up your Man at Arms & Expansion... good stuff! ~F Thank you! Tirick |
|
|
|
Post by Vermin King on Feb 11, 2011 8:16:54 GMT -9
This one looks a lot more straight-forward than some of your other projects. I am not so good with tweasers and toothpicks for detail work. I'll have to pick this up.
|
|
|
|
Post by tirick on Feb 11, 2011 10:36:40 GMT -9
It is much more straightforward, at least the cannon and carriage portion. The blocks (especially at 1:50) are very small however.
There are about 12 pages of instructions included though, and all of the fiddly bits are hard more because they are small.
|
|
|
|
Post by tirick on Feb 17, 2011 18:35:42 GMT -9
The diorama is coming along, although there are a lot of components to put together before I finish (the figures foremost). I thought however that I would present a little teaser of the parts, and the assembly of the train-tackle. The blocks work better than I hoped, and although they are not functional as pulleys, they play the part well. The parts and gun carriage are all built to 1:50. The bits, unassembled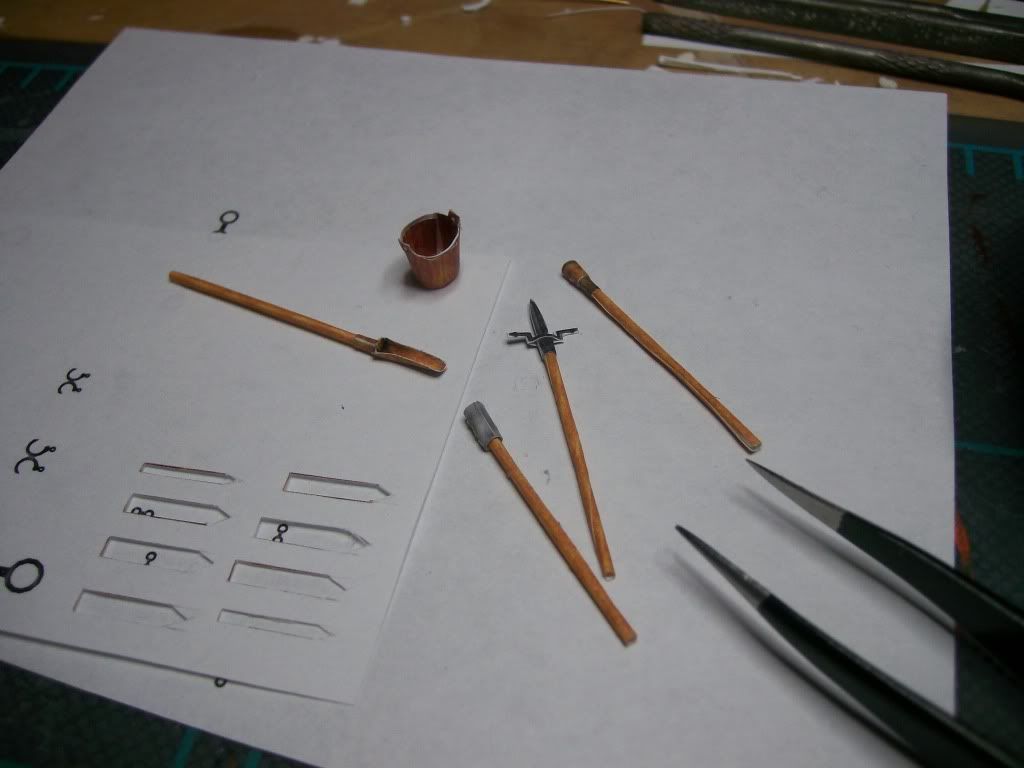 Blocks, assembled, with the thread (about 1" to scale)The train-tackle, starting to thread Blocks, assembled, with the thread (about 1" to scale)The train-tackle, starting to thread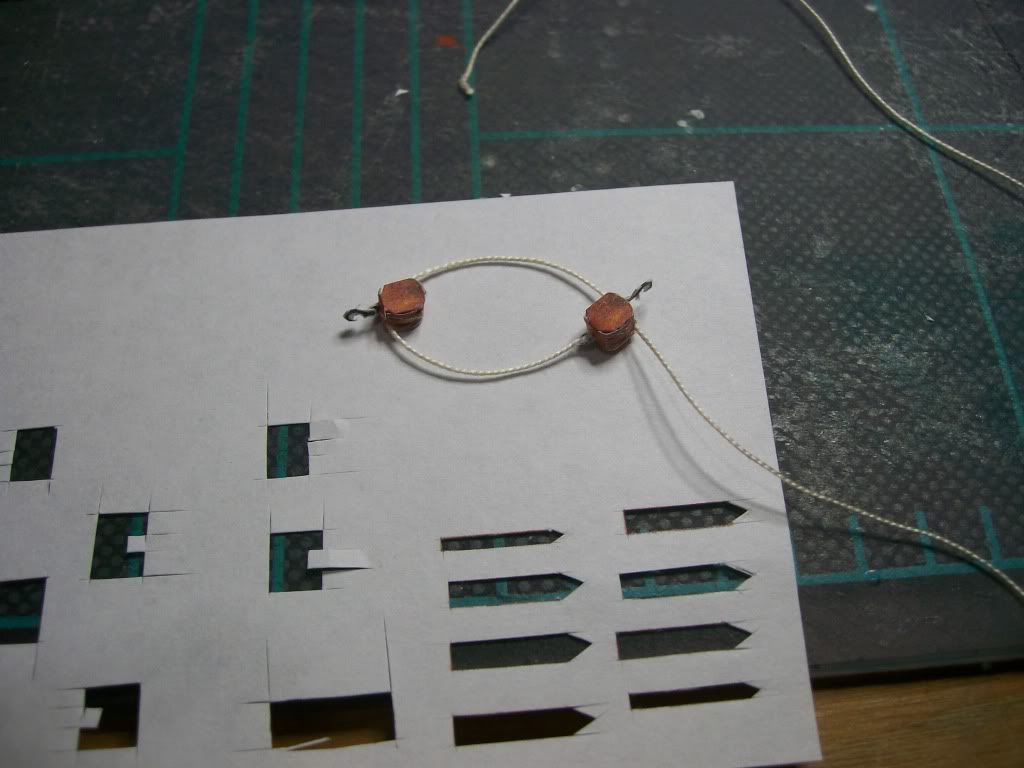 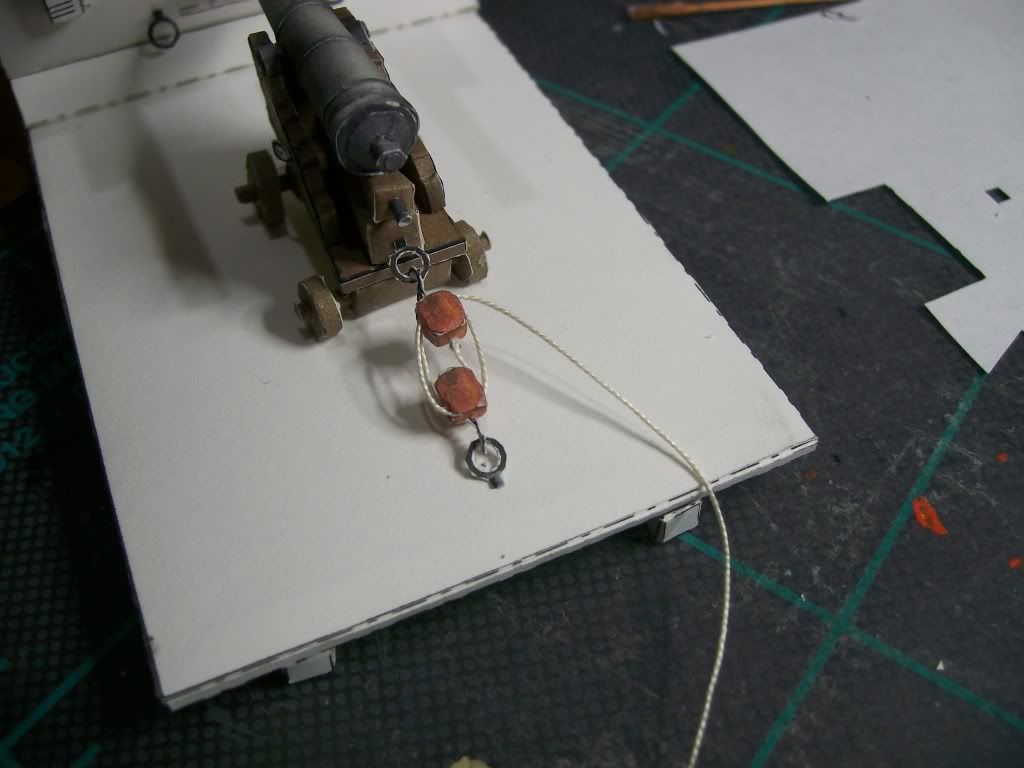 The train-tackle has to be tightened up a bit yet, and I will likely glue the thread to stiffen it somewhat. I'm not 100% certain if the train tackle is rove to advantage or disadvantage, but will leave it as is. Enjoy! Tirick (I do realize now that the train-tackle is supposed to be a gun-tackle, but I'd modeled a double-tackle instead, and so have assembled it as such.) |
|
|
|
Post by Vermin King on Feb 18, 2011 9:44:11 GMT -9
Amazing how that adds to the 'reality' of the piece
|
|
|
|
Post by tirick on Feb 21, 2011 7:00:46 GMT -9
The diorama is now complete, using a bit of thin thread, embroidery floss and parts from the Man at Arms and Expansion. Needless to say, I'm quite pleased with the result (although its used up my 'store' of pre-built figurine components). I've a large collection of images, although I'll only display a few here, the rest will be in the inline links. To start, I've a few shots of the emplacement before I added figures. I regret not using a white background, but its too late to correct now. I used thick thread for the tackle and embroidery floss for the cascabel rope. The floss is very lightly woven, so I had a bit of a fight keeping it together. They are about 1" and 2" to scale respectively (I built it to 1:50). 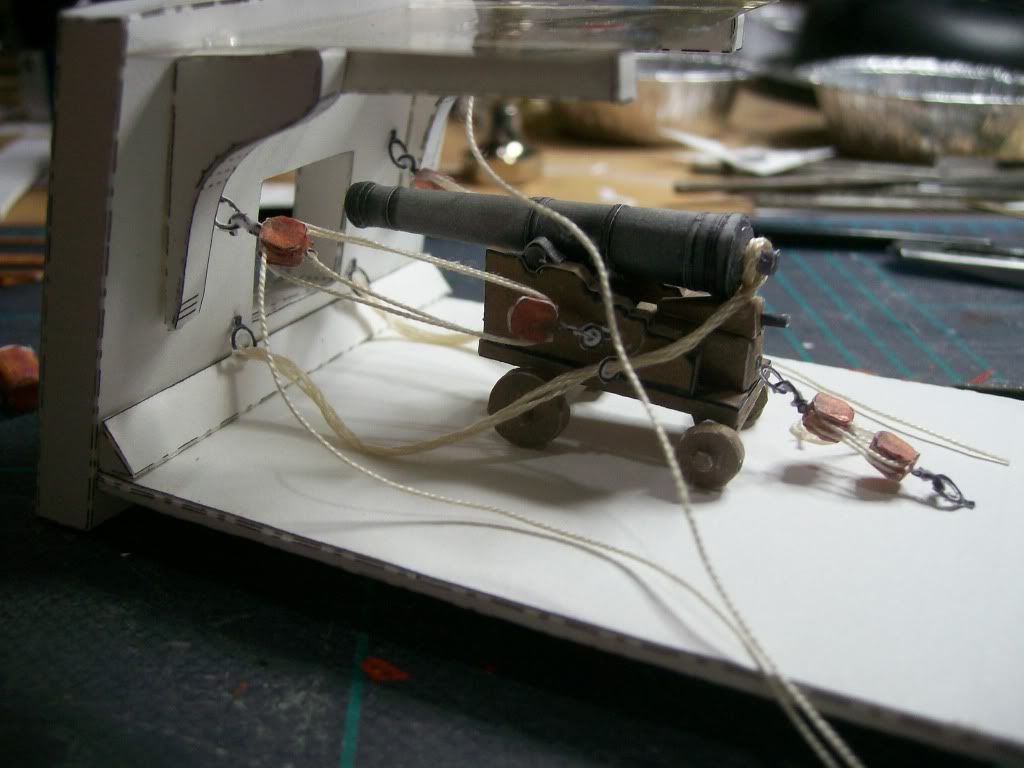 A side angleTop downAnother angle A side angleTop downAnother angleAssembling the figures took about 2-3 hours, about 1/2 hour per figure. I only modeled 5, rather than the typical 6 as I do not have a figure suitable for a powder monkey. These first few shots are before I touched up the white spaces, to give you an idea of the detail right from assembly. 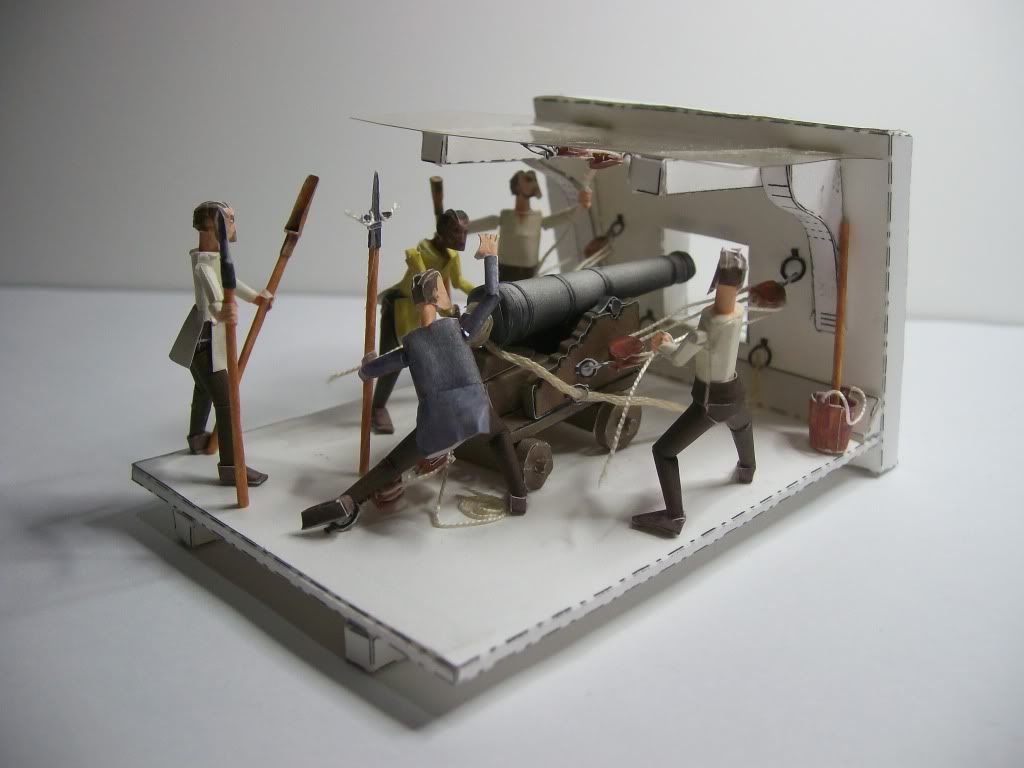 Side ViewAlong the gunFrom aboveAnother angle Side ViewAlong the gunFrom aboveAnother angleTo give you a sense of scale, the whole assembly fits in the palm of my hand: 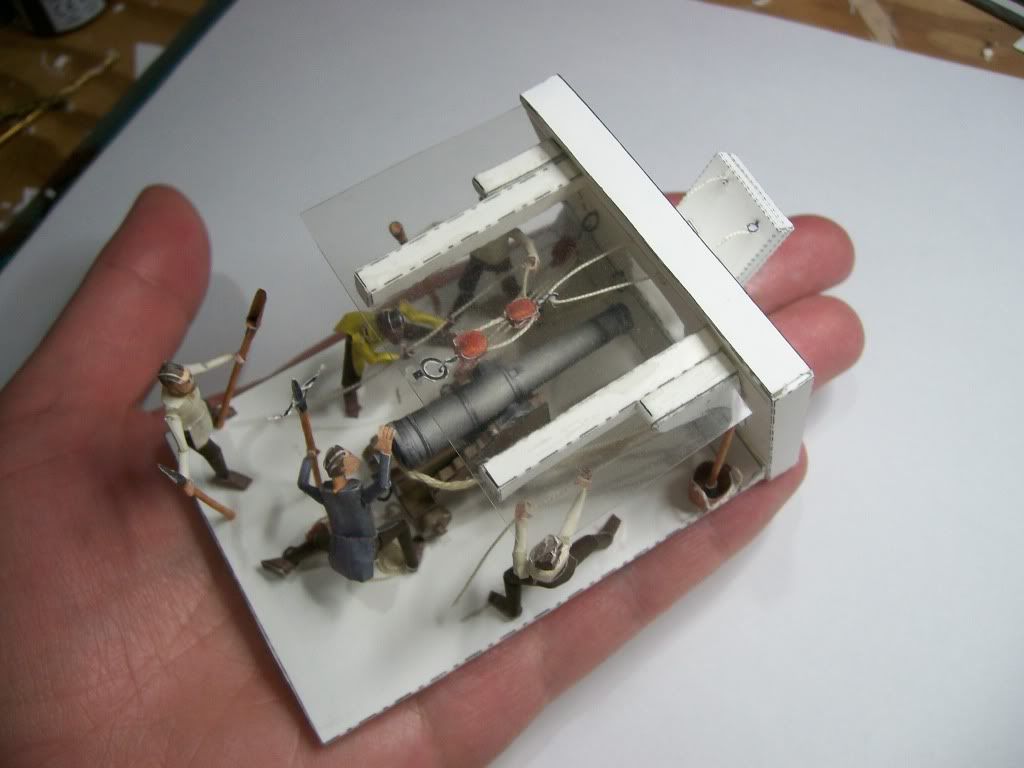 Finally, I took a 1/2 hour to touch up the obvious whitespaces, and present the final diorama. 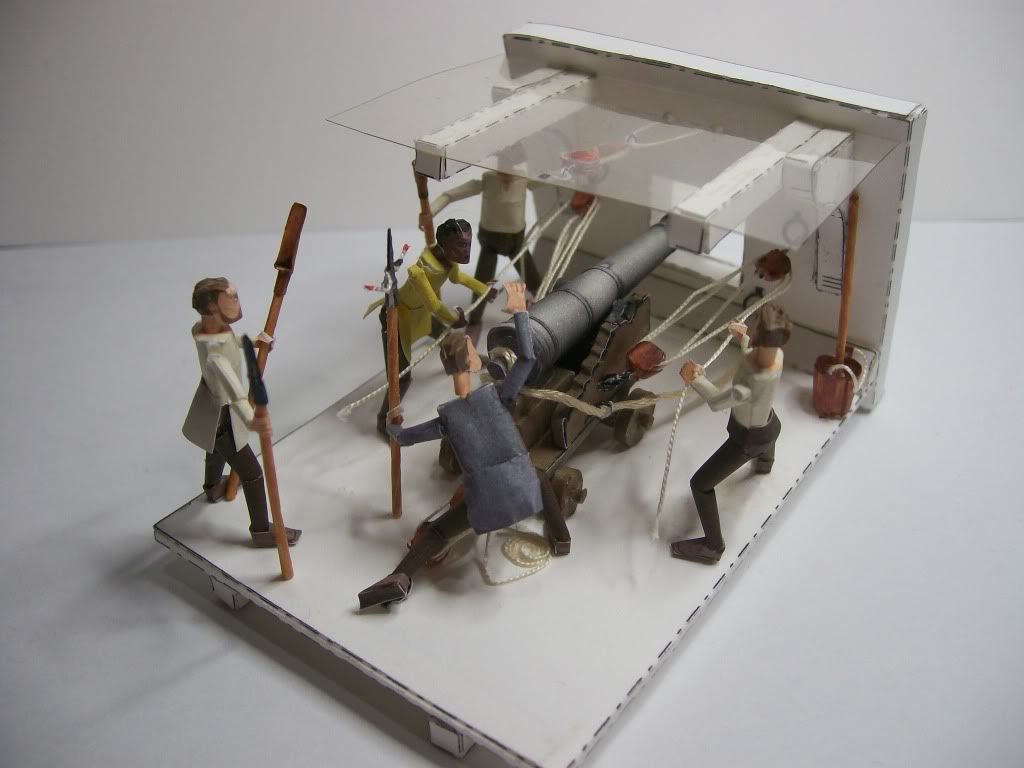 Side viewAlong the gunOpposite sideBit of a top-angle view Side viewAlong the gunOpposite sideBit of a top-angle viewEnjoy! Tirick |
|
|
|
Post by Vermin King on Feb 21, 2011 10:32:09 GMT -9
Beautiful! 1/2 hour per figure? Practice must be the key.
|
|
|
|
Post by tirick on Feb 21, 2011 10:48:28 GMT -9
1/2 hour per figure to assemble, using pre-built components. I printed about 6 sheets of the man at arms and built all of the bits over the course of a few weeks; enough for a dozen or so took maybe ten hours. So somewhere around 1 1/2 hours per figure is normal, at least for me. About the same time it takes me to paint a plastic/metal figure (maybe less, actually).
|
|