|
|
Post by Dave on Nov 30, 2011 13:12:09 GMT -9
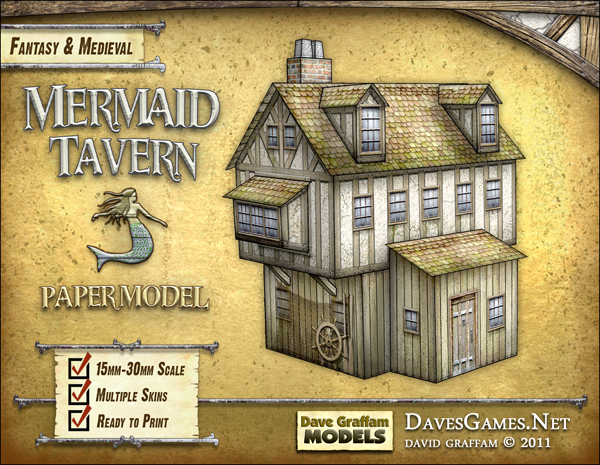
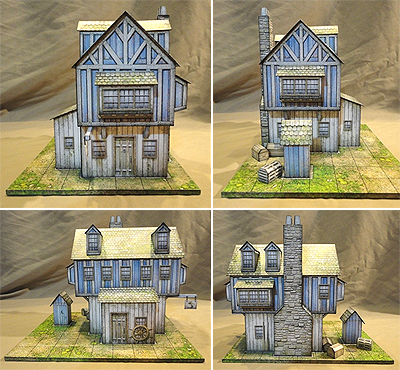
 Here's my next model, patterned after the Tudor House, Tudor Shop and Tudor Restaurant. Unlike those models, this one will have multiple textures. I'm pretty far along with the texturing, and should be able to send it off to Jerry by tomorrow night for quality control and final assembly. With luck, this set should be available early next week. |
|
|
|
Post by Vermin King on Nov 30, 2011 15:54:08 GMT -9
Excellent ... as always.
|
|
|
|
Post by Dave on Dec 2, 2011 9:15:47 GMT -9
Here's a peek at one of the hanging sign options. 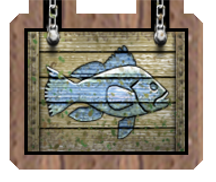 |
|
|
|
Post by oldschooldm on Dec 2, 2011 11:14:30 GMT -9
I like "textless/iconic" sign options! Very nice. Honestly, I'd buy the kit just for those - so don't skimp! :-)
|
|
|
|
Post by Dave on Dec 2, 2011 22:43:49 GMT -9
Windows are in place. Still need to add doors, a few other important details, and the footprint piece. Here's how we're looking at the moment. 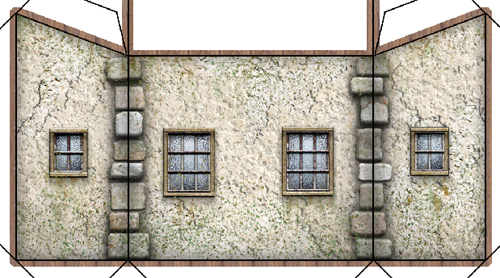 |
|
|
|
Post by afet on Dec 3, 2011 10:44:40 GMT -9
I like "textless/iconic" sign options! Very nice. Honestly, I'd buy the kit just for those - so don't skimp! :-) Ditto. I love the sign. Definitely a draw on its own. Other iconic options might include things like: - animals: horse, fox, dog, cat, bull, snake, stag - mythical animals: unicorn, dragon, griffon, mermaid - weapons & armor: sword, club, shield, helm, spear - tools: wheel, anvil, hammer, saw, compass |
|
|
|
Post by Dave on Dec 3, 2011 12:23:40 GMT -9
Great suggestions for signs, Afet. I was hoping somebody would post out a good list like that.
I'll probably have three sign options for the Sailors' Tavern: the fish (which is a fat Atlantic sea bass), a sailing ship, and either an anchor or a ship's wheel. Probably a ship's wheel, because I don't think an anchor is going to read at such a small size.
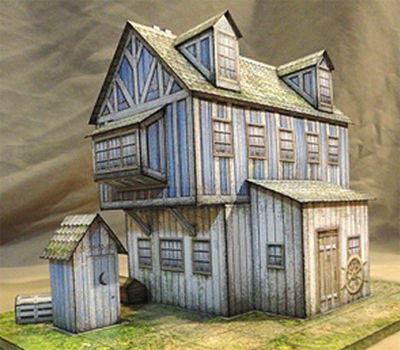
The little boxes are ordinary wooden storage trunks, but someone on my Facebook group also suggested lobster pots (or thought that's what the boxes were supposed to be). I'll see what I can do.
|
|
|
|
Post by Dave on Dec 3, 2011 15:06:19 GMT -9
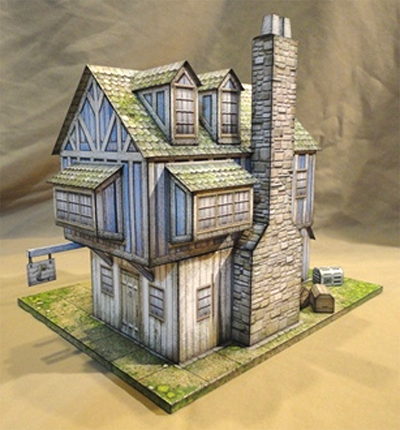
Whitewash wall texture and some decoration. 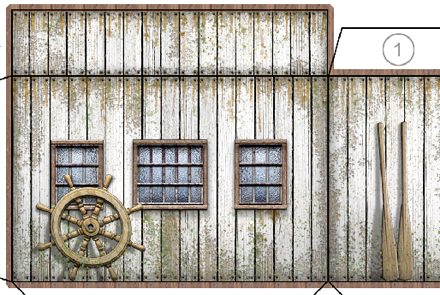 |
|
|
|
Post by dragnoz on Dec 3, 2011 15:49:36 GMT -9
man i really love your work!
|
|
|
|
Post by Dave on Dec 6, 2011 7:35:53 GMT -9
Thanks!
Okay, this model has been officially named -- The Mermaid Tavern!
I've designed a mermaid graphic to use on the hanging sign in three color schemes. The fish icon also comes in three color schemes.
I'll probably add a third sign -- a yacht, I'm thinking. Fish, mermaid and a boat. If you can't tell this is a bar for seafarers, you deserve what you get when you wander in and order a strawberry daiquiri.
Anyway, the wall textures are all in place, and (aside from the last sign) I just have to create the footprint and then do my final shading/highlighting pass (burning and dodging in Photoshop).
This has taken a few days longer than I expected, but there's a lot of extra love in this one.
|
|
|
|
Post by Dave on Dec 6, 2011 12:13:01 GMT -9
Added a boat option to the hanging sign. That's 3 different icons, each in 3 different color schemes.
|
|
|
|
Post by cowboyleland on Dec 6, 2011 20:13:41 GMT -9
I like the classic touch. You are aware that the Mermaid Tavern is where Christopher Marlow met his end? If not, a strange coincidence.
|
|
|
|
Post by Dave on Dec 6, 2011 20:25:43 GMT -9
Didn't know that. Just lucky, I guess.  |
|
|
|
Post by Dave on Dec 7, 2011 0:45:29 GMT -9
Footprint work: 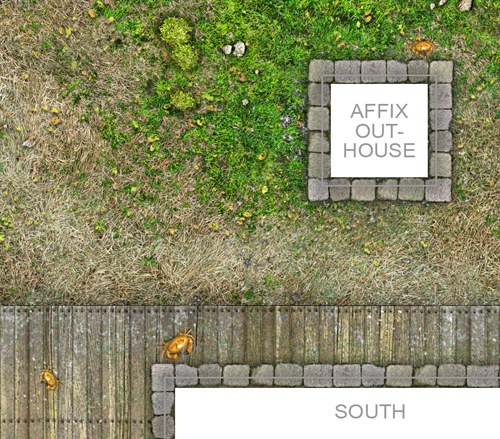 |
|
|
|
Post by magpiestear on Dec 7, 2011 3:33:09 GMT -9
One word.............................WOW!  |
|
|
|
Post by Dave on Dec 7, 2011 10:29:32 GMT -9
The artwork is done! I'm wrapping up the files now to send off to Jerry for a quality check.
|
|
|
|
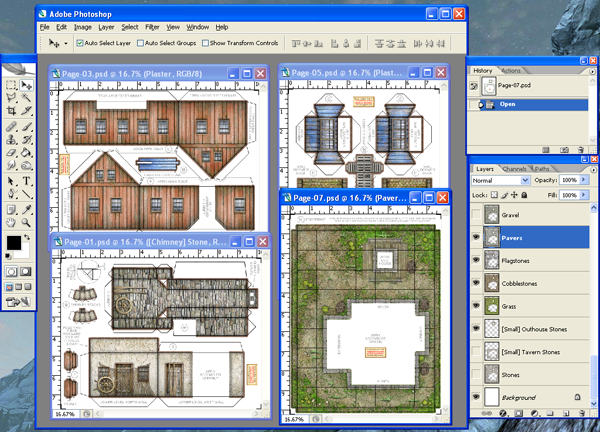
Post by Dave on Dec 7, 2011 12:22:03 GMT -9
Preview of some of the textures on this model.  The files have been sent to Jerry and I've finished all of the promo prep. I don't think there's anything more I can do until Jerry gives me his report. I've earned myself a little break! |
|
|
|
Post by afet on Dec 7, 2011 13:06:02 GMT -9
Damn this is amazing! I wish your buildings had interiors. I can use them for fillers in town set-ups and that's it. But I know that doing interiors implies a giant leap in terms of design and, therefore, cost.
Could you at least provide a textured option for the interior on the base tile?
In the case of this building I might make a floor for the second level as well. The floor would be foam core with wood texture on it, and the second level would fit over it. I would glue stops at the corners on the inside of the second level so that foam core recesses correctly.
|
|
|
|
Post by Vermin King on Dec 7, 2011 17:14:16 GMT -9
Oo, I like that idea.
|
|
|
|
Post by Dave on Dec 7, 2011 18:21:37 GMT -9
Sorry, but I'm done with this one. If I'd planned to include interior ground pieces, I would have budgeted some time to it, but I just didn't.
As it is, I've already spent a week longer than I intended and really need to get moving on another project while prepping this one for final launch.
A good project stretches my abilities in some way, and this one felt like running a marathon. So I'm moving on. But I'm always setting the goal line a little further, and some day, when I feel like I can create interiors at the same standards as my exteriors in a reasonable timeframe, it'll become a regular feature. I'm not there yet.
|
|
|
|
Post by afet on Dec 8, 2011 11:58:06 GMT -9
I hear you. When you do get to it, though, I´m sure you´ll do it well.
|
|
|
|
Post by Dave on Dec 9, 2011 0:37:58 GMT -9
|
|
|
|
Post by oldschooldm on Dec 9, 2011 7:03:07 GMT -9
Awesome. This will be the first time I'm picking up the PSD instead of the PDF. Great options!
|
|
|
|
Post by Dave on Dec 13, 2011 12:07:37 GMT -9
|
|
|
|
Post by Dave on Dec 13, 2011 14:32:25 GMT -9
|
|
|
|
Post by Parduz on Dec 13, 2011 16:15:46 GMT -9
While your design is never complicated, i think that these instruction, other than teaching how to build your stuffs, give to your brand a very professional push. NOW you're a PRO (not that you were not before...oh well you got the point ) |
|
|
|
Post by dragnoz on Dec 15, 2011 2:45:57 GMT -9
Amazing... seriously raising the bar!
|
|
|
|
Post by old squirmydad on Dec 22, 2011 13:23:06 GMT -9
Wonderful instructions for a great fun model! However, I was mostly finished with my build prior to my reading these, so I did a few things different. YMMV (standard disclaimer) For starters, since I had no instructions, I decided to try building it in order of the numbers on the pieces. Which means that the chimney was attached before the roof went on. This works better for me as it allowed me to check the fit on the notch cut-out in the roof where the chimney goes. And so that I could press against the inner side of the walls while the glue was setting;  I also find it easier to attach dormers (both types) before the roof goes on so that I could hold them from both side while glueing.  Then I attach the whole roof, half at a time instead of all at once;  Attaching it to the base is the last thing I did, I like to pick the model up and work on it from different angles and I thought the base would get in the way of that.   I really enjoyed all of the options in this model so thanks again for a great piece of work. ;D Eric |
|
|
|
Post by Vermin King on Dec 22, 2011 14:49:16 GMT -9
Excellent model, excellent build. Thanks
|
|