


Post by oldschooldm on May 28, 2012 14:32:18 GMT -9
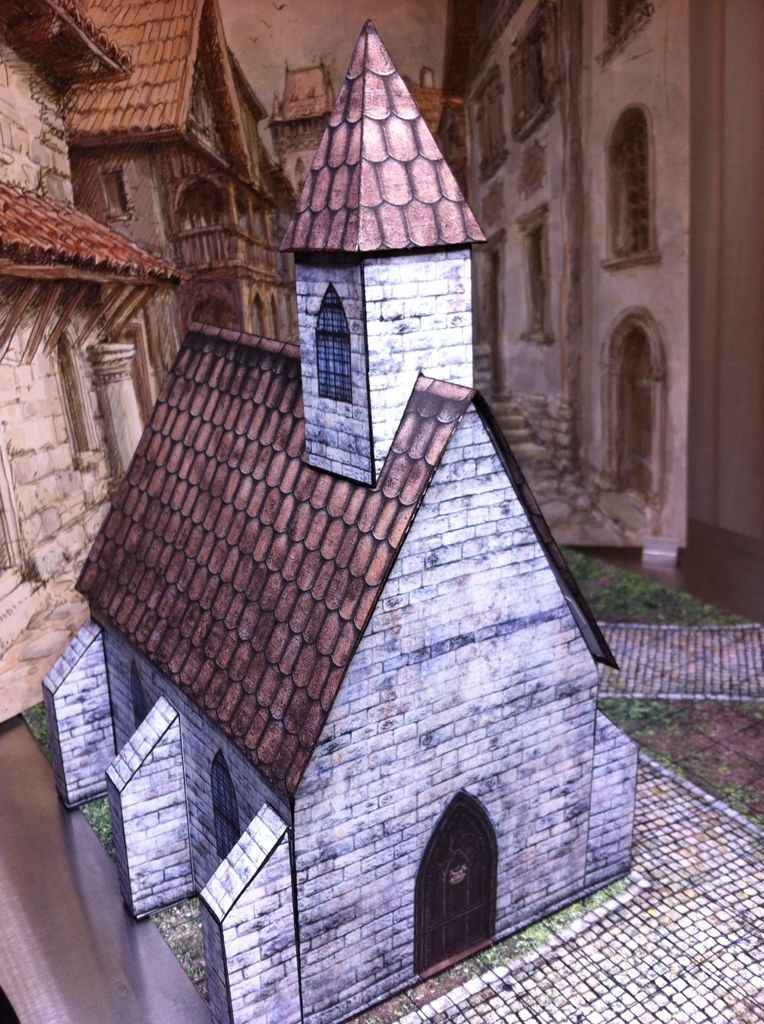
I like "playable" structures, though lately I've noticed that with smaller ones, the walls get in the way - so when I wanted to build a chapel, I did a simple kitbash on Medieval Chapel (and the inexpenisive Add-On:Interiors) by Joel L. Teply Productions - I didn't glue the walls to the floor ... check out my solution below.
There are 16 cutfiles in this set(!) - more than I expected, and more than would probably be the case if the kit were designed for an interior from the start - There 8 internal supports that wouldn't need to be there if they sides were full-on boxes instead of partial-tab design.
Still, I think it turned out rather lovely, and it is very very sturdy.
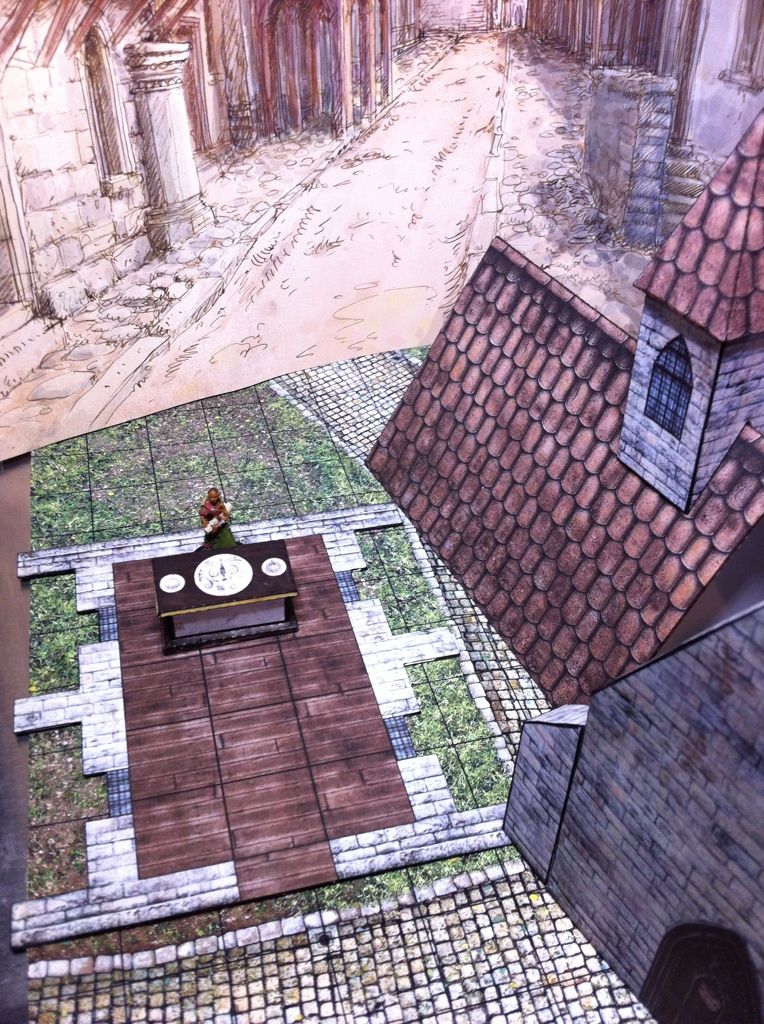
Removing the roof to show the interior walls, floor, altar, and torches.
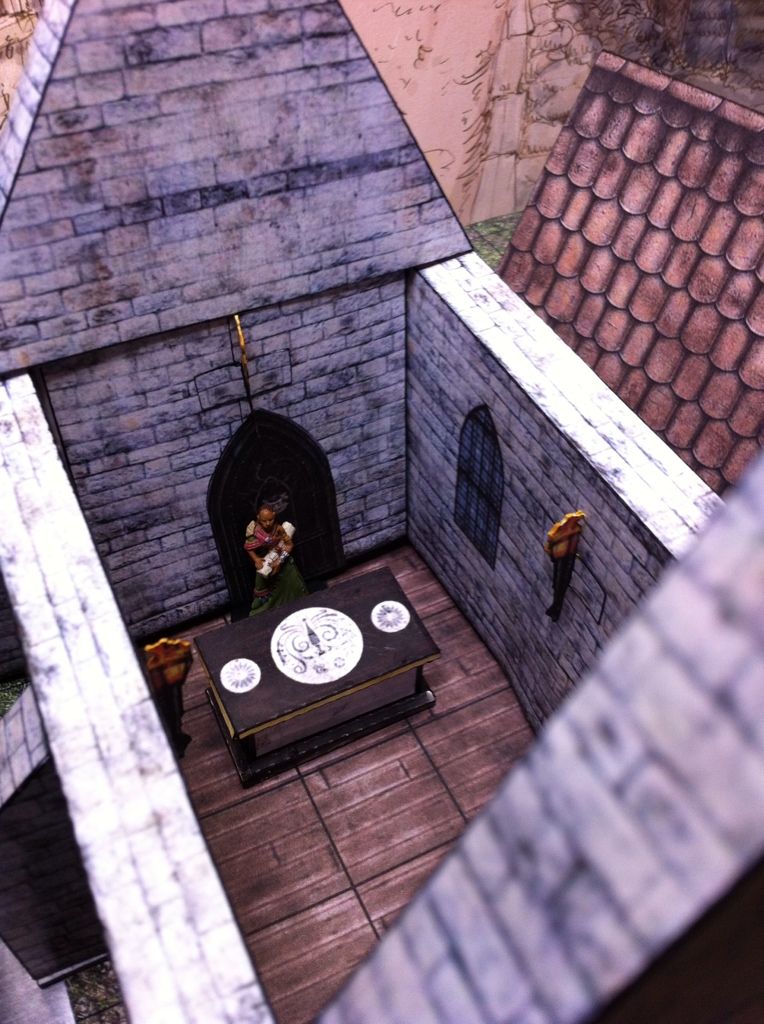
Instead of gluing in the base, I used 2 magnets in the center buttresses and under the paperboard tile to hold the walls in the correct position, but allow for them to be removed for easy play directly on the tile:
--- README ---
These cutfiles are for the Medieval Chapel and Add-On: Interior by Joel L. Teply Productions and available at www.rpgnow.com/product/61228/Medieval-Chapel and www.rpgnow.com/product/61332/Medieval-Chapel-Add-On%3A-Interior
You will need to download a copy of that product to use these correctly (see the instructions below) the artwork is not included to protect the rights of the copyright holders.
These cutfiles were created with Silhouette Studio version 2.5.0 by OldSchoolDM @ the Cardboard Warriors forums: cardboard-warriors.proboards.com/
Instructions:
Medieval Chapel and Add On: Interior are distributed as a PDFs, but do not have the required registration marks to work with the cutter.
In order to get the registration marks in the correct place relative to the cutting lines in these files, you will need to print from within the Studio program itself after merging the artwork.
Step one: Get each model PDF page into individual PNG files, so Studio can read them. There are several choices of ways to do this.
If you have Adobe Acrobat Pro, split and reformat the pages one at a time by choosing: Save As > Image > PNG.
If you want to customize the layers (There are various wall/door/window options), you can print-to-PDF after selecting the layers. Then you still have to convert each PDF into a PNG.
If you don't have Acrobat Pro, another means to move PDF -> PNG is using the GIMP editor. When you open a PDF with GIMP, you can specify which pages to import. Be sure to set the resolution to 300 DPI on the import dialog! Once it is open, save the page with a .PNG file (by typing in that suffix), no compression.
Now you need to merge the PNG files with their cutfiles to get the registration marks right when you print...
[The remaining instructions are specific for Studio 2.5.0]
Step two: Now you have PNG files for each page, start Studio and then open one of them (you won't see the PNG files by default in the open dialog, click the file-type pop-down and chose PNG to see them).
Once you see the image on simulated carrier sheet, you may see it rotated 90-degrees (not fitting on the sheet), just click Portrait on the Page control to rotate the carrier sheet to match.
Next choose Merge from the file menu and select the matching cutfile page. You should see red-lines overlaying the image, they probably won't align properly at first.
Step three: Align the image to the cutlines. Zoom in 3-4 times by clicking on the +-magnifier at the top of the screen.
The lines are in the correct place, it is the image that needs to move to match. Click on the image (including white area) somewhere, and use the arrow keys to shift the image until it matches the cut lines. I'd save the cutfile at this point.
Step four: Print the file and cut! Choose the printing option from within Studio - either from the File menu or as the first option after clicking on the Cut icon at the top of Studio - it will include the registration marks from the cutfiles. Then you know the drill, mount to carrier sheet and cut then edge and assemble!
Have fun, and if you got these files from the Forums, please post a photo of your build! The thread I created is a great place to leave feedback and comments.
There are 16 cutfiles in this set(!) - more than I expected, and more than would probably be the case if the kit were designed for an interior from the start - There 8 internal supports that wouldn't need to be there if they sides were full-on boxes instead of partial-tab design.
Still, I think it turned out rather lovely, and it is very very sturdy.
Removing the roof to show the interior walls, floor, altar, and torches.
Instead of gluing in the base, I used 2 magnets in the center buttresses and under the paperboard tile to hold the walls in the correct position, but allow for them to be removed for easy play directly on the tile:
--- README ---
These cutfiles are for the Medieval Chapel and Add-On: Interior by Joel L. Teply Productions and available at www.rpgnow.com/product/61228/Medieval-Chapel and www.rpgnow.com/product/61332/Medieval-Chapel-Add-On%3A-Interior
You will need to download a copy of that product to use these correctly (see the instructions below) the artwork is not included to protect the rights of the copyright holders.
These cutfiles were created with Silhouette Studio version 2.5.0 by OldSchoolDM @ the Cardboard Warriors forums: cardboard-warriors.proboards.com/
Instructions:
Medieval Chapel and Add On: Interior are distributed as a PDFs, but do not have the required registration marks to work with the cutter.
In order to get the registration marks in the correct place relative to the cutting lines in these files, you will need to print from within the Studio program itself after merging the artwork.
Step one: Get each model PDF page into individual PNG files, so Studio can read them. There are several choices of ways to do this.
If you have Adobe Acrobat Pro, split and reformat the pages one at a time by choosing: Save As > Image > PNG.
If you want to customize the layers (There are various wall/door/window options), you can print-to-PDF after selecting the layers. Then you still have to convert each PDF into a PNG.
If you don't have Acrobat Pro, another means to move PDF -> PNG is using the GIMP editor. When you open a PDF with GIMP, you can specify which pages to import. Be sure to set the resolution to 300 DPI on the import dialog! Once it is open, save the page with a .PNG file (by typing in that suffix), no compression.
Now you need to merge the PNG files with their cutfiles to get the registration marks right when you print...
[The remaining instructions are specific for Studio 2.5.0]
Step two: Now you have PNG files for each page, start Studio and then open one of them (you won't see the PNG files by default in the open dialog, click the file-type pop-down and chose PNG to see them).
Once you see the image on simulated carrier sheet, you may see it rotated 90-degrees (not fitting on the sheet), just click Portrait on the Page control to rotate the carrier sheet to match.
Next choose Merge from the file menu and select the matching cutfile page. You should see red-lines overlaying the image, they probably won't align properly at first.
Step three: Align the image to the cutlines. Zoom in 3-4 times by clicking on the +-magnifier at the top of the screen.
The lines are in the correct place, it is the image that needs to move to match. Click on the image (including white area) somewhere, and use the arrow keys to shift the image until it matches the cut lines. I'd save the cutfile at this point.
Step four: Print the file and cut! Choose the printing option from within Studio - either from the File menu or as the first option after clicking on the Cut icon at the top of Studio - it will include the registration marks from the cutfiles. Then you know the drill, mount to carrier sheet and cut then edge and assemble!
Have fun, and if you got these files from the Forums, please post a photo of your build! The thread I created is a great place to leave feedback and comments.
Attachments:

