|
|
Post by Sirrob01 on Nov 27, 2012 10:04:55 GMT -9
The theme for this months HOARD is Dec - Chaos Unleashed or Modern & Ancient This can be any sort of miniature on the above theme or feel free to submit miniatures off theme. If you submit a figure, they must include both front and rear art, have a proper trimming outline, and include instructions for multi-part models. Recolors and figure mods are encouraged, and even uncolored designs are welcome. No nudity or sexuality, but bloody gory and horrifying is encouraged. If you have questions about how to design your figures, like formats, resolution, and stuff like that, see the HOARD GUIDELINES in this forum category. Getting this up early as I know most people are tied up with XMAS stuff by around mid Dec. I simply nominated two of the missed themes from the previous months for Dec  |
|
|
|
Post by old squirmydad on Nov 27, 2012 10:38:12 GMT -9
Modern & Ancient...I see babylonians with M16's....  |
|
|
|
Post by Sirrob01 on Dec 7, 2012 14:41:14 GMT -9
I wont close this Hoard off until the weekend of the Jan 14/15, allowing for that 2 weeks we all lose over Xmas that should give about 4 weeks of time to work on submissions for everyone |
|
|
|
Post by old squirmydad on Dec 11, 2012 16:45:28 GMT -9
What could be more chaotic than...an accordian player! 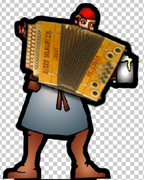 Found him lurking in my projects folder from way back. |
|
|
|
Post by onemonkeybeau on Dec 11, 2012 19:35:09 GMT -9
Aye, and a drunk accordian play at that!
;D
|
|
|
|
Post by Sirrob01 on Dec 11, 2012 21:40:52 GMT -9
Nice, I better get moving on mine torn between ancients and modern. Not sure a machine gun wielding roman legionnaire would really work |
|
|
|
Post by Vermin King on Dec 12, 2012 6:05:57 GMT -9
It might work better than a Navy Seal carrying a spear and shield
|
|
|
|
Post by cowboyleland on Dec 12, 2012 9:10:39 GMT -9
Yep, a SEAL would definitely need a trident |
|
|
|
Post by old squirmydad on Dec 12, 2012 22:27:05 GMT -9
Chaos from the wastelands of the future;  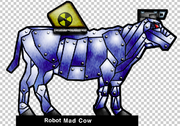 Another old, not quite finished project, that was lurking on my hard-drive. |
|
|
|
Post by nikloveland on Dec 17, 2012 13:23:04 GMT -9
My Chaotic recolor of an Ancient figure as the Modern Hobbit movie is Unleashed on the world (see, it's clearly on topic).  I needed a "white wizard" for the my LotR Epic Duals board game. |
|
|
|
Post by Sirrob01 on Dec 21, 2012 17:43:20 GMT -9
I'm off theme but my steampunk army needed some form of lighter vehicle. Fits on 2 pages, will be 3 when done but pages 2 and 3 will be mirrors of each other for the most part so you can opposite mount the arm options. I'm trying to have it fit in with Squirmydad's Steam Ram, I'm only about 25% through texturing so a fair bit to go but I should finish by the time the hoard closes. I give you the Mechanical Master Mover (Name links to the short backstory): 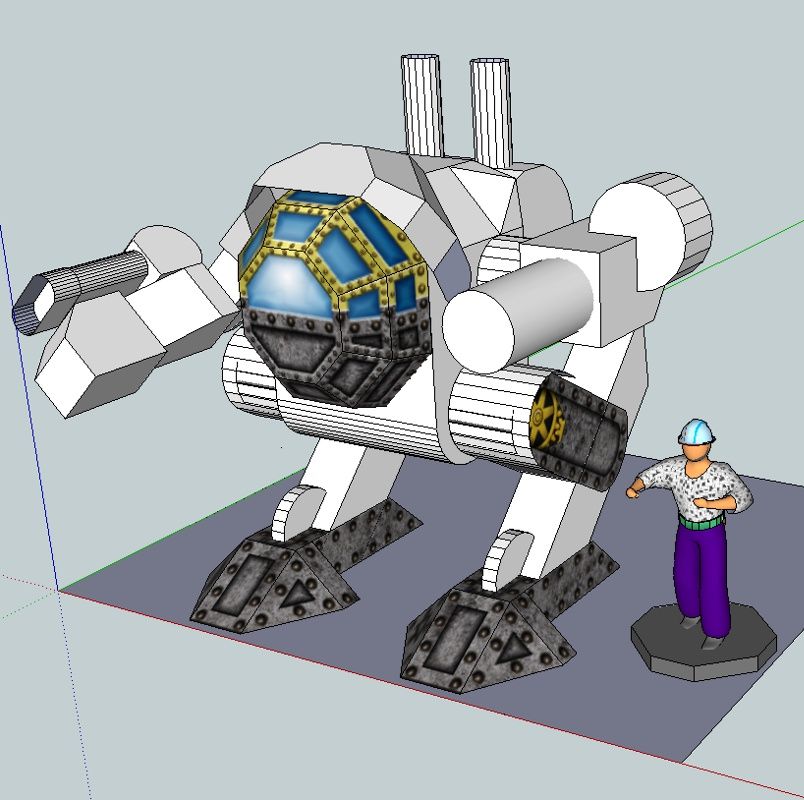 The man above is scaled to about 28mm from foot to mid eye so it stands around 3 inchs tall with smoke stacks. Ive done a test white build which was not to fiddly. Back to texturing, I hope to get the body legs and boiler all textured today (all of page 1) |
|
|
|
Post by Sirrob01 on Dec 31, 2012 21:10:55 GMT -9
I know not everyone checks all the boards but the Mech is coming along 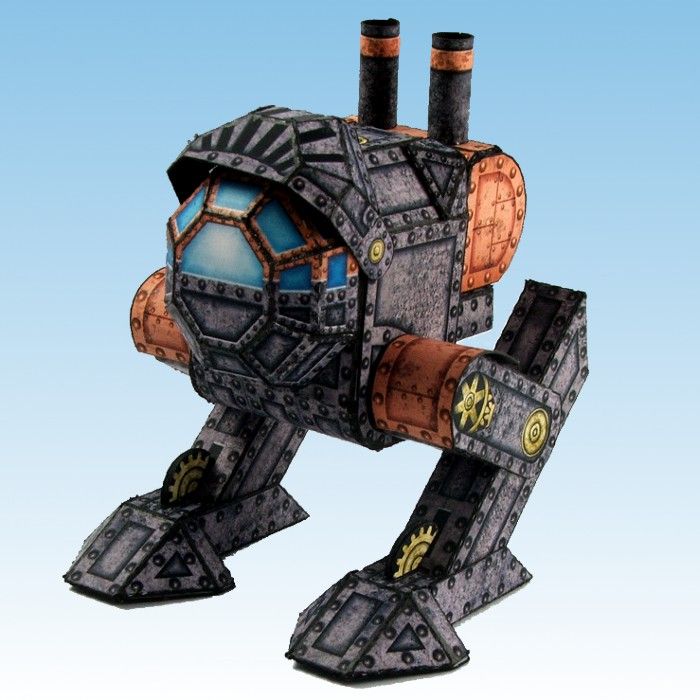 Should get it finished by hoard deadline. |
|
|
|
Post by emergencyoverride on Jan 1, 2013 7:07:26 GMT -9
Very nice! This will be a super addition to my steam warriors! That is awesome! You really outdid yourself. ;D
|
|
|
|
Post by glennwilliams on Jan 1, 2013 8:53:17 GMT -9
Sirrob, that mech is premium commercial quality.
|
|
|
|
Post by Brave Adventures on Jan 3, 2013 2:18:24 GMT -9
Sirrob01, your mech looks fantastic! Great textures. How did you make them? Here is my contribution to the Hoard. Let me know if it would be better to send it to you in a different format or whatever. It's a modern or futuristic soldier. Ryan Attachments:
|
|
|
|
Post by Sirrob01 on Jan 3, 2013 11:21:59 GMT -9
Thanks both Glen and Brave. The futuristic soldier is looking good. Make the textures, it's pretty long and involved but I have two methods. 1. From scratch following tutorials online so the brass and copper parts are pretty much your standard metal texture tutorial. I added a grungy worn-ness to them. I should have also added some oil marks and oxidization but time is a killer. 2. Take a picture or find one in the Public Domain. Remove as much lighting shadow as possible, you add that back later. Then run 2-3 filters over it to remove the "photo" look. Scale and Slice it into base components for use. So in the case of the steel plate this left me with 2 parts a Rivet and a large flat plate, I replicated the plate up using the clone tool in patches so I had a large piece without to much pattern repeating (this is more cheating but gives a good result). 3. I normally run a test print at that point to check how they look printed to dark/light, chunky, etc. 4. Then you take your base textures and start adding them, applying drop shadows outer glows, bevels etc to give the illusion of depth to each part. 5. Print test build, Instructions, photo's, PDf and release finally done Hope that helps |
|
|
|
Post by Brave Adventures on Jan 5, 2013 7:04:26 GMT -9
When you create the textures do you use texture fills at all? I'm not sure if you can use texture fills in photoshop, but if you use "Live Paint" in Illustrator you could just use a texture fill and it might make texturing your models easier and faster. If I understand your process right, you are creating individual textures for each piece of the model. Is that correct? Instead, you could create a repeatable texture using your same methods but then just fill the relevant areas with the paint bucket tool with your custom texture fill applied.
|
|
|
|
Post by bravesirkevin on Jan 5, 2013 8:02:03 GMT -9
When you create the textures do you use texture fills at all? I'm not sure if you can use texture fills in photoshop, but if you use "Live Paint" in Illustrator you could just use a texture fill and it might make texturing your models easier and faster. If I understand your process right, you are creating individual textures for each piece of the model. Is that correct? Instead, you could create a repeatable texture using your same methods but then just fill the relevant areas with the paint bucket tool with your custom texture fill applied. Photoshop actually has some pretty powerful options when it comes to quickly laying in textures. Doesn't really save you the hard work of creating the texture though. 2. Take a picture or find one in the Public Domain. Remove as much lighting shadow as possible, you add that back later. Then run 2-3 filters over it to remove the "photo" look. Scale and Slice it into base components for use. So in the case of the steel plate this left me with 2 parts a Rivet and a large flat plate, I replicated the plate up using the clone tool in patches so I had a large piece without to much pattern repeating (this is more cheating but gives a good result). Quick tip to eliminate the obvious repeat in tiled textures: 1. Lay in your texture layer. 2. Lay in a second layer with the exact same texture, but at a different scale (150% rather than 100%) 3. add a layer mask to the second layer 4. with the mask selected apply a black and white clouds filter This works best with grungy textures and dirt. Not too good for things like bricks or gravel, for obvious reasons. It should save you a lot of time on things like the metal plates though. |
|
|
|
Post by glennwilliams on Jan 5, 2013 8:25:53 GMT -9
and quick rivets so you don't have to manipulate a photo (I've done both):
circular brush with a pillow emboss. I add a metallic pattern, but any gray with some grunge will work.
I also have some clean and rusted riveted panels in my texture files that I use (you can see them in the Omega Prime Cargo Bay and on Bel's Kitty). Best--keep your phone charged and an eye open. It's amazing how much grunge, grime, and slimy metal is out there--and camera phone pictures work great.
Since I use Photoshop and not GIMP, I'm not sure if a similar feature is available, but Photoshop's "define pattern" let's you create and save a repeating texture.
One thing Jim Hartman did was to add a layer on top of the texture with his bevels, drop shadows, inner and outer glows (for rusted edges), then reduced the fill to zero. That way you can change the base coat underneath and not have to fiddle with the purty effects.
|
|
|
|
Post by Christopher Roe on Jan 5, 2013 12:05:45 GMT -9
I do something similar--85% of a typical texture I do is zero-fill vector shapes with layer effects, the other 15% are raster overlays and brush strokes.
I also group layers by material property (surface texture, global shading/highlighting, diffuse colors, local shading/highlighting, then utility layers for adjustment and reference).
Separating out those components into layer groups makes it easy to do things like change paint colors without affecting the weathering or shading, and using vector shapes for most of it makes scaling up/down the textures without losing detail fairly straightforward. I only have to redo a handful of raster layers when scaling up.
Whenever I use photos, it's usually as a visual reference for a texture done from scratch, dropped in as a grunge overlay, or otherwise used as a building block for something more complex.
|
|
|
|
Post by old squirmydad on Jan 5, 2013 22:43:00 GMT -9
I wont close this Hoard off until the weekend of the Jan 14/15, allowing for that 2 weeks we all lose over Xmas that should give about 4 weeks of time to work on submissions for everyone It just occurred to me that we are now into this; Jan/Feb - Real World Armies - Across HistoryI think I have something, need to dig around a bit and see. |
|
Deleted
Deleted Member
Posts: 0
|
Post by Deleted on Jan 6, 2013 17:00:03 GMT -9
Hmm... is something like this OK?  What we have here is rather alternate history - Roman XXV Century legionnaire => so Ancient and Future not Modern mix. Well - it's shameless collage - actually this one is rather Greek / Macedonian (vide helmet) with some crazy big assault gun. The gun is definitely futuristic and rather fantasy shaped then functional one... BTW1. Should I add this big shield on his back? I think that there is too many small white gaps, so with shield it will be easier to cut of 2. Now I see that gun could be positioned in different way, and without grip handle - so there will be no white space between grip and chase/main gun. Figurine still needs some finishing - textures, light/shadow effects etc. Not sure but I'll try to manage to finish this one before deadline. Preview: |
|
Deleted
Deleted Member
Posts: 0
|
Post by Deleted on Jan 6, 2013 18:17:26 GMT -9
OK - some changes / corrections applied Gun is changed and slightly differently positioned => looking better or not? |
|
|
|
Post by Vermin King on Jan 6, 2013 18:26:58 GMT -9
Better. I actually figured this mixed-genre theme would have had much more interest. I'm more than a bit surprised
|
|
|
|
Post by old squirmydad on Jan 6, 2013 19:24:09 GMT -9
OK - some changes / corrections applied Gun is changed and slightly differently positioned => looking better or not? Great! Now he can fight the robot cows. |
|
|
|
Post by Sirrob01 on Jan 6, 2013 21:12:53 GMT -9
That is classic, Love it, exactly what we needed some Romans with big guns |
|
|
|
Post by bravesirkevin on Jan 7, 2013 0:54:12 GMT -9
OK - some changes / corrections applied Gun is changed and slightly differently positioned => looking better or not? I think I actually prefer the way he's holding the gun in the first one. It makes it look heavier. In the new pose it looks more like he's holding the gun that way for comfort, while in the original it looks like he has no choice but to hold the gun that way. It kinda reminds me of Roadblock from GI Joe and his habit of shooting from the hip with an M2 Browning. ;D Good job either way though Mesper! |
|
Deleted
Deleted Member
Posts: 0
|
Post by Deleted on Jan 7, 2013 0:54:51 GMT -9
Uff... some more XXV Century legionnaires! Changes:- shield - now it's classic Roman imperial Scutum (other color versions possible) - version without shield, but I'm not convinced, or shield could be as optional accessory -- what do you think? - various panache/crests + version without crest - some minor additions: -- golden bracer -- view-finder added Of course there might be various colors for tunic, armour, leather jacket and ground. But... with all mentioned variations it could turn into whole cohort and separate page or two in Hoard?!?  ;D So I'm curious what's your opinion - which version(s) should be submitted? --- Oh... I forgot about shield's belt - let's pretend that it is hidden somewhere or this shield is kinda magically fasten to shoulders or back, OK?... |
|
Deleted
Deleted Member
Posts: 0
|
Post by Deleted on Jan 7, 2013 1:16:08 GMT -9
@kevinI was writing while you posted your reply... Regarding weapon holding - good point - I agree with you. Hmm... so perhaps there should be 2 versions: 1. HEAVY GUNNER (vide v.1, this one might be equipped with lunette/view-finder and w/o shield) 2. LIGHT INFANTRYMAN with more light / smaller / shorter weapon (holding as v.2), w/o lunette but with shield... Then different figurines inclinations and grounds so figurines will more distinguish... Then some sentinel / guardian could be useful as well... Wait, I should be more moderate/modest perhaps and not try to submit whole mini-set into this Hoard 
|
|
|
|
Post by bravesirkevin on Jan 7, 2013 1:42:53 GMT -9
Should I add my Flaming Skeleton from the calendars? Does it fit the Chaotic theme?  |
|


 ;D
;D


