|
|
Post by oldschooldm on Jun 3, 2015 8:15:52 GMT -9
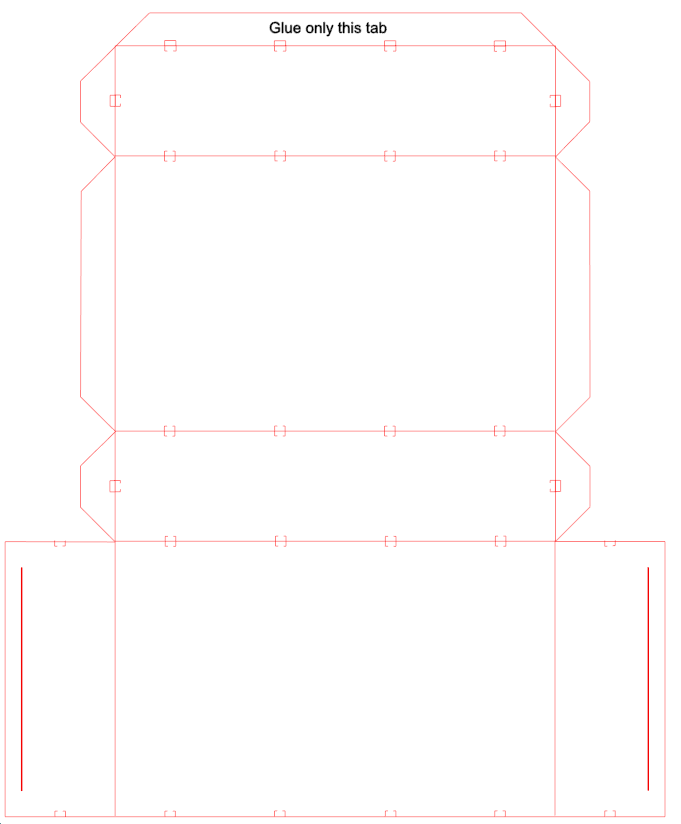
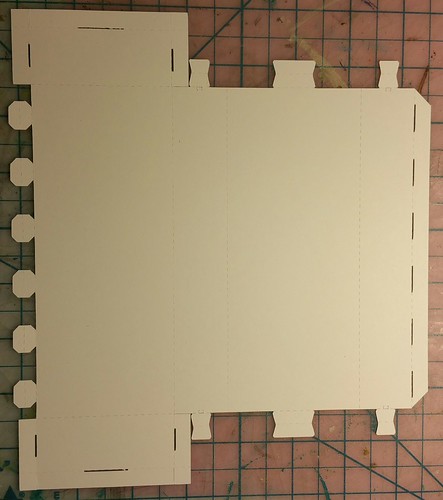
I've got a new fold-flat scheme I'd love to share with you all. It's the easiest fold-flat mod I've ever done... Background: BSGTony (lordzsezse)'s Kickstarter Elven Wall Set is now available. I am planning on making a LOT of this (hopefully in the Dark texture, if it comes out on time) but I don't have the space to store lots of boxy wall segments. At least the blank walls MUST be fold-flat. So, I started experimenting with various ideas to make that happen. I'm happy to report that I really like my section option, something I call "EZSlot Fold Flat". It only adds 2 cuts and doesn't change any other cuts/folds. The darker red lines are the new cuts. The side tabs are fold-in. Only the bottom tab is glued. Here's my prototype photos: Here's the rub - if (and only if) you want the ends to look nice: The side former-glue-tabs are now outside the model, and so need to be textured. The texture is the inverse (rotate 180degrees) of the edges of the side panels. I did two quick select-copy-rotate-paste in photoshop (any PDF loading editor will work) before printing, and here's the results when cut and assembled: It's stronger than you think (at least using 80# card stock) - but not as strong as glued. This technique makes no sense for walls with holes in them (such as gates.) If you use these for only interior wall segments, you don't even have to retexture the fold-over-side-tabs, as the will be hidden when you bobbypin the whole thing together. For me this won't save 100% of the wall-storage problem, but I'm sure it'll make 80%-90% of the pieces take virtually NO space. That's a huge win for me. Here's the cutfile: Walls_4in_Fold_Flat_EZSlot.studio3 (101.92 KB) |
|
|
|
Post by mproteau (Paper Realms) on Jun 3, 2015 8:35:48 GMT -9
Very nice idea. I'm struggling to like any of these boxy wall builds... I really want a way to have a good modular floor... I haven't resigned myself to giving up on multi-level builds or custom floor tiles yet, but I feel that's where I'll end up.
|
|
|
|
Post by ignatious on Jun 3, 2015 11:17:15 GMT -9
I see some fold flat Elven walls in my future. Thanks oldschooldm.
|
|
|
|
Post by oldschooldm on Jul 18, 2015 14:01:00 GMT -9
BSGTony (lordzsezse) was inspired by this thread and designed a stronger fold-flat wall here... cardboard-warriors.proboards.com/thread/6992/help-test-fold-flat-wallI'm inspired by *his* work, and so have modified it further to further strengthen the design and remove the most fragile part of the model... Here's my design:  In short, replaced the too-flimsy-for-me interlocking fold-over corners with 2 more double thick insert tabs on each end. Before gluing 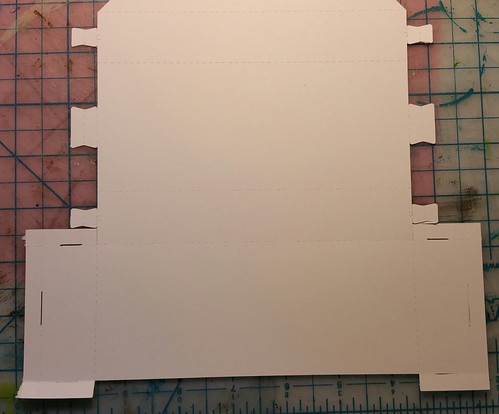 Fold flat wall experiments #4 Fold flat wall experiments #4 by Oracle Omega, on Flickr Close up of the prototype. I increased the thickness of the new slots after this build to make it easier to fold together... 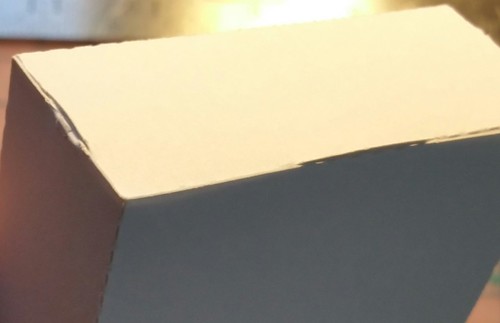 Fold flat wall experiments #4 Fold flat wall experiments #4 by Oracle Omega, on Flickr I then made one with the Moon Elf texture and build it. 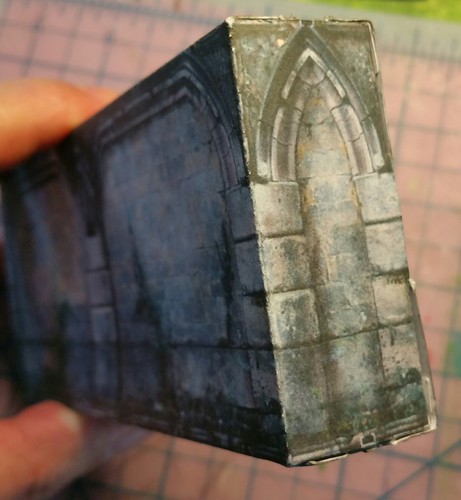 Fold flat wall experiments #4 Fold flat wall experiments #4 by Oracle Omega, on Flickr 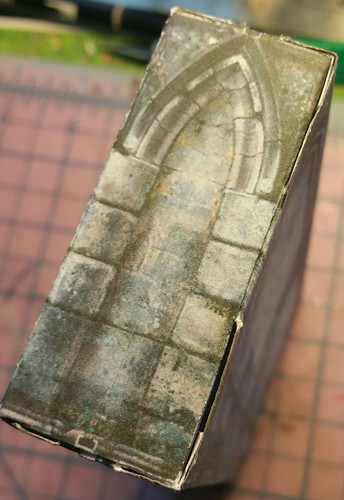 Fold flat wall experiments #4 Fold flat wall experiments #4 by Oracle Omega, on Flickr 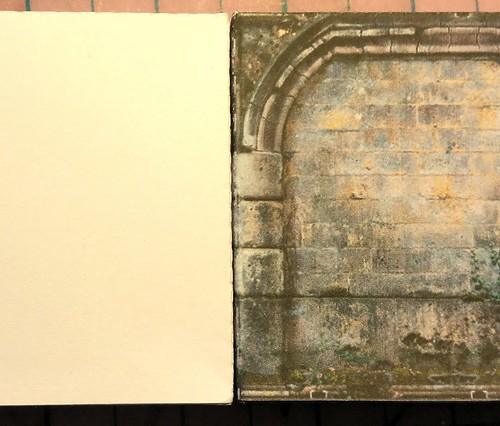 Fold flat wall experiments #4 Fold flat wall experiments #4 by Oracle Omega, on Flickr This is where the real payoff was - of all the fold-flat designs so far, there was some sloppiness in the side walls when pinned to other walls, when compared to glued walls. That's all but gone with this build! Check out the next two pix... No light leak: 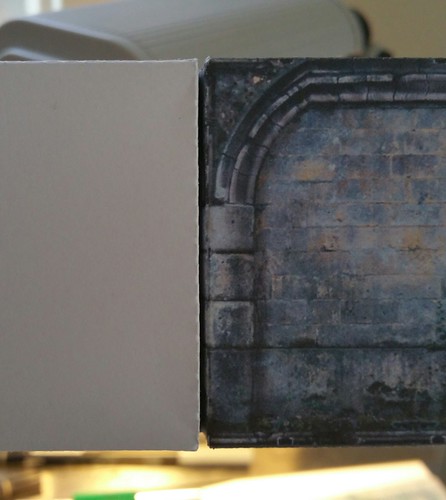 Fold flat wall experiments #4 Fold flat wall experiments #4 by Oracle Omega, on Flickr Snug as a bug... 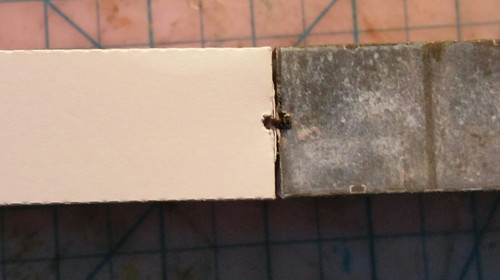 Fold flat wall experiments #4 Fold flat wall experiments #4 by Oracle Omega, on Flickr What it looks like after two folds/unfolds: 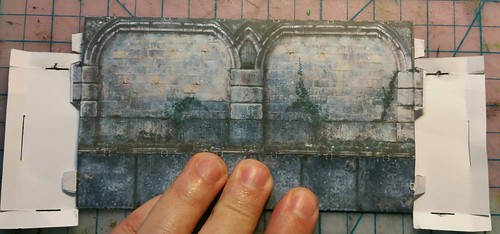 Fold flat wall experiments #4 Fold flat wall experiments #4 by Oracle Omega, on Flickr Though the fold time is more than a few seconds to get the tabs in the slots, it unfolds instantly with a fingernail under the side... Pop! I really like that this mod could be applied to any boxy-wall - it is a cut-only mod! :-) I also love how this community working on projects together, building on each other's efforts. BTW, flipping the LZZ texture did get rid of the problems I was having with cutting the detailed endcaps. Links: dl.dropboxusercontent.com/u/3838990/Foldflat%20Boxy%20Wall%20Test%20%234.pdfdl.dropboxusercontent.com/u/3838990/Foldflat%20Boxy%20Wall%20Test%20%234.pngdl.dropboxusercontent.com/u/3838990/FoldFlat%20Boxy%20Wall%20Test%20%234.studio3 (includes flipped sample Moon Elf wall texture...) Strongest Fold-Flat wall yet!
|
|
|
|
Post by oldschooldm on Jul 19, 2015 21:41:28 GMT -9
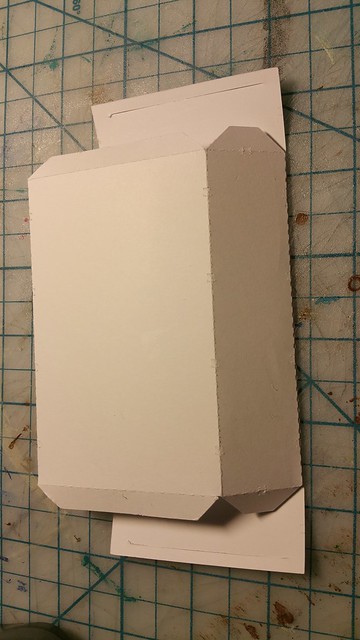
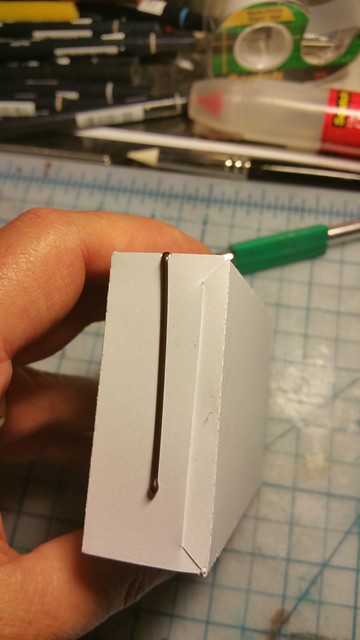
I do a *lot* of inventing in my life (I am an inventor on no less than two dozen patents) - this has taught me some tricks of innovation. One lesson is to not give up the first time you get to a satisfactory solution (even if it's new.) Sometimes there's even more cool stuff in that same direction... ... So I was looking at the latest diagram and noticed that the tabs could all go on in pairs (length of the wall) - if there was just away to attach the floor AFTER the sides. This isn't the traditional way to build these boxy walls. Then I thought "WAIT! Could I build a NO GLUE fold-flat wall this way? Would it be strong and straight?" Turns out the answer to both questions is "Yes!" Here's some pictures of my test build: It's very strong and tight when completed. I had to make two compromises with my first prototype build: - I didn't redesign the tabs to be no-glue (they glue 2 sides together for thickness) - I don't think the fold-over is needed - so many tabs can be thin.
- I hand trimmed the bottom tabs to better go in (a simple improvement.)
But here's the rub. The model is now significantly more complicated than the original box, with a LOT more cuts and scores - and they must all be perfectly straight, ruling out hand-cutting. Honestly the box design was about simplicity, and this tosses that all away for a unneeded no-glue gimmic which significantly increases construction time. Fold flat with some glue is a better compromise for me, so I'm officially (finally) done with my quest for the fold-flat boxy wall. I've got two designs I like on this thread already. I'm retiring this experiment and moving back onto my Designer Staircase kit - I'd like to get that out before Christmas. Thanks for all the great ideas and contributions to this thread. And, if you'd like to continue and take this in a different direction, by all means, knock yourself out! |
|
|
|
Post by cowboyleland on Jul 20, 2015 6:37:52 GMT -9
So, to be sure I follow, you are saying that your design posted July 18 is the best fold flat wall you have tried, is a good compromise of ease of construction and strength and if someone was tempted to start building terrain, this is (July 18, 2015) the method you would recommend?
|
|
|
|
Post by oldschooldm on Jul 20, 2015 11:52:47 GMT -9
So, to be sure I follow, you are saying that your design posted July 18 is the best fold flat wall you have tried, is a good compromise of ease of construction and strength and if someone was tempted to start building terrain, this is (July 18, 2015) the method you would recommend? Happy to clarify! :-) There are trade-offs with each approach. Method 1: "Two Slits" is at cardboard-warriors.proboards.com/thread/6937/kitbash-boxy-walls-fold-flat is the first one I posted to this thread. If someone were starting out and didn't have a cutter, this would be a good option. PLUSES: Works with ALL boxy walls, easy to mod, easy to cut, easy to "popup/popdown". MINUSES: Much weaker than fully glued walls, not "tight" so walls wobble a bit when pinned together, tuck-tabs my need retexturing for any segments that will show at the ends in your build. Method 2: BSGTony (lordzsezse) made a model here: cardboard-warriors.proboards.com/thread/6992/help-test-fold-flat-wall. PLUSES: strong when folded, MINUSES Not tight (though tighter than "Two Slits"), fiddly popup/down, some tabs fragile, requires extra texturing, requires cutter. Method 3: My "6 tabs" variant of Method 2 at cardboard-warriors.proboards.com/post/69698/thread. PLUSES: Strong & tight when folded, no extra texture work. MINUSES: requires cutter. Method 4: "No Glue" variant of Method 3 at hhttp://cardboard-warriors.proboards.com/post/69720/thread. PLUSES: No glue, strong & tight when folder no extra texter work. Minuses: Tough to assemble, double the tabs, requires cutter I prefer method 1 for about 50% of my new boxy-wall builds. These I will use for "interior" walls, pinned between stronger ones. For the rest, because I have a cutter, I prefer method 3 - gluing just the bottom long-tab. Still takes some time to pop-up but the saved storage space is worth the bother. Hope that helps anyone who wants to do this... |
|
|
|
Post by oldschooldm on Jul 25, 2015 22:33:38 GMT -9
|
|
|
|
Post by mproteau (Paper Realms) on Jul 26, 2015 6:30:38 GMT -9
Those look lovely!
|
|