|
|
Post by lightning on Jun 16, 2016 2:05:26 GMT -9
Made a couple of bridges to test all the variations (length, width, color).  The underside with the stabilizing crossbars ... 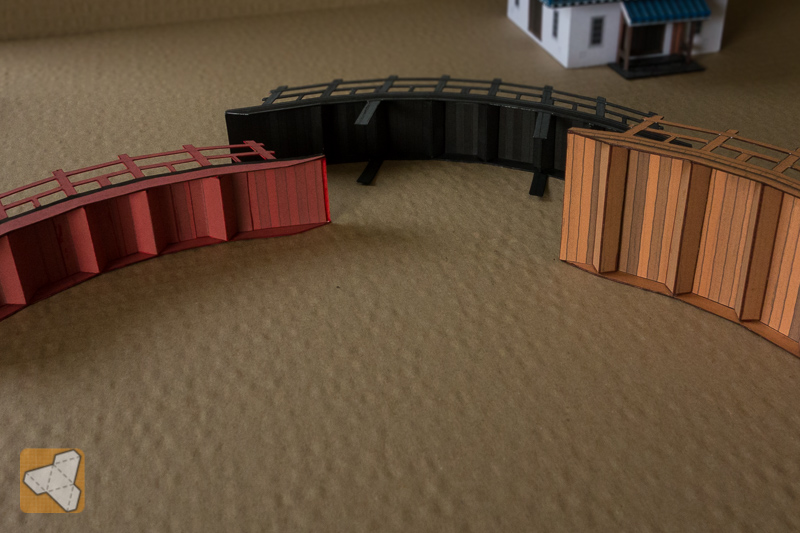 As the sides and the walkway are on different pages you may mix the colors like this classic red and black bridge. 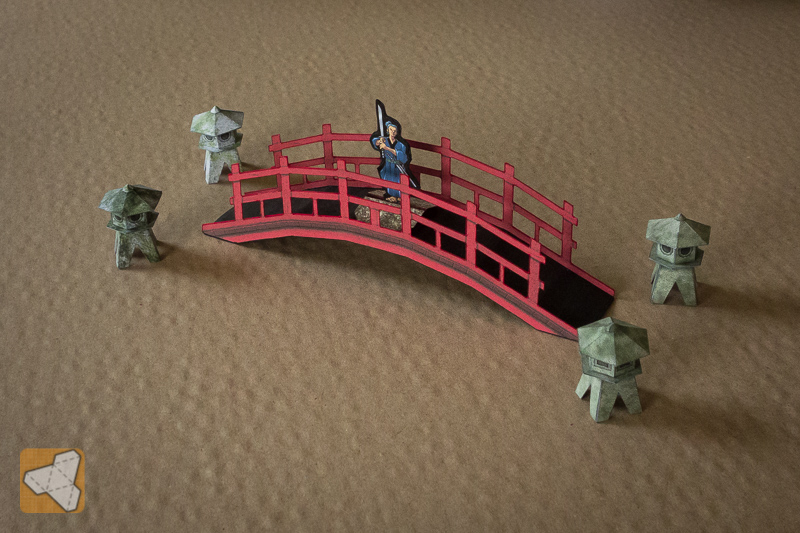 The edging for these bridges takes a while but is so worth it! |
|
|
|
Post by lightning on Jun 17, 2016 7:45:19 GMT -9
... and the easy version with filled side panels. This is the straight panels version. There is also a wood lattice version. And I have added green to the color variations possible. 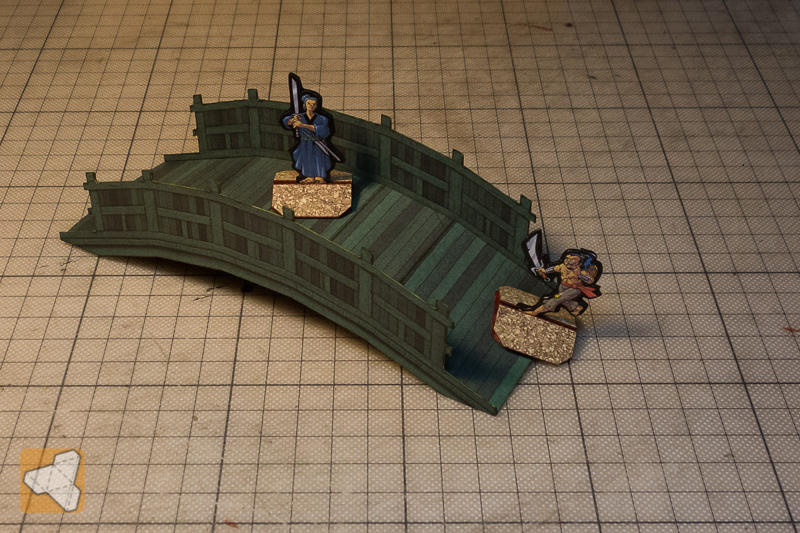 So much faster to build and edge  |
|
|
|
Post by mproteau (Paper Realms) on Jun 17, 2016 7:48:23 GMT -9
I hope you're going to build a diorama when you're done that uses all the bridges. Crazy canal city with bridges EVERYWHERE.  |
|
|
|
Post by lightning on Jun 17, 2016 10:18:45 GMT -9
Japanese Venice or something |
|
|
|
Post by lightning on Jun 21, 2016 0:06:29 GMT -9
Besides the planks I have also added the lattice texture for the filled/easy version of the bridge sides ... 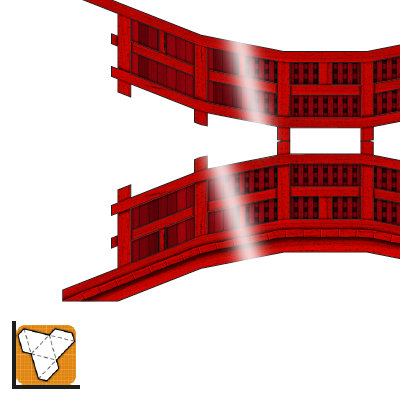 |
|
|
|
Post by lightning on Jun 21, 2016 9:24:16 GMT -9
Smallest and largest version ... 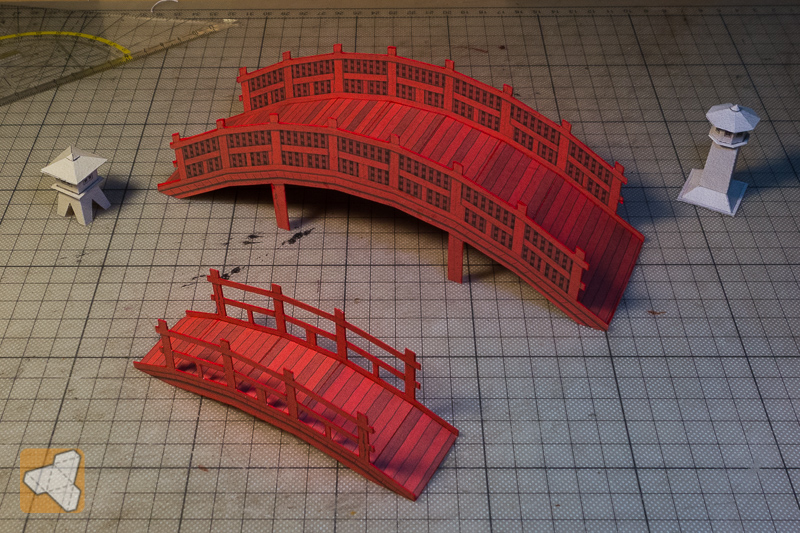 I think I want to add some optional part to make the "legs" of the long bridge sturdier. They are just 2D now and though they seem to work with thicker cardboard an optional 3D addition would be even better! |
|
|
|
Post by ignatious on Jun 21, 2016 12:03:22 GMT -9
These bridges and lanterns are looking awesome.
|
|
|
|
Post by lightning on Jun 22, 2016 8:31:44 GMT -9
Thank you ignatious Quick jump back to the tower: I was asked about a 15mm version and started compiling an optimized layout for the roof top. 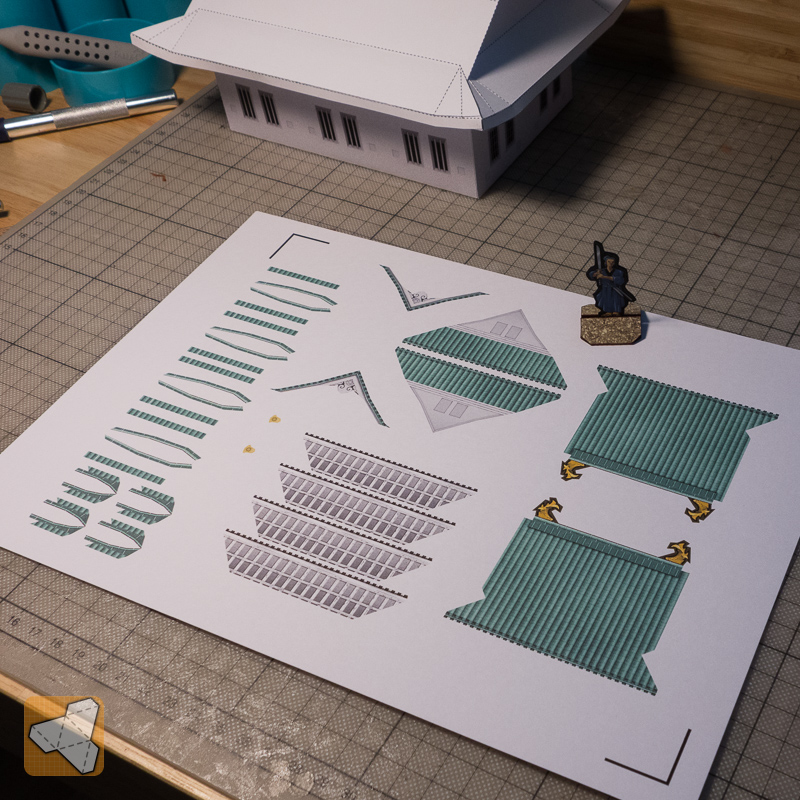 I was surprised how well it could be built! I used the auto-cutter and a chopstick for fine tuning the placement of the small parts ... and it worked. Even the details  Didn't think I would, but I like it very much built at that scale. 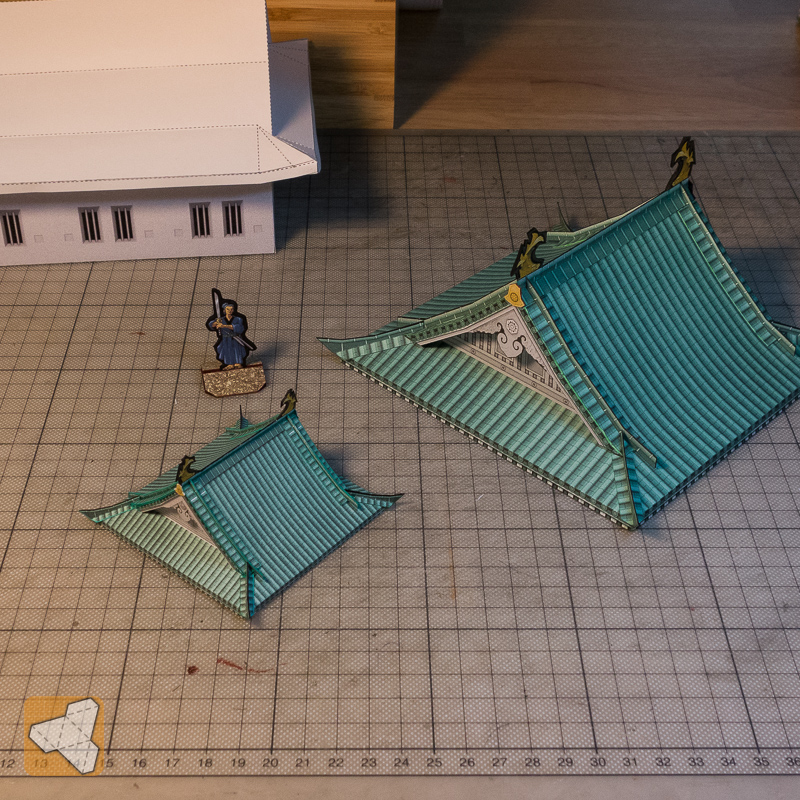 |
|
|
|
Post by mproteau (Paper Realms) on Jun 22, 2016 8:56:43 GMT -9
Gotta ask so maybe I can learn something... the reg marks I see there are quite large. Any reason for that? It's kinda dangerous to have stuff inside the reg mark area "bounding square" and so the larger the reg mark, the larger the restricted area is. Would it give you more page space to have smaller reg marks (I tend to use .375/.035 as the size/thickness values).
|
|
|
|
Post by mproteau (Paper Realms) on Jun 22, 2016 8:57:30 GMT -9
BTW - love it! Every time I look at 15mm scale stuff, I wonder if that isn't the "right" scale for me - I'd be able to fit more stuff on the table, and it's SO CUTE!
|
|
|
|
Post by lightning on Jun 22, 2016 9:15:15 GMT -9
I don't really know why I made the registration marks that size. I guess that was the default. But as I never had any problems with them I did not see a reason to change it.
I think longer marks could help with better alignment than short ones.
I have to observe when designing new models how much space I could "save" when making the mark shorter...
|
|
|
|
Post by mproteau (Paper Realms) on Jun 22, 2016 9:20:57 GMT -9
I've been using the same settings for years, and it's been a fine balance of size and detectability (sp?). If the marks are read, then I guess there's no "wrong" But, if I didn't ask, I might have been missing some nugget of well earned wisdom! |
|
|
|
Post by lightning on Jun 23, 2016 7:45:11 GMT -9
I changed the length of the marks from 20mm to 10mm and ... it works So thanks for the inspiration mproteau (Paper Realms) ! Working on the walls layout today ... not sure if I am imagining things, but it feels like the build time is much faster. Or I just know the model that well  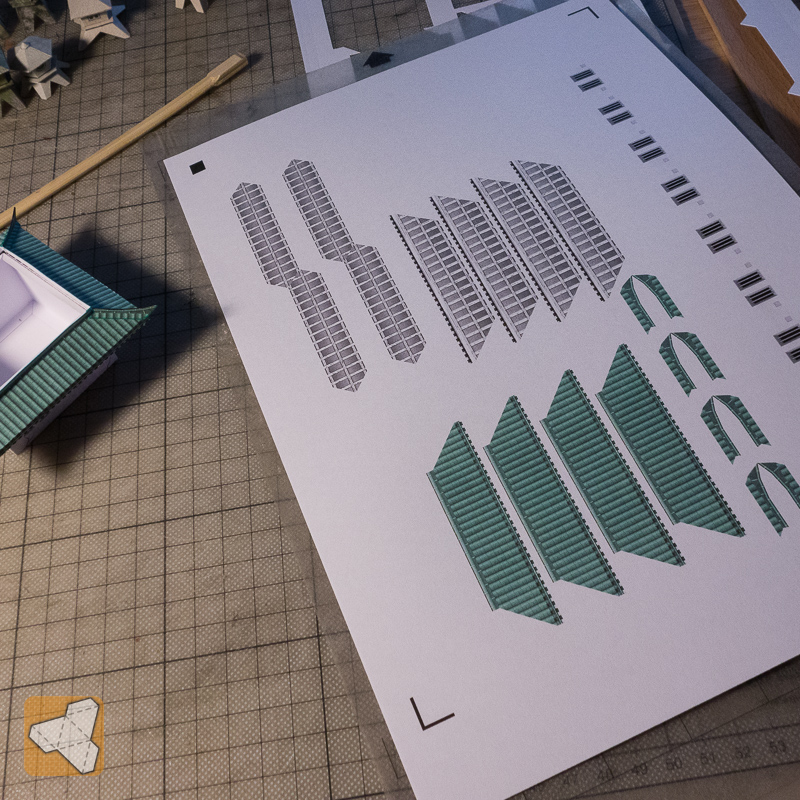 |
|
|
|
Post by lightning on Jun 26, 2016 0:39:36 GMT -9
So what next? Castle walls and gates? 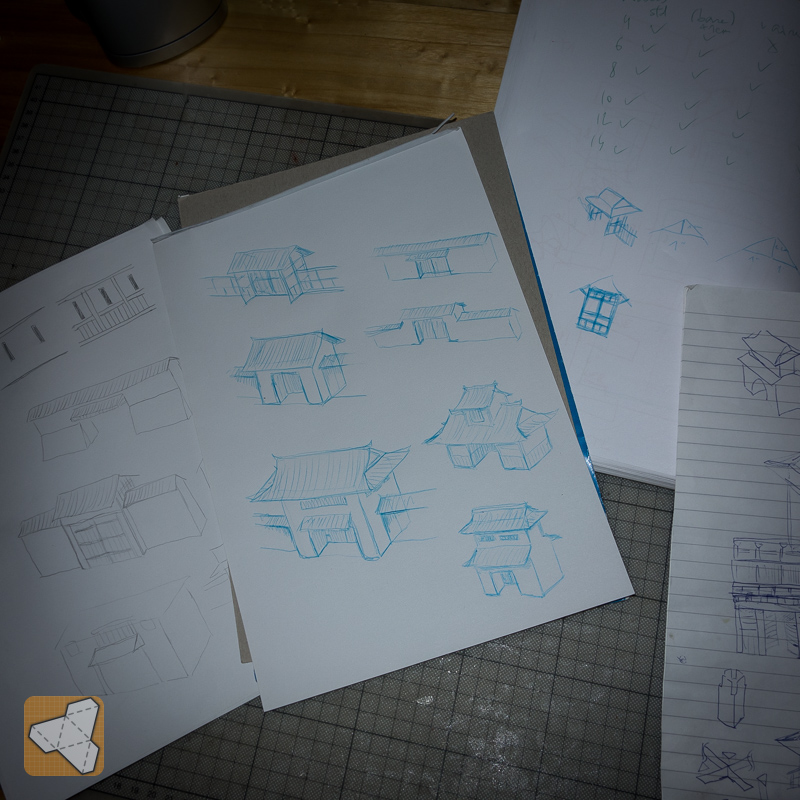 |
|
|
|
Post by lightning on Jun 26, 2016 22:15:49 GMT -9
I'll take it as a yes then |
|
|
|
Post by lightning on Jun 28, 2016 0:25:01 GMT -9
First prototype of the 4x2" gate and walls ... and a problem 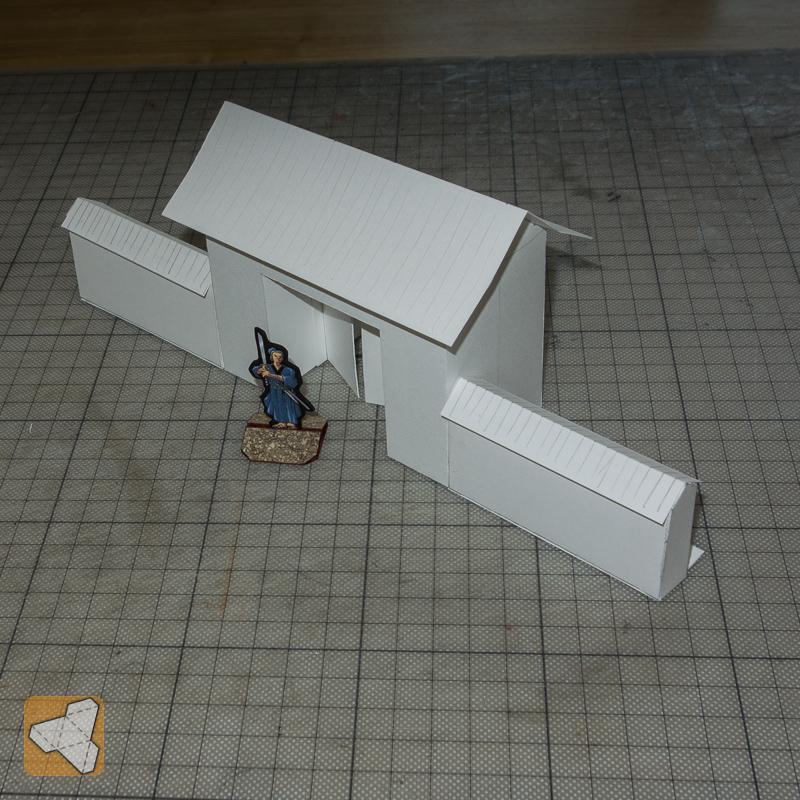 The gate looks fine ... Front view 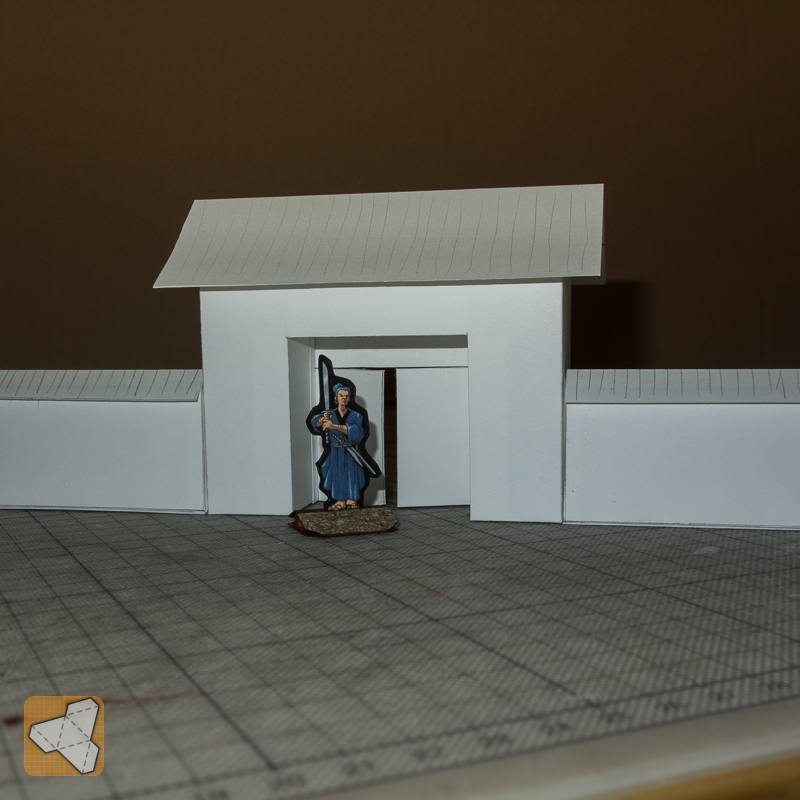 Here I see the mini looks great with the gate but the walls seem too small (because of the base) Problem ...  The walls are now 4cm and the height to the roof is 5cm (it looks less on the pic but that's due to perspective). I could raise the wall to 4,5cm. But depending on the pose of the mini (here the raised sword) it still might look too low. If I raise it to 5cm then the wall roof would touch the buildings roof which I don't really like. A solution would be to create a base for the tower and keep buildings that is 5mm. BTW the height of the door opening in the gate house is 5cm and the door wings are 4cm. Am I overthinking this? Is there no problem? Any thoughts or preferences? |
|
|
|
Post by Vermin King on Jun 28, 2016 3:32:25 GMT -9
I doubt that most would see it as a problem
|
|
|
|
Post by lightning on Jun 28, 2016 5:36:04 GMT -9
That's good to know sometimes I need the outside perspective! And another prototype .... the big gate (6x4") 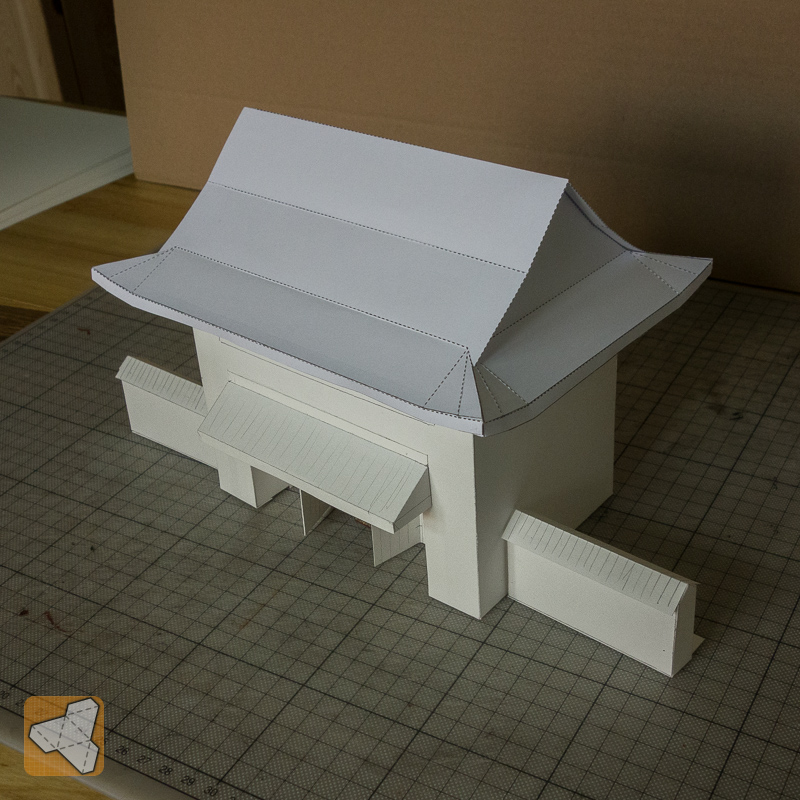 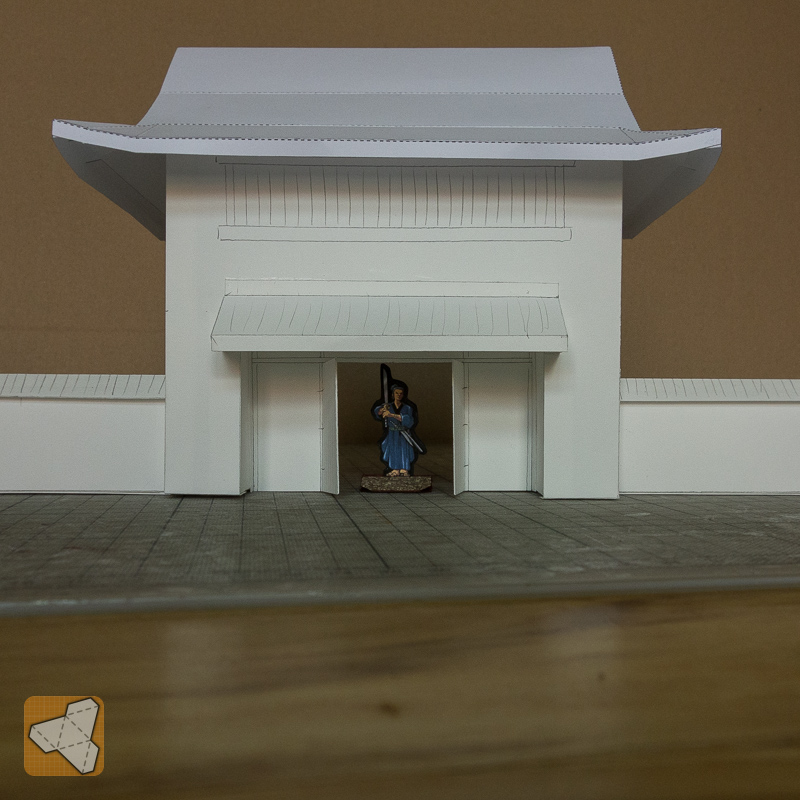 |
|
|
|
Post by mproteau (Paper Realms) on Jun 28, 2016 5:57:06 GMT -9
I think they look great. Designers will have minis at slightly different scales, and crazy poses, so I wouldn't worry about that. Also, some folks have thicker bases for their minis than others.
|
|
|
|
Post by kgstanley81 on Jun 28, 2016 7:51:06 GMT -9
I don't see any problems
|
|
|
|
Post by cowboyleland on Jun 28, 2016 13:24:47 GMT -9
I don't see a problem but let's do the math. 30mm figures are roughly 1:60 scale. 5cm becomes 3m. 3m or about 9'9" is a respectable gate height. Certainly base thickness is always a factor.
|
|
|
|
Post by lightning on Jun 29, 2016 3:42:22 GMT -9
Thanks to the reality check of my problems! Sometimes an idea grows in your head and it takes an outside force to squash the bug! Today I have been working on how to connect the wall modules. I have decided to use good old paper clip method. I used that 10 years ago, it is easy to create and the raw ingredient should be available to everyone. 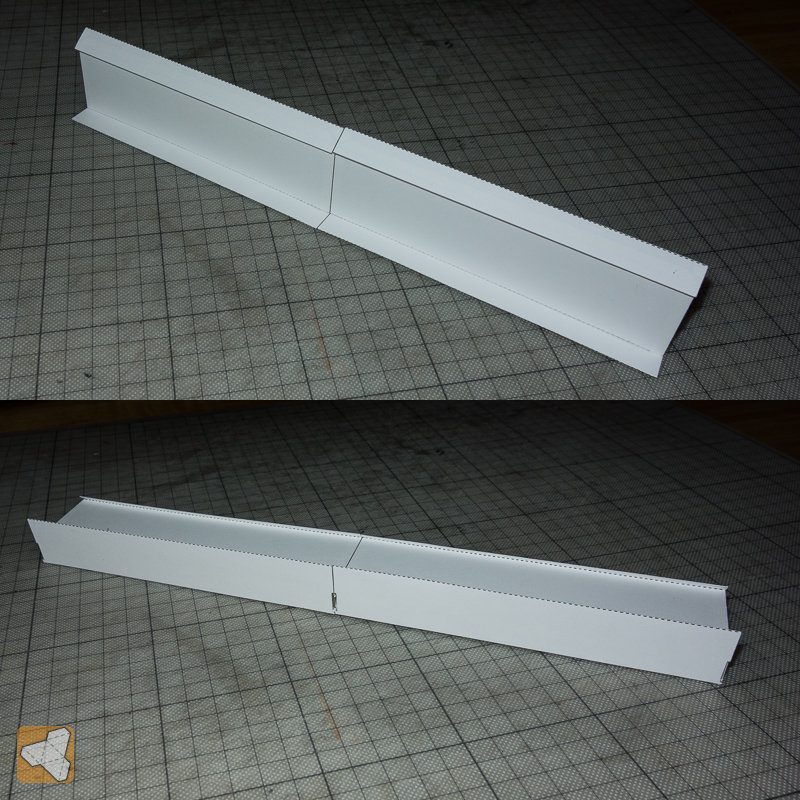 The connection is really tight. I glue the side walls a little "inside" the long wall side so that when the clip is inserted it has space to "pull" the two modules together. 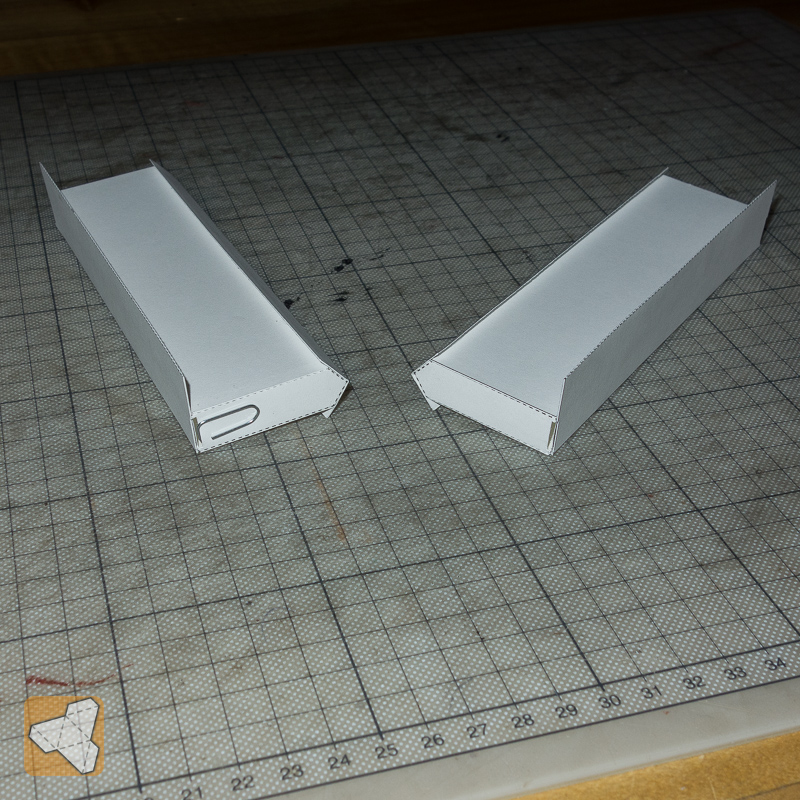 The connection taken apart. There is a little slot cut into the sides and the base.  Detail of the opened up part. |
|
|
|
Post by lightning on Jul 2, 2016 22:30:25 GMT -9
So instead of the very simple door in the wall as the small gate, I thought of doing something like this instead. How do you like it? 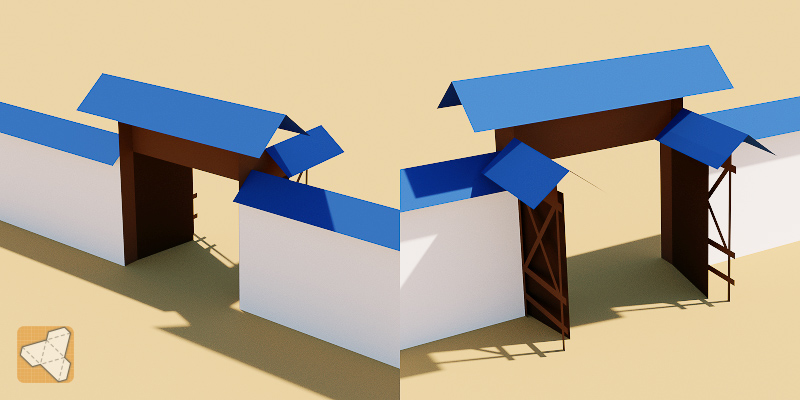 |
|
|
|
Post by kgstanley81 on Jul 3, 2016 5:32:37 GMT -9
I like it, would they be able to move
|
|
|
|
Post by lightning on Jul 3, 2016 9:11:13 GMT -9
The door wings? Yes. My standard way is that they are scored and can be opened (and then locked again with a bar). The other approach would be different separate door elements (open and closed) that you can insert as needed (for gaming).
|
|
|
|
Post by lightning on Jul 6, 2016 6:59:52 GMT -9
Continuing with the big gate, today I adapted the roof file for the new 6x4" version. There is only one page that is changed. The rest you could use from the tower file. So nice recycling 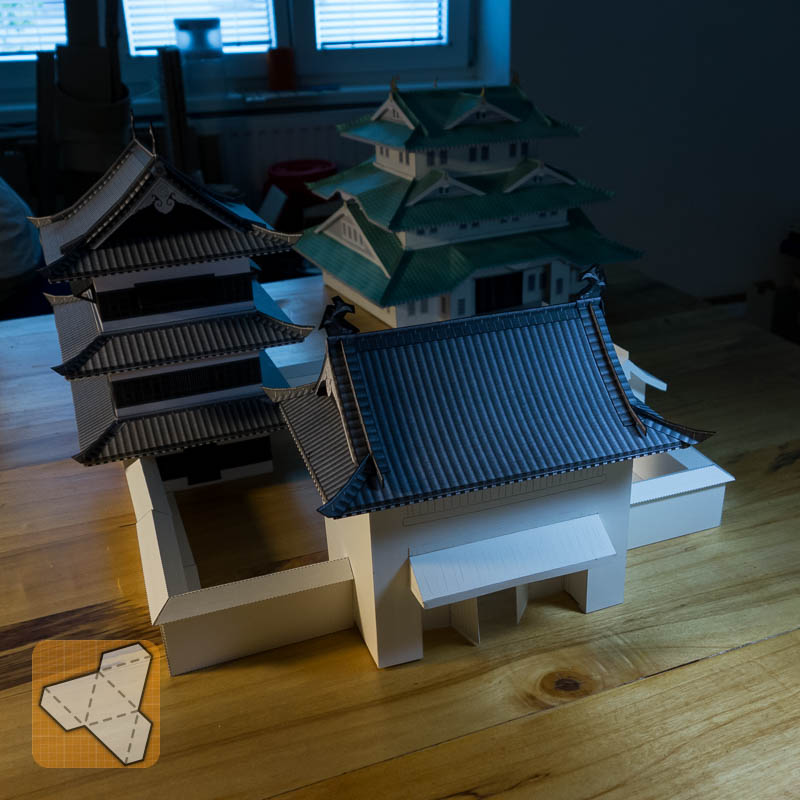 The old castle arrived today from the other appartement. It looks so squashed now  The new roof version looks so much better! The better is the enemy of the good!!! |
|
|
|
Post by chiefasaur on Jul 6, 2016 8:42:21 GMT -9
Those roofs look so good!
|
|
|
|
Post by lightning on Jul 7, 2016 8:19:20 GMT -9
Started texturing the walls today. I have added a couple of color variations as suggested by squirmydad. I will also add the openings/slots for the arrow and gun shooters. Maybe I will try a wood variation. Am I missing any important texture for the walls? 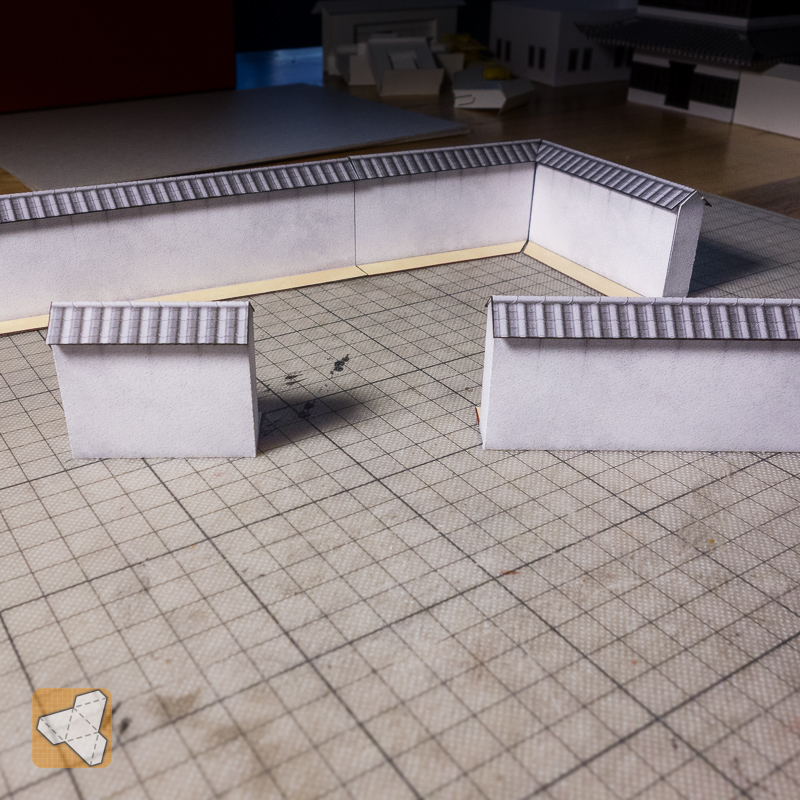 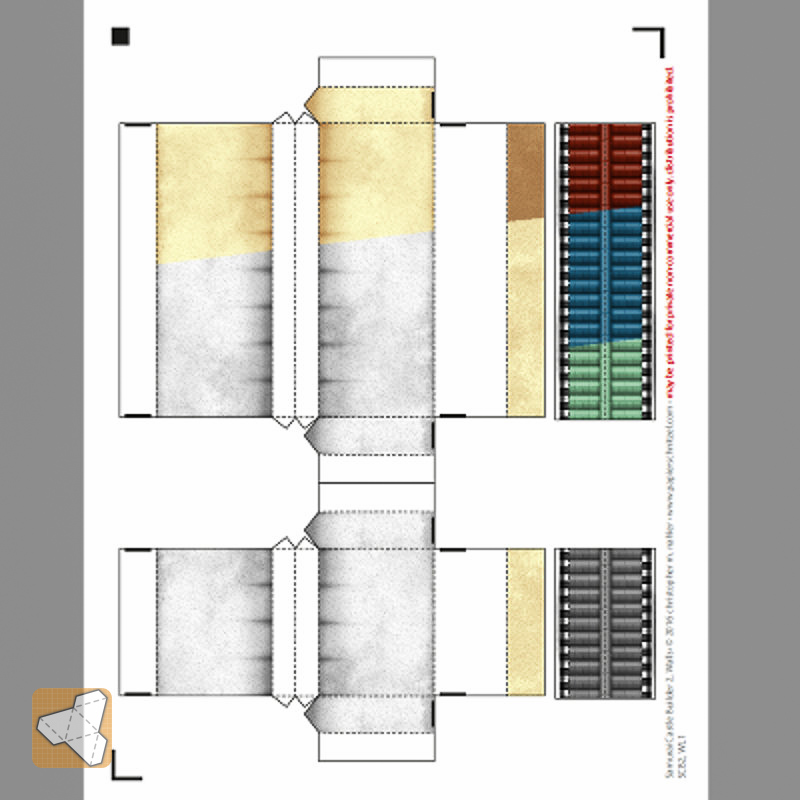 |
|
|
|
Post by lightning on Jul 8, 2016 1:14:50 GMT -9
Openings for the shooters done! 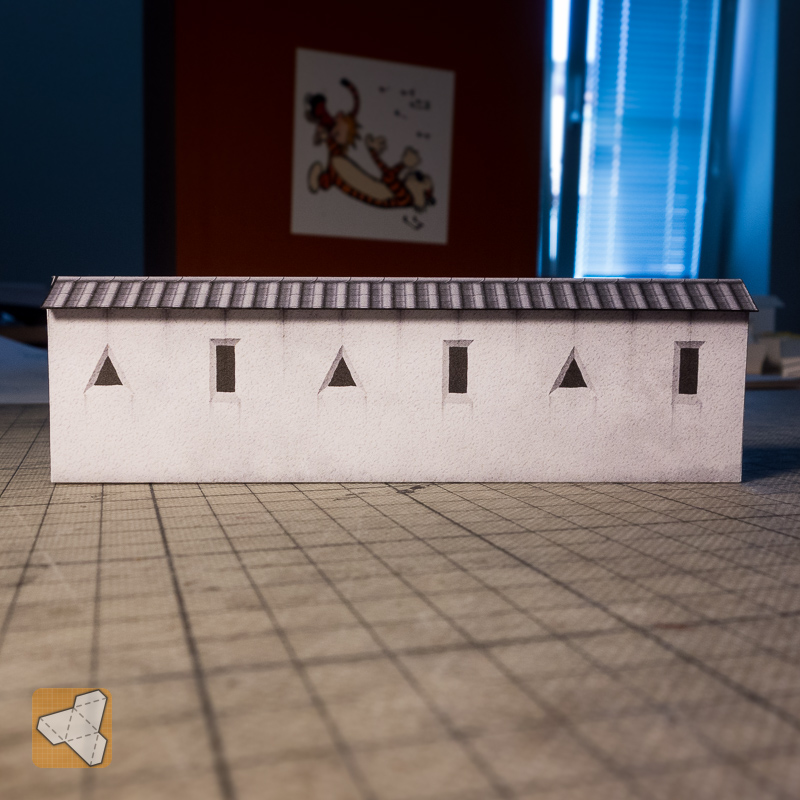 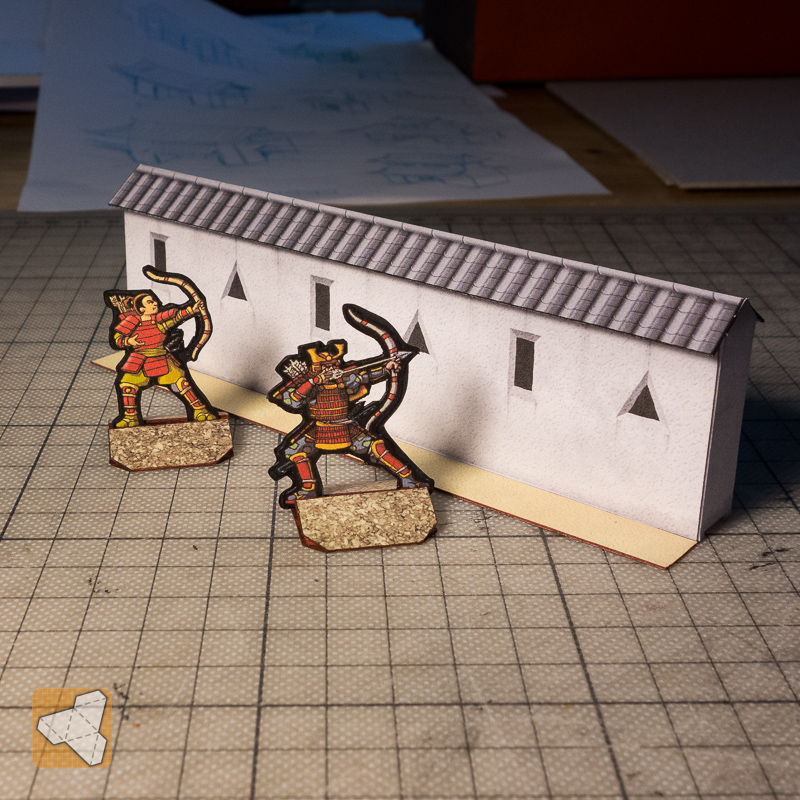 |
|
|
|
Post by lightning on Jul 9, 2016 10:43:53 GMT -9
Simple gates texturing is done. Just want to add some minor stuff like the lock bar on the inside. And hopefully next week I will find a way to add rocks and grass for the ground ...  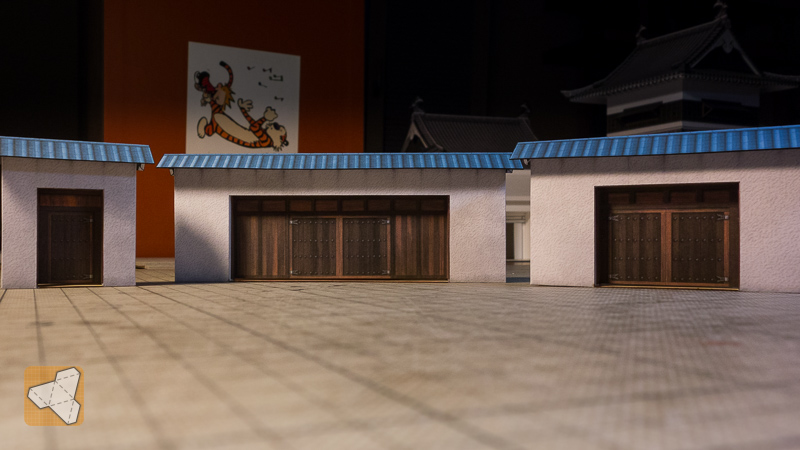 |
|


 The new roof version looks so much better! The better is the enemy of the good!!!

