


Stone Tower Interior/Fold Flat Kitbash
Aug 27, 2016 22:55:44 GMT -9
Vermin King, bravesirkevin, and 5 more like this
Post by oldschooldm on Aug 27, 2016 22:55:44 GMT -9
Stone Tower Interior/Fold Flat Kitbash
Cutlines, cutfiles, and tips for converting any simple building to fold/flat with interior.
This model is a conversion of Medieval Village Set 1:Stone Tower, by Paper Realms (mproteau (Paper Realms))

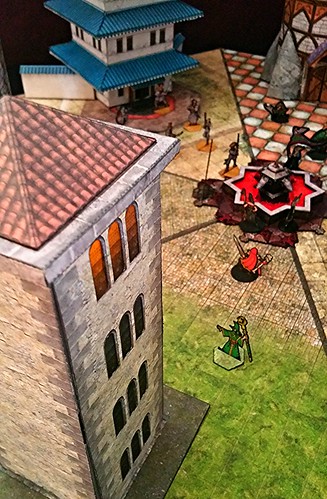
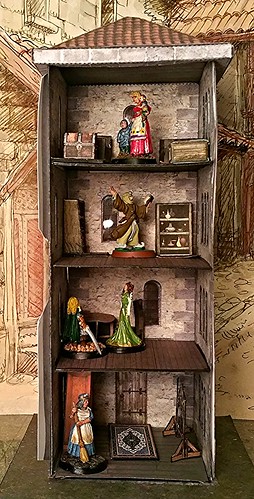
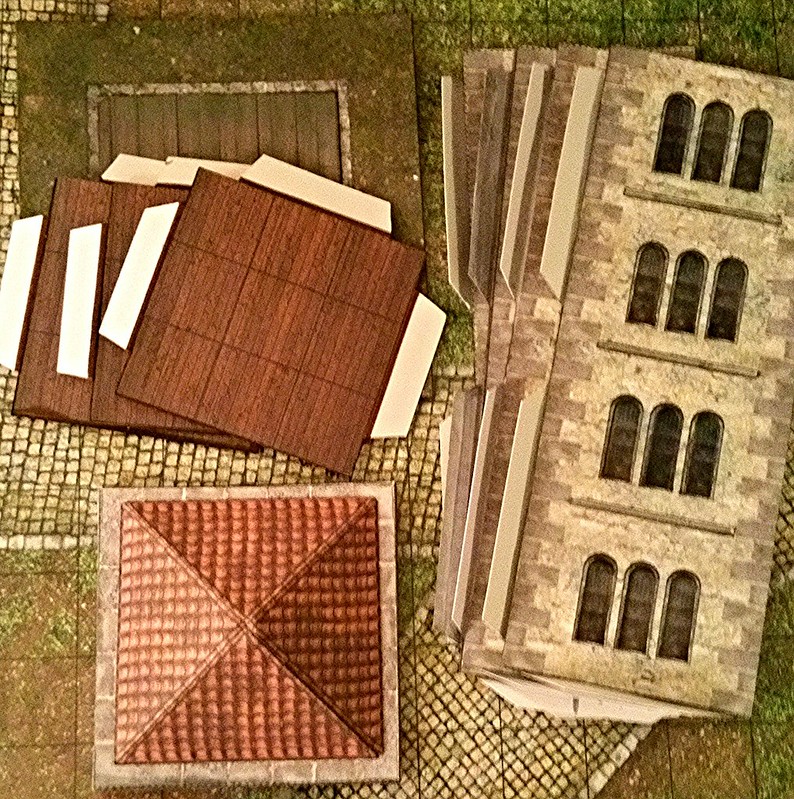
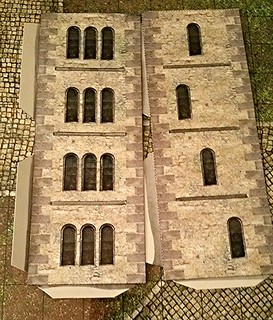
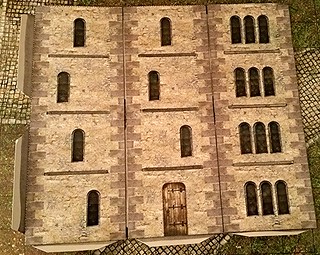
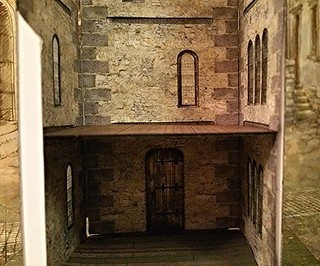
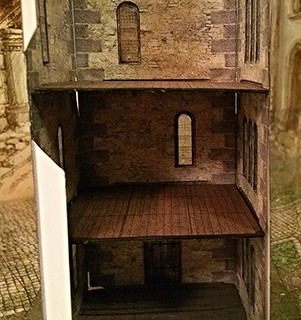
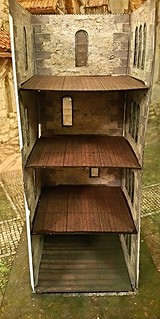
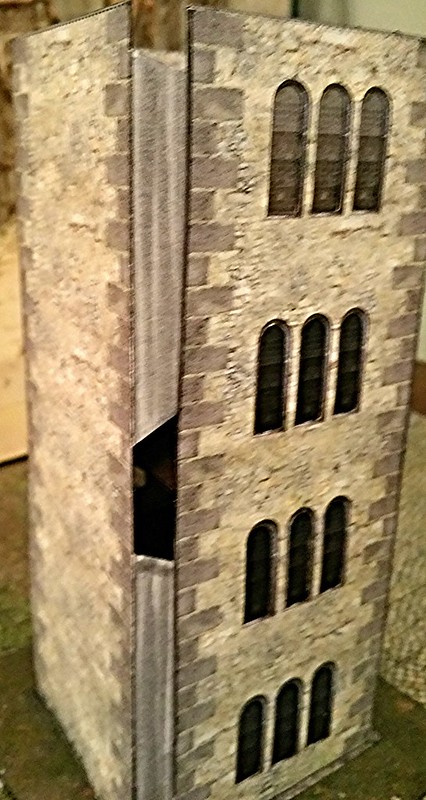
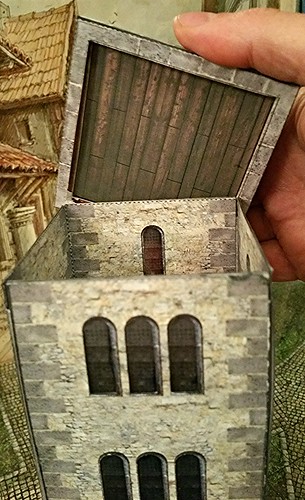
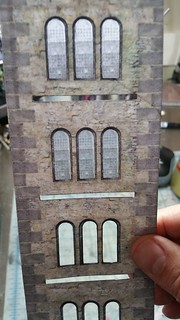
The finished model
[Main Entry Image: The collage]
Assembling the model (from finished parts)
Stores nearly flat...
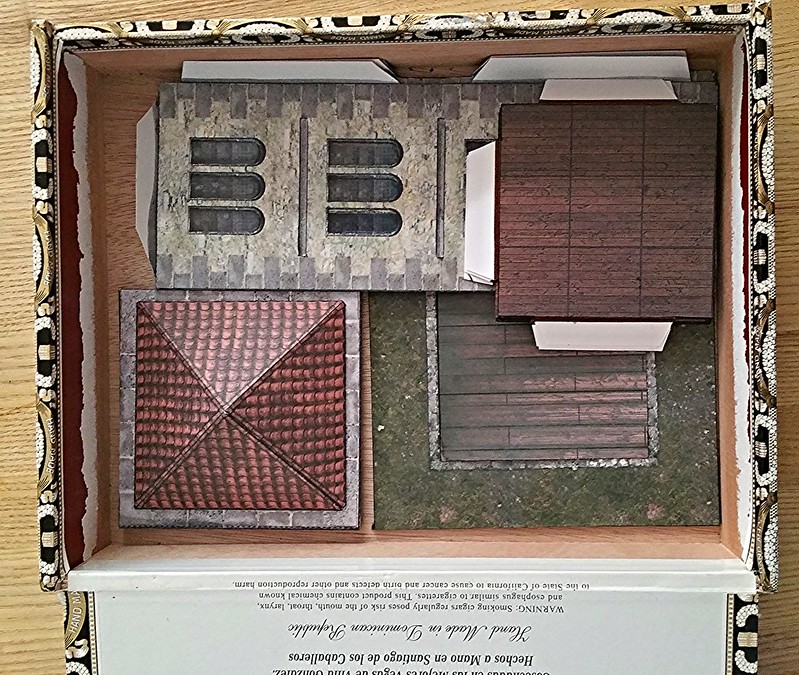
The Parts
To Start: Put walls together, and insert upright in base
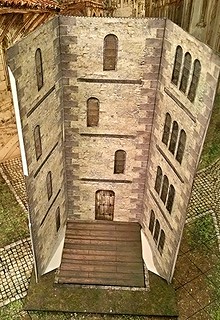
Insert the Floors into the three walls, from bottom to top

Insert Back Wall (Optional/Removable)
Add Roof
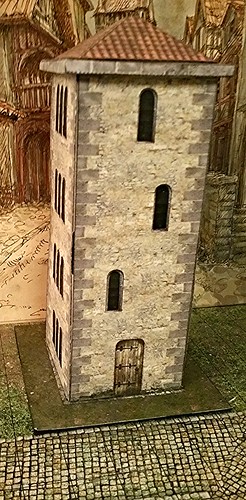
All done in less than 3 minutes at the table!
Converting the model
I'm assuming that you've built a few models before... Other folks have great tutorials for free.
My files: Stone Tower Fold-Flat Conversion by OldScho....zip (181.02 KB) or try the (Dropbox backup)
You'll need your standard cardstock, 4 sheets of 5mil acetate, translucent paper for the windows, and some stiff board (I use matte board) for the base and the floors.
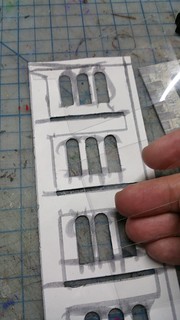
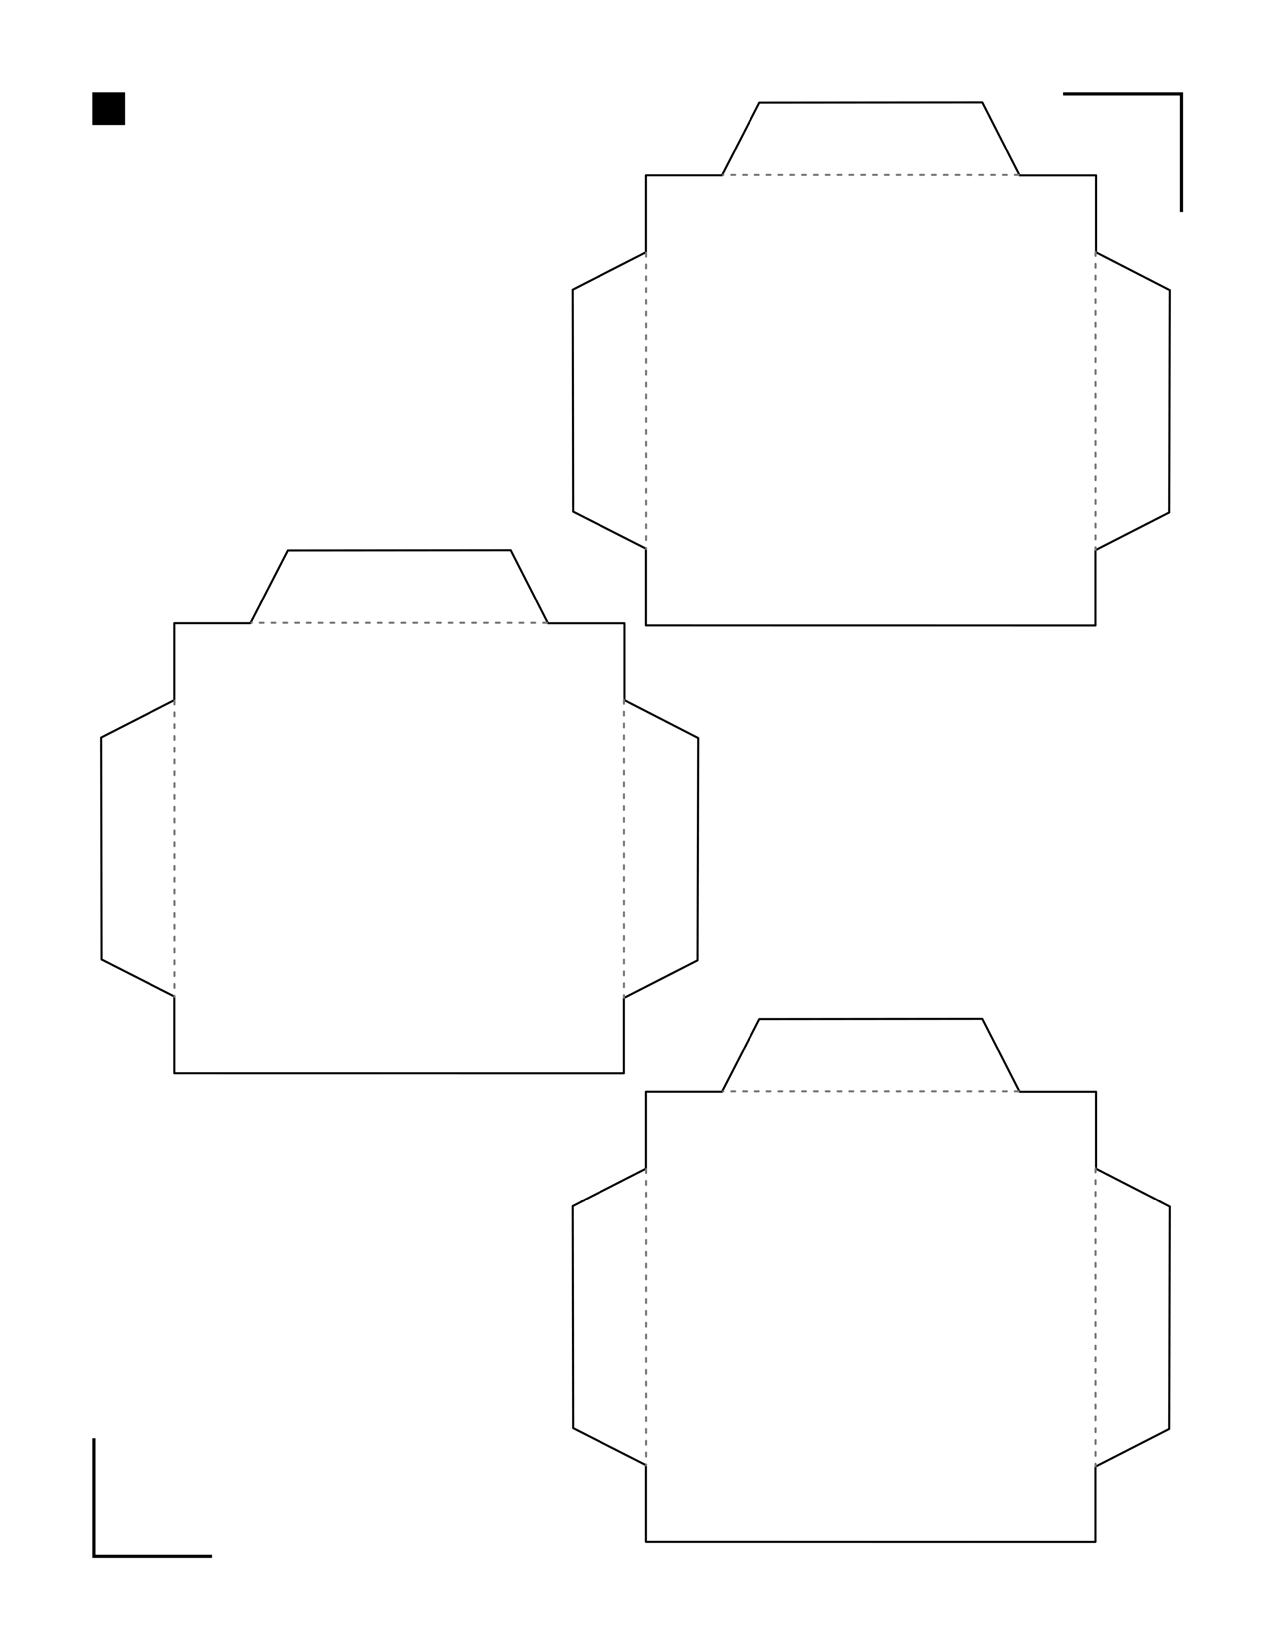
To make the walls, you'll need a reverse image of each wall. Use photoshop or GIMP to extract and flip them and align them to the following template, or (more easily) use the cutfile and Silhouette Studio.
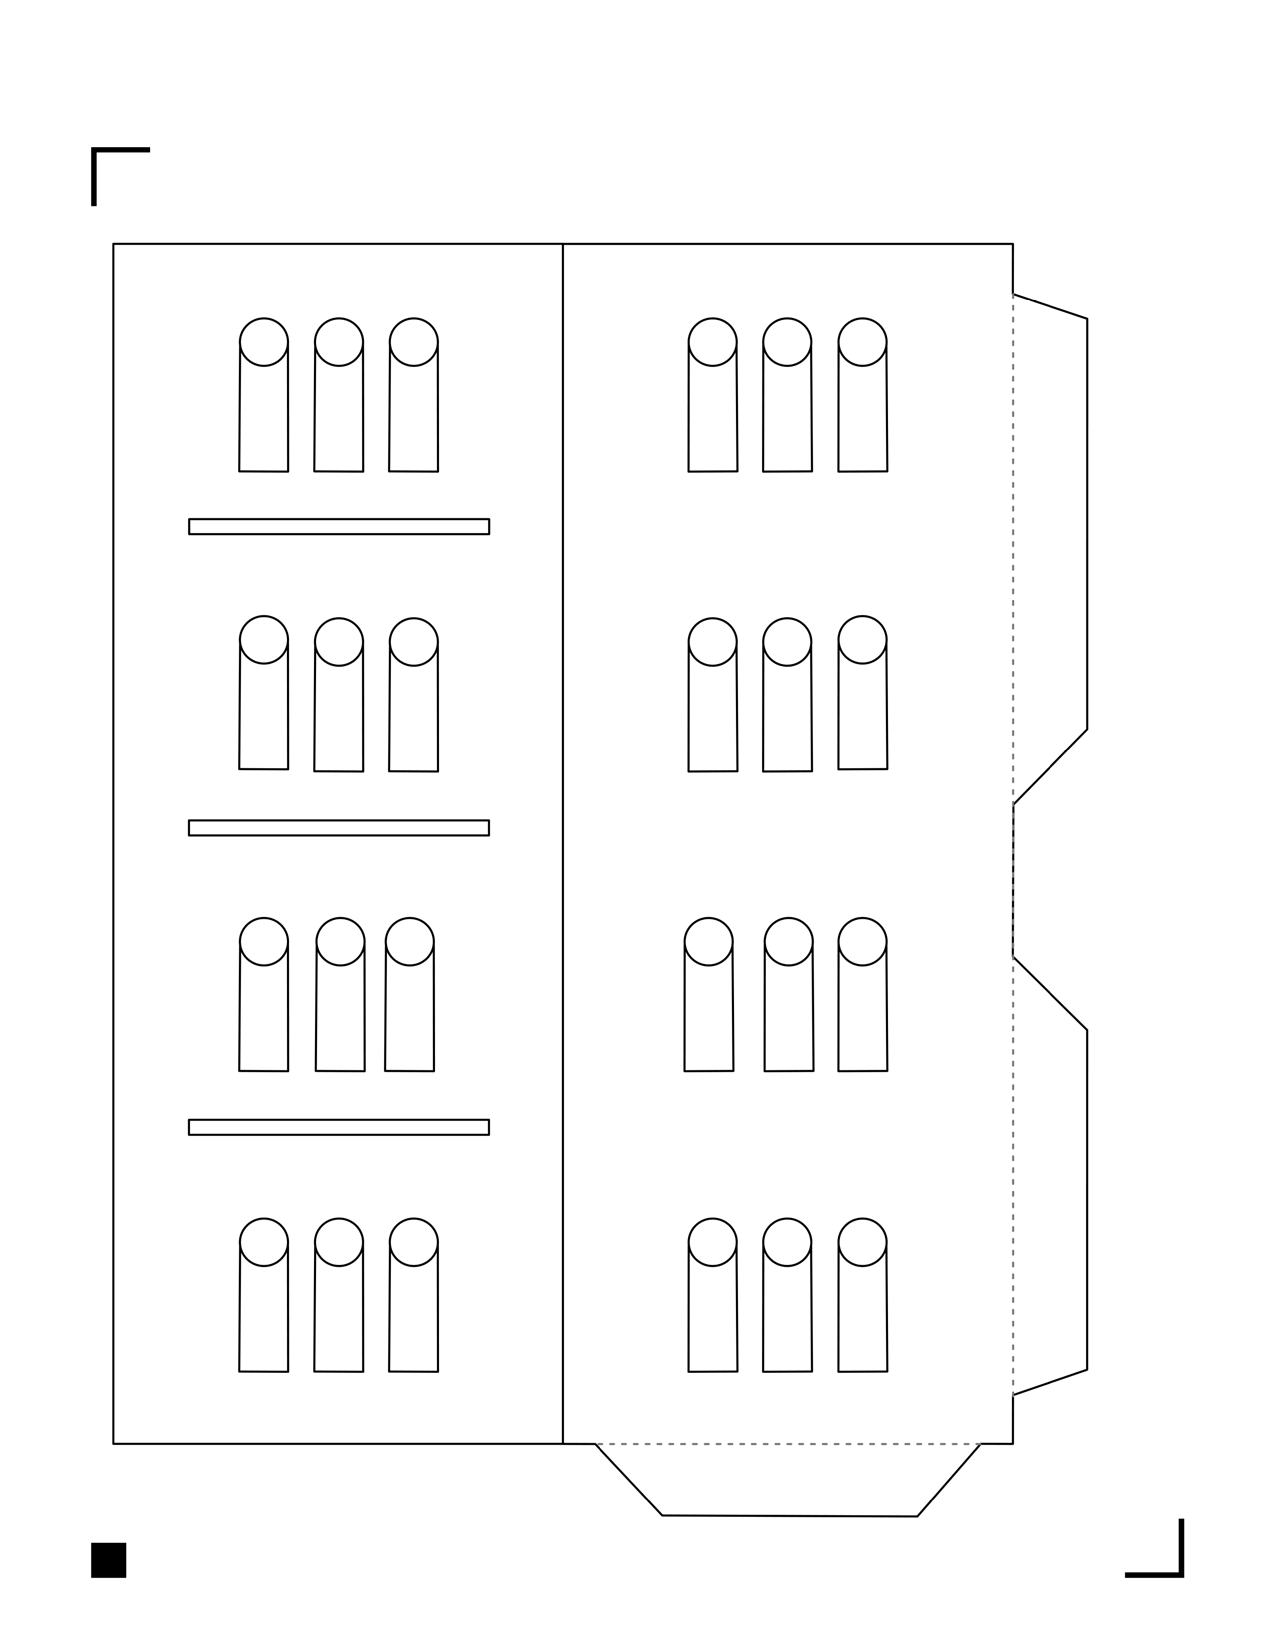
It isn't obvious from this outline, but the panels should mirror each other exactly. You will need 4 of these walls. The back wall (opposite the door) won't need any of the windows cut.
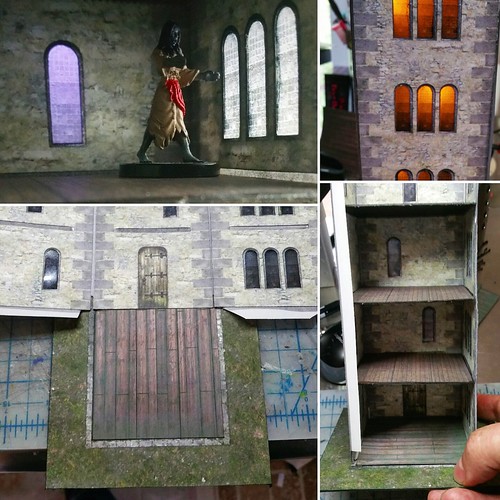
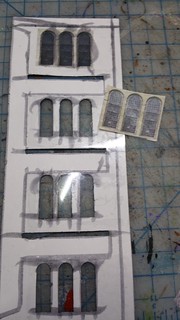
If you want translucent (open) windows, cut out the window holes. Then also print a bunch of windows on a piece of translucent paper and cut them out in groups of 3 (which you can cut down as needed)
I did two of the 12-window tower on a single sheet.
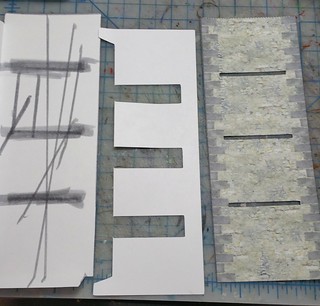
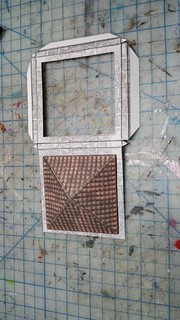
Now you need to cut out 3 templates (sandwitch layers) of the 5min clear plastic/acetate. You do NOT want to cut out window holes from the acetate, it will provide strength for the windows and the walls.
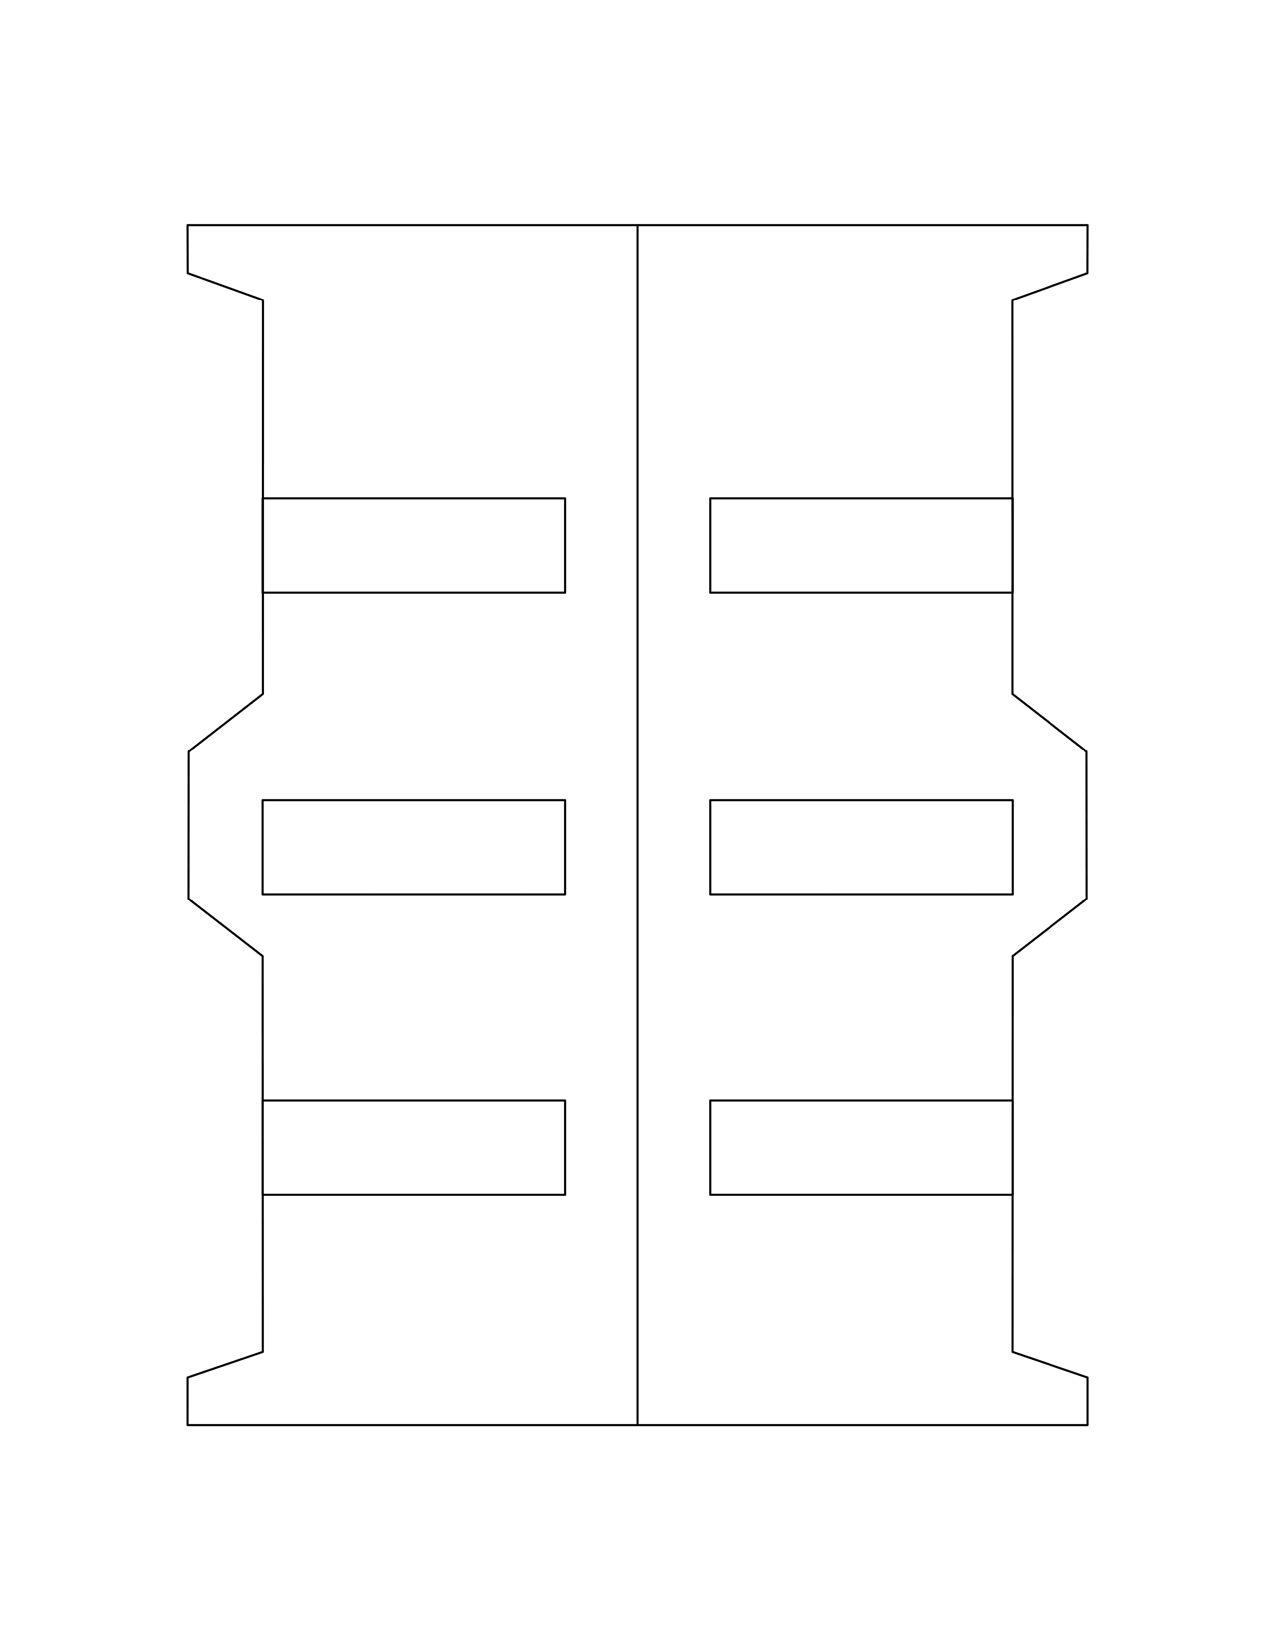
Get a pair of mirroed wall sides. Edge it all, including any window frames. Trace the acetate shape onto the back of one side. This will mark "No Glue" areas for assembly slots.
Place glue on the wall avoiding the tracing, and carefully place the acetate to match. It should cover the window slots.
Glue in the appropriate translucent window pattern again, avoid getting glue on the visible window acetate.
After all the windows are in, glue on the other side of the wall.
Repeat for the 3 walls with windows. For the 4th wall, you don't have to use acetate for the sandwitch. Cardstock will do. Otherwise assembly is the same.
The slots are optional, in case you want to make different wall removable.
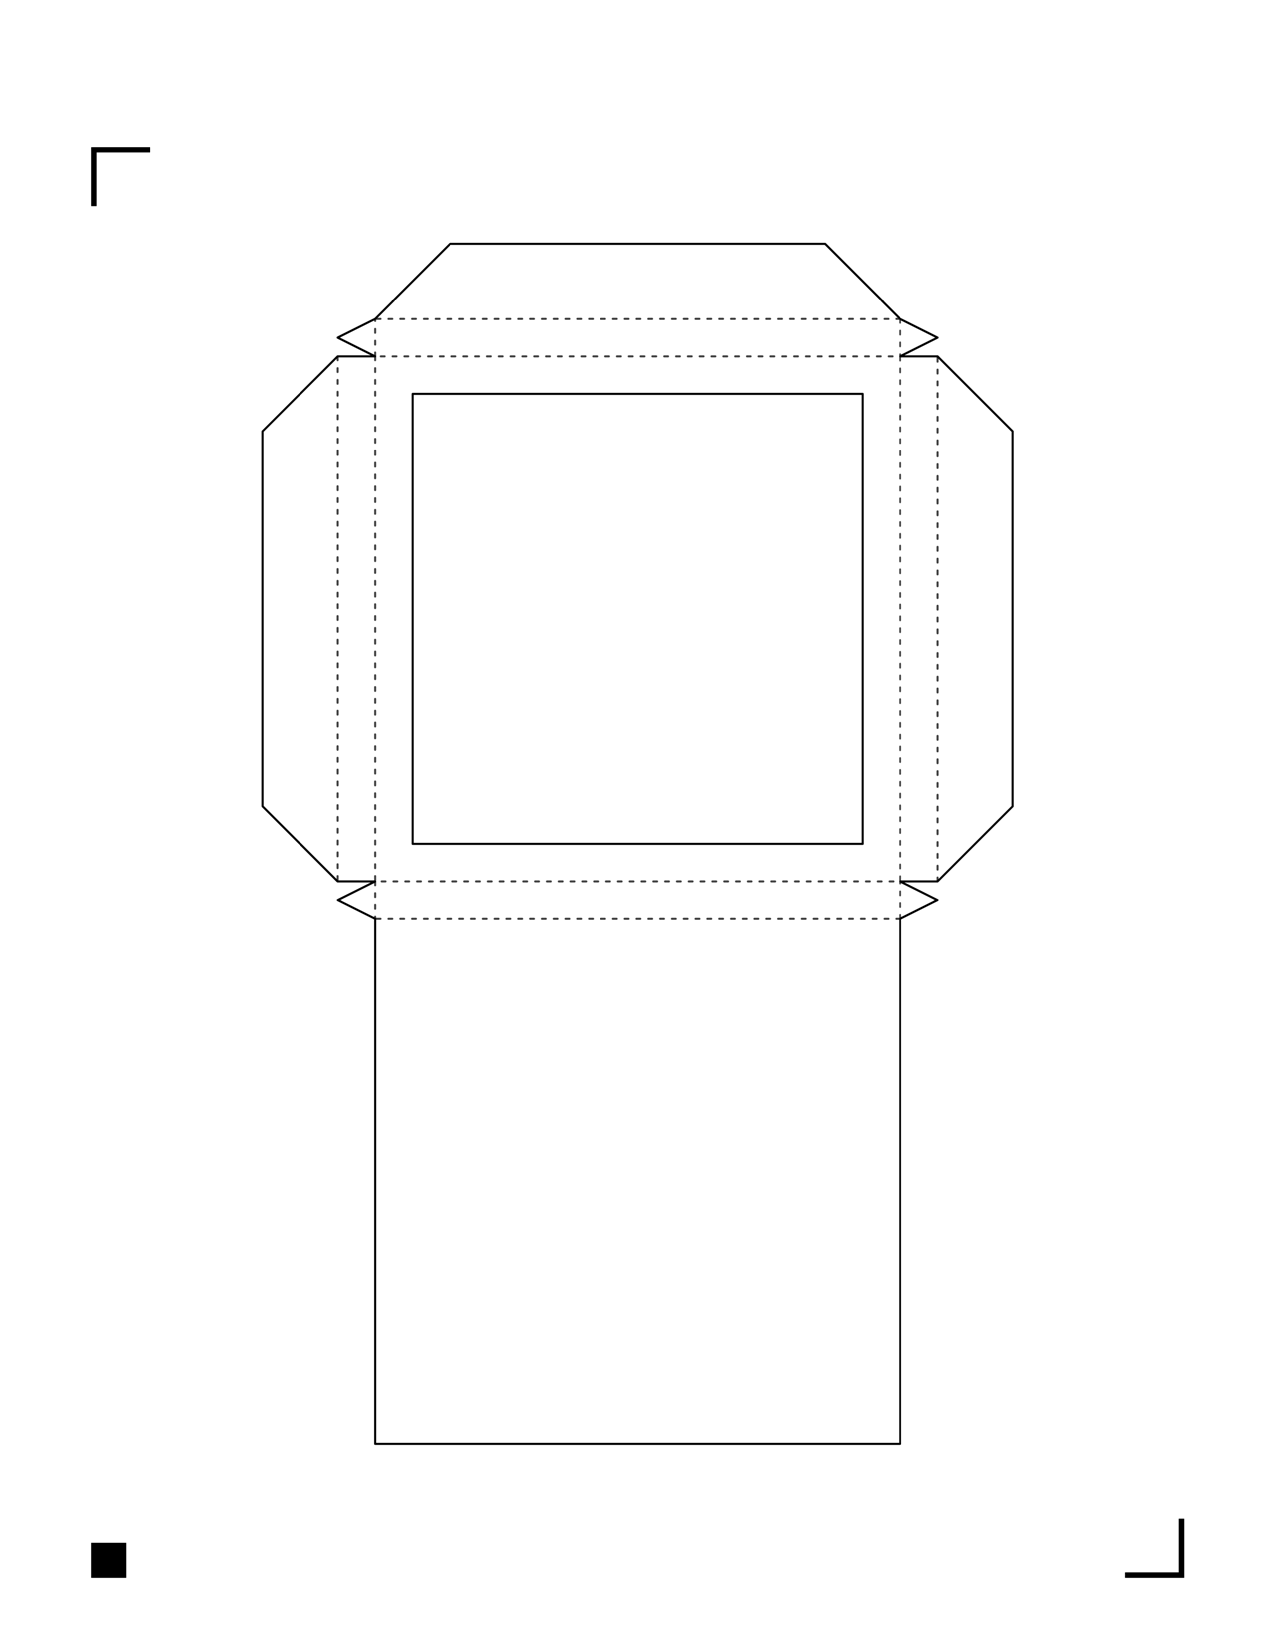
Creating the interior floors simply requires you to find some floor texture and apply it to this template:
Cut them out and glue them to a 3-inch stiff (matte) board for strength - That's all!
For the roof cut the existing art to this new template - build it to have an outer lip, as shown.
Optionally, you can add a ceiling texture - just find one on the internet, cut to size and glue in.

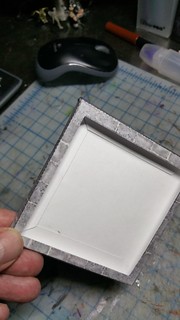
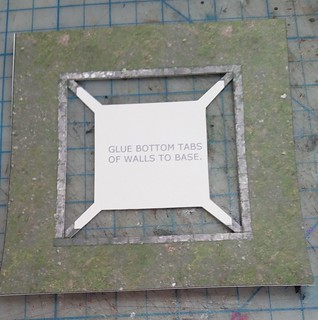
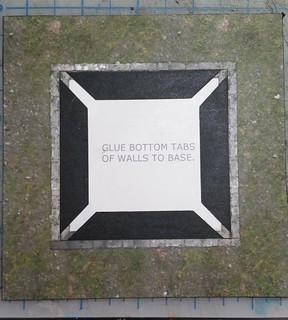
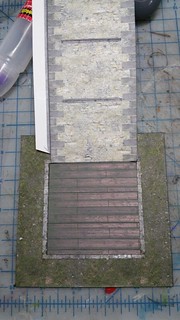
Last piece. Print the base as normal. Use the same trace-on-the-back technique to mark were the tabs will go, and cut out a slightly larger shape. Glue carefully to a base (Matte board.) Cover with a 3" square floor texture, gluing on the paper, avoiding the black areas. When dry, you should be able to insert a wall tab.
You're done! Dry everything overnight pressed under a bunch of heavy books and assemble/decorate/play/disassemble/store into the future!
My files: Stone Tower Fold-Flat Conversion by OldScho....zip (181.02 KB) or try the (Dropbox backup)


