|
|
Post by jeffgeorge on May 18, 2017 9:49:08 GMT -9
I'm setting up the final pdf for the Dungeons of Olde basic tile set, and I want to make it cutter-friendly. Unfortunately, I don't own a cutter, and I can't sift out the necessary cut-file sorcery from the various posts in this sub-forum to figure out how much margin I need to leave. So...how much margin do I allow for cut-file registration marks, if I want to be safe? Anyone?
|
|
|
|
Post by sunraven01 on May 18, 2017 9:57:50 GMT -9
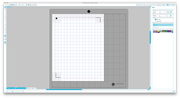 Red lines are safe printing zone; grey hashmarks are the area that can't be cut automatically, and you should keep images outside to minimize the chance of confusing the camera on the cutter. |
|
|
|
Post by jeffgeorge on May 18, 2017 10:09:37 GMT -9
Red lines are safe printing zone; grey hashmarks are the area that can't be cut automatically, and you should keep images outside to minimize the chance of confusing the camera on the cutter. Thanks very much. To be sure I understand...I should keep the images inside the red lines, and avoid the gray cross-hatched areas as well? (Wow, that's a lot of area lost...) |
|
|
|
Post by sunraven01 on May 18, 2017 10:12:25 GMT -9
Yes, if you want maximum safe cutting, that's best practice. Someone else might be able to tell you where you can squeeze in those guidelines, but that's what Silhouette America recommends.
|
|
|
|
Post by Vermin King on May 18, 2017 10:32:00 GMT -9
I just keep it inside the area on the Cutter-Friendly file posted by mproteau (Paper Realms) Of course you can delete the Cardboard Warriors stuff, but the notched box should be safe |
|
|
|
Post by mproteau (Paper Realms) on May 18, 2017 11:22:09 GMT -9
I've been sharing this ZIP file for ages: www.dropbox.com/sh/e1lissr7rrdi4o4/AACetCWcWeM16N0PnLp-8xKaa?dl=0In it are three PNG files and a sample .studio3 file (probably woefully out of date - it's hard to keep up with some of Silhouette's awful version updates). cameo_reg_marks.png and sd_reg_marks.png are useful as layers that can be toggled on/off in a PDF. cutting_area.png should NOT be part of your final product. I use it as a semi-transparent layer above everything I do. I can easily turn it on and see whether something exceeds the available bounds. The position of the reg marks is such that if you were to print on a Letter sized page, or an A4 sized page, the reg marks won't get cut off. They leave a 1" margin at the top of the page if you want to use that for some product branding that won't interfere with the reg marks even if the user prints it out. I made a similar set of png files with way smaller margins: www.dropbox.com/s/mtb34fo6tt2qcf2/reg_mark_layers.zip?dl=0Honestly, I don't think it gains all that much, but it gains a little. I used to have a TON of problems with my older cutter reading really reg marks with the small margins. I haven't seen that problem with my Cameo. I also never print on anything but Letter sized pages. If you tried printing these on A4, it'll likely cut off some of the reg marks, since Letter is a bit wider than A4. My cutfiles use much smaller reg marks than what was in the screenshot posted above. I've never needed larger reg marks. You can download and run Silhouette Studio without having a machine. You can make your cutfiles, and with a high degree of certainty, they'll work fine. If you would like someone to help guide you through the process, I (or many others here) can help out. |
|
|
|
Post by jeffgeorge on May 19, 2017 5:07:22 GMT -9
mproteau (Paper Realms), thanks for these files. I'm currently setting up a sample PDF with one page of DoO tiles laid out using your registration marks as layers. I've also included the cutting area PNG as a layer as well. If I understand correctly, I need to keep my model pieces inside the cutting area, right? I'll upload the file as soon as I have it ready; I'm sure I'll have more questions as I go.
|
|
|
|
Post by jeffgeorge on May 19, 2017 7:24:16 GMT -9
OK, here are two test pages using mproteau (Paper Realms) 's cutter reg-mark templates. In each case, I have included both sets of registration marks (Cameo and Studio), as well as the red cuttable area guide. I didn't bother to apply the Ebbles hack to the PDF files to make it possible to turn off any layers for printing, since no one is going to print from these files anyway. Page 1 should be perfectly safe--all the model pieces stay completely inside the cuttable area. Page 2 is the one I have a question about. Although the portions of the model that get cut out are completely within the red cuttable area, the fold lines do stick out of the red area and even beyond the bounds of the registration marks. Is this likely to cause a problem, or is it ok to have image that is not getting cut out protrude beyond the registration marks? Because the DoO tiles are made with a single piece of cardstock, the ones with multiple walls get quite large; the tiles with walls across the middle can be extremely wide when laying flat on the page. It may be hard to keep all their fold lines entirely inside the safe-cutting area, especially if I want to get more than a single tile on a cardstock page. |
|
|
|
Post by mproteau (Paper Realms) on May 19, 2017 8:17:26 GMT -9
I've also included the cutting area PNG as a layer as well. I repeat - the pink "safe cutting area" png file is NOT something you want/need to put in your PDF. It's a layout guide for GIMP or Photoshop or whatever, so you can easily see if you're within the safe cutting area. Your second file looks fine. You can print stuff outside of the safe cutting area - it just won't get cut. What you really don't want to do is print stuff in the grey "unsafe" area since that may interfere with the machine's ability to properly read the registration marks. The RGB lines are different score line placements depending on what you want? There are techniques for making cutfiles with configurable lines... If you lay out one set of score lines (say, for the red lines) and group them - you can make an off-the-page piece of text that is grouped with the lines. The text might read "5mm foamcore" or whatever you want it to represent. Users can select that group and set the cut style to "none" or "score" for example. Do this for each set of score lines, and you can toggle the one you want on and the rest off. Color the lines in the group based on the guides on the page, and it might even make sense. If that didn't make any sense, I can take a cutfile from you (leave the image on the page) and I can whip up an example for you to look at. |
|
|
|
Post by jeffgeorge on May 19, 2017 11:48:45 GMT -9
I repeat - the pink "safe cutting area" png file is NOT something you want/need to put in your PDF. It's a layout guide for GIMP or Photoshop or whatever, so you can easily see if you're within the safe cutting area. Right. Totally got that. I only included it in these test sample pages so that it was easy for us to see what was in and what was out when we discussed it here. I won't even include that layer in the final project. Okay, good to know. I can run the folding guidelines past the cuttable area without messing up the cutting machine's page-reading scanner. That buys me a little bit of elbow room, since I've extended the cutting and folding guidelines well beyond the actual cut-out pieces, to make them more obvious to users. Okay, that is what I really needed to understand. Don't print anything in the gray area. Check. Yes, the R, B, and G lines are score and cut lines that handle different thicknesses of base material (generally either 4mm dollar-store foamcore, or 3/16" (5mm) craft-store foamcore, though you could use corrugated cardboard or any other material of appropriate thickness, of course) and different printing sizes (100% for 1.25-inch grid, or 80% for 1-inch grid). I'm actually addressing four combinations of printing sizes and base thicknesses (1.25" x 4mm = Red; 1.25" x 3/16" = Blue; 1" x 4mm = Blue; 1" x 3/16" = Green), so if I were providing cutfiles, I'd need four versions for each page of tiles, which sounds like quite a lot of work for a really small number of users. If I understand what you're saying, you are talking about making it possible to toggle the different colored lines, so that the user is only printing the particular color he needs for the configuration he's using. I can see how to do that by brute force, putting each color of cutlines on separate layers in the PDF; since I'm using Scribus and not Acrobat Pro, I don't (think) I have any way to do this in a fancy-schmancy Kev's Lounge/Printable Heroes Javascripty PDF with buttons. And in any case, that would mean adding a lot of extra layers to PDFs, each with the colored lines separated out as separate .png files that have to align with the models. At the moment, each tile or other element is placed in the PDF as a single .png file that includes all cut and fold lines, gray and colored. Moving the colored lines to separate layers would mean going back into the GIMP files for every tile in the set, cut-and-pasting those lines to separate layers by hand, and saving out separate .png files for each layer for each tile. In the original DoO PDF, I used layers to switch out different textures for the tiles (each tile had two versions of its floor texture), and to turn the various elements on and off for printing (especially the "bonus items" like chests and fires, as well as the doors and clips) so that the user didn't have to print four more chests and a clip just to get the one tile he really wanted. Adding three more layers for each tile on each page would add a LOT of layers to the PDF, and each color of cut/fold lines would have to be added and aligned separately. I can see how this might be a slight convenience to the user, to only have to look at the color of cut/fold lines he's actually using, but is it worth the extra man-hours on the front end? It also occurs to me that if I were providing cut files, the user could turn all the cut and fold lines off when he prints (colored and gray), and just rely on the cutting machine to get them in the right places. The colored lines are entirely outside of the perimeter of the finished model, but the dashed gray fold lines do appear on the printed model. (The instructions will suggest hitting those with a Sharpie at the same time you ink the white edges.) But if you're using a cutting machine to trim out and score the pieces, you don't actually need any lines at all... I'm pretty sure I understand what you're saying, but unless there's some really smooth way of automating all of this, especially in the preparation of the PDF, I really hate to further delay the release of the freebie version of the system by upping the production difficulty once again. I'm already several weeks behind where I'd hoped to be by now on this project, and I want to get the free version out relatively soon. Maybe this added level of fancyness could be part of the added value for the paid set, which I'd like to release within a month or so of the freebie set. My main concern when I started this thread was just to be sure not to format my pages in a way that made it impossible or impractical for someone who had a cutter to make his own cut files for the configuration (grid-size and base thickness) he actually needed. I don't have a cutting machine myself, and won't be getting one any time soon (I sank any money that would have gone toward that into my EcoTank printer a few weeks ago!), so all this cut-file stuff is sorcery to me, and I didn't want to anger any grumpy wizards... |
|
|
|
Post by mproteau (Paper Realms) on May 19, 2017 14:06:50 GMT -9
I meant that you'd have your PDF exactly as is. It would print with all three colors. There would be one cutfile with a set of score lines for the red lines, a different set of score lines for the green lines etc. then, you'd be able to turn on just the set you want the machine to use.
I will make you a sample cutfile tonight that demonstrates it.
|
|
|
|
Post by mproteau (Paper Realms) on May 19, 2017 16:07:42 GMT -9
example.zip (66.28 KB) I used your page2 file to quickly whip this example up. I only laid down lines for the bottom piece - I couldn't figure out what was going on with the top piece, and I'll be honest I didn't spend more than a few minutes on this. The basic idea is that I've grouped together all the lines that would cut out the page based on the red lines. I grouped it with a label to make it easier to select them all. I repeated this for the other two colors. If you select a label for a color and set the cut style to "No Cut" then you'll disable it. Do that for the second color you don't want, and you've got the cutfiles for the color you want. Why did I do it so you have to disable two colors rather than start out with them disabled and just enable one? Well, you are picking a cut style for that group. But, the group contains cuts AND perforations. So, if you selected the group and set it to "cut", then the perforation lines become cuts. There are always different solutions! There's no wrong answer! You could make TWO groups - one for the cutlines, and one for the perforation lines. This way, you enable the cut group and then the perforation group, and you're done. Another way (probably the best way) is to make all the lines cut lines - no score lines at all! - but set the line style for the perforations to be some dashed pattern. That'll get you the perforations you want, and there's only one line style. Hah! Now you can disable them all to start, and the instructions are to enable the one group you want. So, there you go!
|
|
|
|
Post by jeffgeorge on May 19, 2017 17:23:16 GMT -9
mproteau (Paper Realms) -- I really appreciate your taking the time to create this sample file, as well as all the coaching you've given me, so please don't apologize for not doing more. I'll need to download the Studio software in order to open up and understand the example file, though. I'll do that, and if any of it doesn't make sense, I'll let you know. Thanks again for all your help!
UPDATE:Okay, I've installed the Silhouette Studio software, and opened up your example. I see exactly what you mean, now that I see how a cutfile works in Studio--how it has layers that can be set to cut or not cut, much like the layers in a PDF can be set to print or not print. Your concept is a good one, and once I get to the point that I can prepare cutfiles to release along with the PDF, I will probably follow it. I think you're probably right that once I learn Studio, I should be able to use it to make cutfiles for my tiles even if I never buy a cutting machine myself. That being said, I don't know how to use it Studio yet, and the last thing I need is to add one more major step to finishing up the first set to the point that I can release it. I'm pretty sure I've seen other publishers here release sets of minis or whatever without cutfiles, and then make cutfiles available later on, either by adding them to the package on OBS, or by making them available as a free download somewhere else. So, now that I know enough that I can lay out the pages of the PDF in a way that doesn't create problems for cutfile makers--whether that's me or someone else--I'm going to focus on getting the PDF done and released, and I'll double back and do cutfiles later. Thanks once again, to you and to everyone who's helped me, in this thread and throughout the forum! I'd never have been able to do any of this without you. (Of course, if I'd never met you guys, I'd never have been aware that there was anything like this to do, so I wouldn't have missed doing it...which reminds me somehow refusing to travel back in time, to be sure you don't accidentally shoot your own grandfather and prevent yourself from ever being born. I'm pretty sure this situation is like that, but I'm not exactly certain how...)
|
|
|
|
Post by jeffgeorge on May 19, 2017 17:27:34 GMT -9
I meant that you'd have your PDF exactly as is. It would print with all three colors. There would be one cutfile with a set of score lines for the red lines, a different set of score lines for the green lines etc. then, you'd be able to turn on just the set you want the machine to use. I will make you a sample cutfile tonight that demonstrates it. OH...whoops...didn't see this post before reading the one that followed it. Yes, I misunderstood what you meant, and now it makes sense to me. I'll still download the Studio software and look through the example cutfile, though. And maybe I will apply at least some of my misunderstanding to the PDF for the paid set anyway, down the line, to make the cut/fold guidelines toggleable...we'll see if time allows that. And forgive me for being obtuse about what's in a cutfile--it's just that I've never actually used or even seen one, so up until today, I really haven't known thing one about how they work. |
|
|
|
Post by lightning on Jun 5, 2017 21:32:14 GMT -9
Just discovered this thread today and guessing all questions are asked and answered already. What is the process/software to create your models? I use Illustrator as the last step and therefore I can export the cut/score lines + registration marks as DXF, which Studio Designer will use to create the actual cut files. Now if you don't own a cutter yourself, you could just provide the DXF files and let the clients do the work  if you are worried about providing files that you cannot test yourself. I am toying with that idea for some time for other reasons, but fear the wrath of oldschooldm if I ever would go that far  |
|
|
|
Post by mproteau (Paper Realms) on Jun 6, 2017 6:28:17 GMT -9
I know I've said this before, but simply making sure that the art honors SOME reg marks (whatever they may be) and doesn't interfere with the resulting "don't put art here" areas, then MAKING cutfiles is quite easy. I've outlined why I like the regmarks I have shared, but it's not like a requirement or anything. It's just that making cutfiles for something that also requires a lot of layout work makes sharing the cutfiles more difficult for everyone involved.
|
|
|
|
Post by oldschooldm on Jun 6, 2017 7:13:10 GMT -9
providing files that you cannot test yourself. I am toying with that idea for some time for other reasons, but fear the wrath of oldschooldm if I ever would go that far Wrath? WRATH??? :-) :-) :-) Or you could just offer a free copy of the kit to whoever tests the cutfiles for you. :-) Some people do that. Pretty fair deal, I think. |
|
|
|
Post by jeffgeorge on Jun 6, 2017 11:03:38 GMT -9
Or you could just offer a free copy of the kit to whoever tests the cutfiles for you. :-) Some people do that. Pretty fair deal, I think. Well, the first DoO kit is free to everyone, so I suppose that includes cutfile testers... |
|
|
|
Post by jeffgeorge on Jun 6, 2017 11:13:09 GMT -9
Just discovered this thread today and guessing all questions are asked and answered already. What is the process/software to create your models? I use Illustrator as the last step and therefore I can export the cut/score lines + registration marks as DXF, which Studio Designer will use to create the actual cut files. Now if you don't own a cutter yourself, you could just provide the DXF files and let the clients do the work if you are worried about providing files that you cannot test yourself. I am toying with that idea for some time for other reasons, but fear the wrath of oldschooldm if I ever would go that far I do the artwork in GIMP, saving each layer for each piece as a separate .png. Then I use Scribus to lay out the pages, arranging the pieces to stay within the registration marks in mproteau (Paper Realms)'s zip file. I include those reg marks as separate layers on each page of the final pdf for the convenience of users with cutting machines, but I don't have a cutter myself, nor have I learned how to use the software to make cutfiles. I realize this is far from an ideal workflow, but unless these products start making serious money, I can't justify the expense of Adobe applications which would no doubt work better in the long run. I have installed Inkscape as an open-source Illustrator alternative, but I haven't had time to learn to use it well enough to decide if it would serve better than GIMP for part or all of my process. I have no idea what a DXF file even is, but I infer it has something to do with cutfiles for one or more cutting machines. Is that the file extension for the Silhouette Studio software? |
|
|
|
Post by jeffgeorge on Jun 6, 2017 11:17:45 GMT -9
I know I've said this before, but simply making sure that the art honors SOME reg marks (whatever they may be) and doesn't interfere with the resulting "don't put art here" areas, then MAKING cutfiles is quite easy. I've outlined why I like the regmarks I have shared, but it's not like a requirement or anything. It's just that making cutfiles for something that also requires a lot of layout work makes sharing the cutfiles more difficult for everyone involved. For the moment, my plan is to do everything I can to avoid making life unnecessarily difficult for cutting machine users, by using your registration marks and no-art-here overlay. (Thanks very much for those, btw, from myself and the rest of the community!) If this goes beyond a couple of sets, I'll look into learning how to actually provide official, tested cutfiles, but for now, I'm counting on your assertion that "MAKING cutfiles is quite easy," so long as I don't create problems for you guys. |
|
|
|
Post by Vermin King on Jun 6, 2017 12:39:12 GMT -9
I know I've said this before, but simply making sure that the art honors SOME reg marks (whatever they may be) and doesn't interfere with the resulting "don't put art here" areas, then MAKING cutfiles is quite easy. I've outlined why I like the regmarks I have shared, but it's not like a requirement or anything. It's just that making cutfiles for something that also requires a lot of layout work makes sharing the cutfiles more difficult for everyone involved. For the moment, my plan is to do everything I can to avoid making life unnecessarily difficult for cutting machine users, by using your registration marks and no-art-here overlay. (Thanks very much for those, btw, from myself and the rest of the community!) If this goes beyond a couple of sets, I'll look into learning how to actually provide official, tested cutfiles, but for now, I'm counting on your assertion that "MAKING cutfiles is quite easy," so long as I don't create problems for you guys. I'm with you there. I don't have a cutter, don't really want one, but I don't want to cause anyone trouble |
|
|
|
Post by lightning on Jun 10, 2017 4:50:37 GMT -9
I have no idea what a DXF file even is, but I infer it has something to do with cutfiles for one or more cutting machines. Is that the file extension for the Silhouette Studio software? It is an old file format used for CAD software etc. It basically is just another way of describing your lines as vectors (as opposed to bitmap or image files). When I am done with a model I delete everything except the cut and score lines and export these as DXF. I then import that into Studio Designer to create the single cut file pages. Another route is SVG as Designer is also capable of importing that but I am not sure if that is in the free standard version. With the data being vectors I don't need to trace images in Studio and therefore it is very accurate. I hope I am not confusing you with my ramblings  It's just meant to show different ways for inspiration. But to answer the more important question here, regarding the safe margin: I am using 10mm margin |
|
|
|
Post by jeffgeorge on Jun 11, 2017 11:17:16 GMT -9
It is an old file format used for CAD software etc. It basically is just another way of describing your lines as vectors (as opposed to bitmap or image files). When I am done with a model I delete everything except the cut and score lines and export these as DXF. I then import that into Studio Designer to create the single cut file pages. Another route is SVG as Designer is also capable of importing that but I am not sure if that is in the free standard version. OK, I see. Problem is, at the moment, my entire workflow at the moment is bitmap, no vectors. Without adding at least one step to the workflow, or totally reconceiving it, bitmaps is all I got. Maybe as I become more sophisticated, I'll move the appropriate parts of my process to a vector-based app, but for now, I have to go with what I know, and just try not to introduce unnecessary hassle for people interested in creating their own cutfiles. Thanks for all the guidance, everyone! |
|


 if you are worried about providing files that you cannot test yourself. I am toying with that idea for some time for other reasons, but fear the wrath of


 It's just meant to show different ways for inspiration.
