|
|
Post by dicingdangers on Sept 3, 2017 1:15:34 GMT -9
 This is my Dwarf adventurer. The second figure I have now designed and printed (I have a third on the way). A bit rough around the edges. I need to establish a base that I like. |
|
|
|
Post by migibb on Sept 3, 2017 1:37:35 GMT -9
Looks fantastic to me Nikolai! Both figures you have done so far have such character and would fit so well amongst the likes of okumarts and 8rad (and others!!) So looking forward to what else you come up with. As far as bases go there seems to be two (maybe three) main streams of thought. Most on here have a black tab beneath the feet which slots into a paper or plastic base (see the One Monk downloads for examples of the paper ones). Others, such as printableheroes, mirror the figure at the head and have a fold out base attached to the bottom. And then you have the funky slot-in bases designed by bravesirkevin.... You can find examples of each if you have a browse round the forum....  |
|
|
|
Post by jeffgeorge on Sept 3, 2017 9:07:42 GMT -9
He looks great! Would love to have him on my table! As for a base, the simplest version--for the creator, at least--is a 20mm x 4mm black rectangle attached at the feet, the way okumarts and many others do. As I recall, that's pretty much the standard for the Forum Hoards, as well. Here's an actual-size .png file of my paper-mini adaptation of the Card Hunter characters, which use this type of base, and shows how to set it up for accurate folding, gluing and trimming: 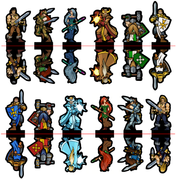 If I may make just one artistic suggestion: Try experimenting with varied line width. It looks like all the lines in your figure are close to the same width/weight. By varying the line width, you can really enhance the three-dimensionality of a line illustration, without having to do a lot of delicate shading. Generally, just make the outlines on the lower side of things a bit heavier than the lines on the upper side. You might be amazed at how much dimension this simple change adds to your line art. Or you may decide that it doesn't fit your personal style, and scrap it. But give it a try on a copy of your dwarf--you may like the results! |
|
|
|
Post by dicingdangers on Sept 3, 2017 12:53:30 GMT -9
Thanks for the feedback, both. That ragged edge on him is now driving me mad. I put him together in the wrong order and fudged it. I have played with variable line widths and you are right, I should probably do that more. The reason I don't is that I do a lot of drawing with a simple UNI Pin fine liner and that is fixed width and so I am used to that. Having said that, the paper minis I have made are vector files made in flash, so no reason not to try variable widths.
|
|
|
|
Post by pavaro on Sept 3, 2017 19:55:31 GMT -9
This is my Dwarf adventurer. The second figure I have now designed and printed (I have a third on the way). A bit rough around the edges. I need to establish a base that I like. Will you make a guide "how do you make a chain armour"? |
|
|
|
Post by dicingdangers on Sept 4, 2017 7:23:05 GMT -9
I might do a guide at some point. Thanks for asking. I will say that the whole dwarf is coloured by me except for the chain mail which is from a photo of real chain mail. |
|
|
|
Post by 8rad on Sept 4, 2017 9:23:26 GMT -9
Yer wee dwarf is looking really good, dont worry about the raggy bits without a cutter its always going to happen. Bases are tricky, I settled with a top folding mini. So the base at the bottom can fold out to its own base or glued together to slip in a plastic base. Good pose, good face & hair. Colour all works, not sure I like the perspective on the hands. I can see why, your wanting the hammer hand to pop more but at first glance the shield hand looks too small. But all in he looks tough as a Dwarf should and a really nice mini.
|
|


