|
|
Post by squirmydad on Sept 26, 2018 18:46:36 GMT -9
Some iron fences for your house, I haven't test-built them yet, and I need to make a corner-post for stability. 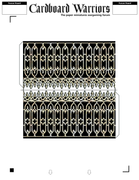 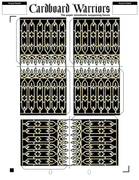 |
|
|
|
Post by Vermin King on Sept 27, 2018 3:54:52 GMT -9
Are you thinking brick or iron or stone?
|
|
|
|
Post by squirmydad on Sept 27, 2018 5:37:49 GMT -9
Are you thinking brick or iron or stone? For the corner posts? Probably iron. Some short ones for corners and taller ones to use as gate posts. |
|
|
|
Post by Vermin King on Sept 27, 2018 6:02:19 GMT -9
I like that pattern you used EDIT-- Built the delivery van to prepare myself for modifying the Flivvers to being a hearse. 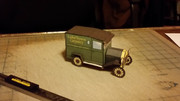 Knowing that I was going to be modifying the front end, lowering and narrowing, but making it slightly longer, I revised the attachment of the front fender, which was unnecessary. Going to switch that back kinda. Instead of having the tab that glues onto the hood side, it will glue underneath. I'm very happy with the curled over front of the roof.  |
|
|
|
Post by Vermin King on Sept 28, 2018 7:02:54 GMT -9
|
|
|
|
Post by Vermin King on Sept 28, 2018 17:02:19 GMT -9
Still a couple days to go
|
|
|
|
Post by yifferman on Sept 29, 2018 4:49:02 GMT -9
this is pacific halloween war XD
|
|
|
|
Post by cowboyleland on Sept 29, 2018 5:22:03 GMT -9
Are you thinking brick or iron or stone? For the corner posts? Probably iron. Some short ones for corners and taller ones to use as gate posts. I would think stone would match the house and give a good excuse for a wide solid base. Maybe even the bottom two feet of fence could be stone. Just spit ballin' |
|
|
|
Post by Vermin King on Sept 29, 2018 8:56:22 GMT -9
When you look at iron fences on the net, all three are seen. Ravensblight tends towards stone bases. Haunted Dimensions towards brick posts. Iron posts seem to be overlooked. On the funeral parlor, I actually took iron posts from a cemetery photo to use as the posts for the awning.
BTW, I'm building the hopefully final version of the hearse, taking photos of my build process to use for an instruction sheet.
|
|
|
|
Post by cowboyleland on Sept 29, 2018 12:17:34 GMT -9
As a matter of fact I have been working on something this month. It is a pop-up bullette. I just built version 2.1 and I would like to do a few more tweaks. I will also have to write some instructions. Do we want this in this Hoard or should I just share it in my projects?
The build isn't arduous but the tweaks means it won't come until late tonight or maybe tomorrow evening (I have plans in the day.)
|
|
|
|
Post by Vermin King on Sept 29, 2018 14:26:27 GMT -9
I think we are still waiting on fence posts...
EDIT --
Finished up the final build of the hearse. Need to work the photos into a build order.
Printing up the final version of the haunted house. Should be able to knock it out tonight and tomorrow
|
|
|
|
Post by cowboyleland on Sept 29, 2018 17:20:47 GMT -9
Here is the Bulette, in case we want it: 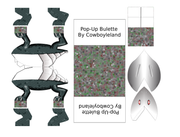 Instructions to follow. |
|
|
|
Post by cowboyleland on Sept 29, 2018 17:25:59 GMT -9
Pop Up Bulette Instructions
1. Score all dotted lines
2. Cut out all parts
3. Put them together.
Done! That was easy. . . Wha? Oh, alright.
|
|
|
|
Post by Vermin King on Sept 29, 2018 17:35:16 GMT -9
I might need a little more info ... Here's my build order on the hearse 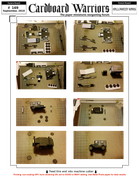 |
|
|
|
Post by cowboyleland on Sept 29, 2018 18:08:21 GMT -9
Pop Up Bulette Instructions
1. Score all dotted lines
2. Cut out all parts
3. (Optional) Cut out two pieces of thick (i.e. cereal box) cardboard a hair under 1.5” x 3”
4. (Optional) Glue the thick pieces of cardboard on the bottom of the base.
5. Fold the label/tabs underneath the base.
6. Crease the base both ways (mountain and valley) along the score line and set aside.
7. Put glue on one of the unshaded, unhighlighted scale texture pieces and align it with the matching leg. There will be a little overhang on all sides except the bottom, at the tab crease.
8. Repeat step 7 with the other legs.
9. Cut away the excess paper on the legs from the top/front.
10. Edge the legs, belly, chin and tail with a black marker.
11. Grey is best to edge the “camo” tabs on the feet.
12. Fold the front tabs against the body, put glue on them and press the two halves together.
13. Repeat step 11 for the tail.
14. Fold the dorsal fin section (no eyes) in half before gluing it to the body in line with central front slope.
15. Glue the head to the top of the dorsal fin.
16. Fold the central support along it's crease and glue it together in the middle “camo” section.
17. Edge the “camo” bits with grey.
18. Put glue on each of the white end tabs and glue them to the inside of the body just behind the front legs.
19. Put glue on the “camo” tabs. Making sure the feet are not hanging over the base, glue the “camo” tabs to each side of the central crease on the base.
20. Put glue on the front and back leg tab of one side of the model and press them in place by folding the base shut.
21. Repeat step 18 with the other side.
22. Flatten the base and the Bulette should stand up. You may need to reach in and adjust the top tabs of the central pillar. When you do, it should open and close in the future with no problem.
|
|
|
|
Post by Vermin King on Sept 30, 2018 9:08:56 GMT -9
Getting ready to build the Hoard Haunted House. The 95% one with enhanced windows. Partly because for the Hoard promo photo, I should have the submission, not a test build. The other part is that '95%' refers to the linear scaling. For printed area, that means 90% of the originals area. When built, we must consider volume, 85.7%. Curiosity of how that compares to the original helps make this less of a 'wasted effort' project.
Since I did a better-than-usual job of numbering on this, I feel like I'd be insulting folks with instructions. Just a few things to remember.
1. Build parts in order.
2. The red dot on part 2-1 goes to the front.
3. Use a marker to blacken the back of part 5.
|
|
|
|
Post by squirmydad on Sept 30, 2018 9:11:35 GMT -9
|
|
|
|
Post by Vermin King on Sept 30, 2018 17:22:44 GMT -9
Not that big a difference. Final house and hearse on left 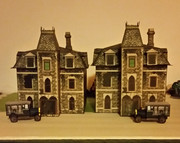 |
|
|
|
Post by Vermin King on Oct 1, 2018 4:06:58 GMT -9
Got the Haunted House 'instructions' put on file ' 2 Roof p1'
Made a Bulette instruction page and a fence instruction page
Do we have anything else coming for the Hoard?
|
|
|
|
Post by cowboyleland on Oct 1, 2018 5:05:03 GMT -9
BTW Feel free to alter the instructions if you find a better way.
Also the tail tabs ended up on one side of the model and the "neck" tabs on the other. Does that matter? Should future models have them on the same side? I have seen/built at least one model where the design had the tabs alternating (left side-right side) all the way down the seam. Is that better?
|
|
|
|
Post by Vermin King on Oct 1, 2018 6:33:47 GMT -9
I was doing production stuff on the Hoard after I finished the final build of the Haunted House, so haven't built it yet.
Alternating tabs is something that gets debated every so often. I personally think it depends on the model. And if you are good at burnishing.
Alternating tabs yields a zipper-like appearance if you do not burnish. Burnishing is another topic, but alternating tabs yields a very ugly result unless you burnish. Most cases of using alternating tabs seems to be on domes, church domes or the front ends of airplanes. Generally, if one thinks alternating will give a better, more rounded result, you would be better off using join strips underneath, butt-joining the actual pieces.
Short answer -- this wouldn't be a good candidate for alternating tabs
|
|
|
|
Post by Vermin King on Oct 1, 2018 11:59:55 GMT -9
cowboyleland, I need help with the Bulette. The central column. Any photos?
|
|
|
|
Post by cowboyleland on Oct 1, 2018 16:36:27 GMT -9
I don't think a photo of the finished model will help. Does this mock-up tell the story? 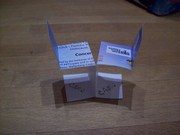 Of course, it should actually be glued, but this way might be a better illustration of how the part works. |
|
|
|
Post by Vermin King on Oct 1, 2018 16:54:32 GMT -9
Helps a bit. I just am fuzzy on step 14 on.
14. Is the dorsal fin solidly glued to the body or loosely? If loosely, at the front, in the middle?
15. Does the head get creased? I think so, but not sure.
16. and forward. Not sure where everything is glued to the base, etc.
EDIT--
I went with a semi-solid glue of the fin and a soft crease on the head. But I don't want to mess anything up at this point.
And went ahead and got the fencing cut out and glued to dry under weight overnight. Tomorrow, I should finish up the Bulette and fencing (still have to cut out the decoration at the top.
Finished photos open and closed would be helpful
|
|
|
|
Post by cowboyleland on Oct 2, 2018 6:21:56 GMT -9
I went with a hard crease of both the fin and the head. The fin is glued solidly to the body, but not to itself. The part of the fin that sticks above the body is not glued. The tricky thing about gluing to the base is that if you want it to close it has to find it's "natural position." That is why you glue the central pillar first. The pillar is aligned with the central crease of the base. (Check that the feet are going to end up on the base) then put glue on the left side foot tabs and fold up the left half of the base to meet them. Then put glue on the right foot tabs and fold up the right half of the base to meet them. 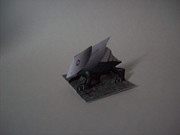 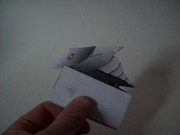 Sorry, I thought I had posted WIP photos somewhere on the forum. But I guess not. |
|
|
|
Post by Vermin King on Oct 2, 2018 6:38:49 GMT -9
Thank you. Here's where I left off last night 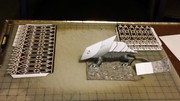 |
|
|
|
Post by Vermin King on Oct 2, 2018 9:12:15 GMT -9
Over lunch I made some fence posts to go with the haunted house. Optional cap piece 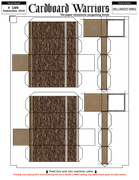 |
|
|
|
Post by Vermin King on Oct 2, 2018 15:57:22 GMT -9
I have an idea for simplifying the instructions of gluing the bulette feet to the base. Paperclipping the feet to the base, it seems to allow the action to work properly (except I would recommend reinforcing the 'spreaders' of the central post.  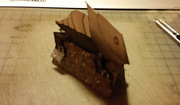 On my build, the center post tabs line up and are glued along the back edge of the front legs. As I was trying to decide where to glue the left feet, I paperclipped the feet on the left side to test the mechanism. While it was clipped, I had a brain storm, hopefully the good kind. Before I glue it, I was wanting cowboyleland's opinion. The second photo shows the idea. Folding the base downward, and allowing the feet to naturally hang, this seems to be the logical position to glue the foot tabs. Will it work? Am I bonkers? It sure looks like it should work. EDIT-- Or I'm an idiot. After removing the paperclips, I was looking to figure out how to reinforce the spreaders after being glued into the bulette, and all of a sudden, the instructions made sense to me. I'll take a photo, after I reinforce the spreaders. Hopefully tonight still |
|
|
|
Post by cowboyleland on Oct 2, 2018 19:05:37 GMT -9
He looks great so far Vermin King.I don't think you are an idiot! You glued him together a little differently than I did, but I think it looks just as good. Maybe better. |
|
|
|
Post by squirmydad on Oct 2, 2018 20:05:12 GMT -9
I think these will work for end caps, junctions, corner-posts; 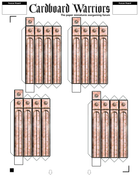 The long vertical line on each side is a cleverly disguised cutting guide. Cut a slit on the line and insert a fence tab inside. If you wait to close the top of the post box then you can reach inside with a pencil or dowel to press the tab flat inside for glueing. I'll post build pics tomorrow. |
|