|
|
Post by Vermin King on Dec 3, 2015 21:06:49 GMT -9
I find myself wanting to collect various elements to use in various buildings: wall patterns, windows, doors, etc.
I think if I could have collections of these elements on a transparent background, it would be easier to copy/paste them in and then manipulate the images.
When I played around putting nose-art, etc. on Sci-Fi vehicles, I would paste the image into a transparent field and fine tune it, but when I save or export the image, the transparency disappeared. I don't want to have to do all of the manipulation on every image every time. If I could start a file of images that I can just use the rectangle select tool, overlapping the transparent portion, I could do better work with much less effort.
My efforts of trying to phrase my search in the Gimp help and on the internet turned up lots of things that are of little or no help.
And I know this shouldn't be hard to do.
Any help would help me keep what little hair that I have left. Thanks
|
|
|
|
Post by bravesirkevin on Dec 3, 2015 21:39:52 GMT -9
For flat art, you may be able to save the image as a transparent PNG.
|
|
|
|
Post by bluecloud2k2 on Dec 4, 2015 4:25:31 GMT -9
I think you mean export the image.
Not sure if gimp will save as a png.
|
|
|
|
Post by Vermin King on Dec 4, 2015 5:05:13 GMT -9
Yes, Gimp will save as a png.
But my question is how do I set a background (all the white) as transparent?
I would think that this should be super easy. Use the fuzzy select, click on the white surround, then do some magical incantation to set it as transparent, but I don't know what the incantation is.
Maybe if I just saved the Gimp file without turning it into a jpg, png or pdf to save it...
|
|
|
|
Post by mproteau (Paper Realms) on Dec 4, 2015 6:15:48 GMT -9
Here's the thing. When you create an image in GIMP, it might be defaulting to making a layer with no alpha channel. If the name of your layer in GIMP appears in bold text, it has no alpha channel. Right-click on the layer and select Add Alpha Channel. Now, if you delete stuff from that layer, you'll be left with a transparent area. So, your magical incantation to make a selected area transparent would be "press the delete key"  |
|
|
|
Post by mproteau (Paper Realms) on Dec 4, 2015 6:19:08 GMT -9
Yes, Gimp will save as a png. is right, though. The term "save" in GIMP means "save a GIMP xcf file". The term "export" means "save the image out to another format, like jpg or png or whatever". So, yeah - in plain English, you just want to "save a png file" but in technical GIMP terminology, you "export a png file". |
|
|
|
Post by Vermin King on Dec 4, 2015 6:57:48 GMT -9
Right, but going back to the original question about setting the surrounding white to transparent...
|
|
|
|
Post by mproteau (Paper Realms) on Dec 4, 2015 7:06:21 GMT -9
Sorry - I thought you had that all set... One strategy is to use the fuzzy select tool or the color select tool to select the white area, then hit the delete key to remove the white and be left with transparency. If your layer has an alpha channel, you'll get what you want. If you're not getting what you want, feel free to hit me up on Steam or AIM chat (I'm mproteau in both places) and we can quickly figure out where the disconnect is.
|
|
|
|
Post by lightning on Dec 4, 2015 8:12:36 GMT -9
i am not sure if you are aware of this, so just to make sure ...
within gimp you can work with layer masks which control the transparency of the drawing part of a layer. so if you right click in the layers window and "add layer mask" you will get a second level on which to paint.
it is represented by a second square in the layer window and if you want to see and manipulate it you can right click in the layers window and select "show layer mask". the meaning of this layer mask is that you can paint on it only in black and white (and grey in between) and everything that is black is 100% transparent or invisible in the original content of the layer. everything that is white is 0% transparent or fully visible. and grey colors would mean partly transparent.
one example: you want to make a window element. you would draw the window on a white layer. then you create a layer mask for that layer and make it white. then you paint everything black that is not the window. voila!
things to watch out. make sure you are drawing on the right layer part. in the layer window you can click either on the "content" square or the "mask" square which then becomes highlighted (barley seeable). or else you will ruin your window with strange black and white art. thank god for undo :-)
with using this and then exporting to png (or any other format that supports transparency) or staying within the native xcf format you can then reuse parts you created for a "library" of parts. just make sure that if you have an opaque background layer in gimp to turn it off.
hope this helps
|
|
|
|
Post by hackbarth on Dec 4, 2015 9:53:55 GMT -9
Yes, Gimp will save as a png. But my question is how do I set a background (all the white) as transparent? I would think that this should be super easy. Use the fuzzy select, click on the white surround, then do some magical incantation to set it as transparent, but I don't know what the incantation is. Maybe if I just saved the Gimp file without turning it into a jpg, png or pdf to save it... The Incantation is: Layer > Tranparency > Color to Alpha Select the color to be made transparent Done. |
|
|
|
Post by mproteau (Paper Realms) on Dec 4, 2015 10:02:09 GMT -9
The Incantation is: Layer > Tranparency > Color to Alpha Select the color to be made transparent Done. That can be extremely bad for images, though. It's not just going to remove the "background" area, but any of that color inside your textured area. I think the fuzzy select is the safest way to go. Layer masks are a GREAT tool to familiarize yourself with, but I think overkill for this sort of thing. |
|
|
|
Post by hackbarth on Dec 4, 2015 10:04:00 GMT -9
The Hackbarth Tutorial for transparency: So you have a piece of terrain or other image you want to modify, say, put a door on this D&D 3D folio tavern: 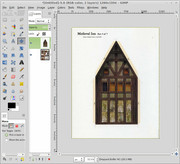 But, alas, the door has this horrendous white background around it! 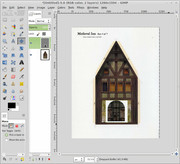 Don't fret! Select the white background with the Magic Wand tool! But the Magic Wand isn't sufficient! you need just a little more of selection, so you go to Select > Grow and ask to Grow Selection by one or more pixels! 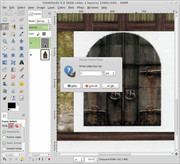 Now you selected ALL the white background a and a little bit of the piece you want to glue. Good, that will make a smooth transition. Now Go to Layer > Transparency > Color to Alpha and select the color of the background to make it transparent!  Now you have a texture that you can seamlessly glue over any other: 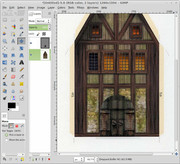 |
|
|
|
Post by Vermin King on Dec 4, 2015 10:07:19 GMT -9
Thank you. My goal as Chris mentioned is creating a library of elements that can easily be placed onto a model template. I think my issue may be what Chris refers to as 'an opaque background layer'. I can get transparent areas that I move images into so that I can further clean up edges and manipulate the textures, but when I export or save the file, I've got the white background again.
When I was doing nose-art, I found a couple images on the internet, that I think were jpg's that are transparent for the surrounding area. That's what I'm wanting to do with my 'library'. I'll have to see more about saving/exporting files with transparent backgrounds
|
|
|
|
Post by mproteau (Paper Realms) on Dec 4, 2015 10:27:11 GMT -9
JPG won't persist transparency. I'd advocate for PNG files, though GIFs will keep your alpha channel as well. It's cool to see that there are multiple ways of doing roughly the same thing. The method hackbarth uses I think works great for solid color backgrounds. Is that true hackbarth ? I'm often pulling bits out of a photo, and I don't think this technique would work well. It's a handy technique to have, and does a great job of leaving the anti-aliased edges intact. My 'just hit the delete key' simple strategy works fine for lots of things, but depending on what you're doing, it may lose some of the edge of what you're trying to retain. One great thing about layer masks (to counter my 'overkill' comment) is that it's a lot easier to make mistakes and correct them. If you're just erasing an area, you'll have to undo that to get it back. With a layer mask, you can make an 'oopsie' and either undo it, or simply paint the inverse color onto the layer mask. When you're trying to pull complex shapes apart, or really blend textures together, this can be a HUGE help. Here's the thing. When you create an image in GIMP, it might be defaulting to making a layer with no alpha channel. If the name of your layer in GIMP appears in bold text, it has no alpha channel. Right-click on the layer and select Add Alpha Channel. Now, if you delete stuff from that layer, you'll be left with a transparent area. Regarding having an "an opaque background layer" - that's what I was referring to here. If the layer appears with a bold label, it doesn't have an alpha channel, so you can't have transparent pixels on that layer. The method hackbarth describes will automatically add an alpha channel for you. What I described was to let you know how to easily tell if your layer lacks an alpha channel and how to add one explicitly. |
|
|
|
Post by hackbarth on Dec 4, 2015 10:27:17 GMT -9
Thank you. My goal as Chris mentioned is creating a library of elements that can easily be placed onto a model template. I think my issue may be what Chris refers to as 'an opaque background layer'. I can get transparent areas that I move images into so that I can further clean up edges and manipulate the textures, but when I export or save the file, I've got the white background again. When I was doing nose-art, I found a couple images on the internet, that I think were jpg's that are transparent for the surrounding area. That's what I'm wanting to do with my 'library'. I'll have to see more about saving/exporting files with transparent backgrounds JPG doesn't have transparency. You need to export anything that you work with transparency as PNGs. File > Export to Choose PNG or simply rename the file.jpg to file.png Done. The PNG file should open with the transparent background, heck, even the icon of the file should appear as transparent. |
|
|
|
Post by Vermin King on Dec 4, 2015 17:28:14 GMT -9
That worked very well, indeed. Thank you all for the help.
But for now, it's off to the library!
|
|
|
|
Post by Punkrabbitt on Aug 11, 2016 17:32:44 GMT -9
I logged on to ask about this very thing, and here we have a discussion from years ago stickied at the top for me!
Thank you, gang!
|
|
|
|
Post by Vermin King on Aug 12, 2016 2:53:25 GMT -9
Glad to help. It sure helped me
|
|
|
|
Post by grendelsmother64 on Aug 12, 2016 12:41:48 GMT -9
I don't know if this was mentioned in the thread, but here's something I learned the hard way: JPGs use a form of compression that "fudges" the details to make a smaller file. If you work in JPGs, every time you save, you get a little bit blurrier image. I was working on an image...a long time ago...where I was adding fine detail to different parts of the picture. It was really time consuming. But whenever I was happy with one section, I'd zoom back in on one I had finished earlier to find that all that detail had turned to mush. Lesson learned...? Work in BMP or PNG....make your LAST save as a JPG. GM64 |
|
|
|
Post by mproteau (Paper Realms) on Aug 12, 2016 17:54:17 GMT -9
Gimp saves to xcf format and that won't lose any quality. You don't "save" to png or jpg, you "export" to those formats. I remember when they changed the terminology in the UI in order to draw the distinction. Always keep your xcf files around so you have your originals complete with layers and what not.
|
|


