


Post by tonsha on Oct 23, 2011 11:44:31 GMT -9
Here's how to re-colour my GIMP & Photoshop files to produce your own customised forces.
This example uses the ZOA Sentries, but I intend it to still work for any future armies as well.
I will be using the GIMP file (.xcf) in GIMP for this tutorial. The same instructions should be the same for the photoshop file (.psd) with a couple of minor adjustments.
To start with - take a backup of the original file! If you do make any mistakes, you can always start again.
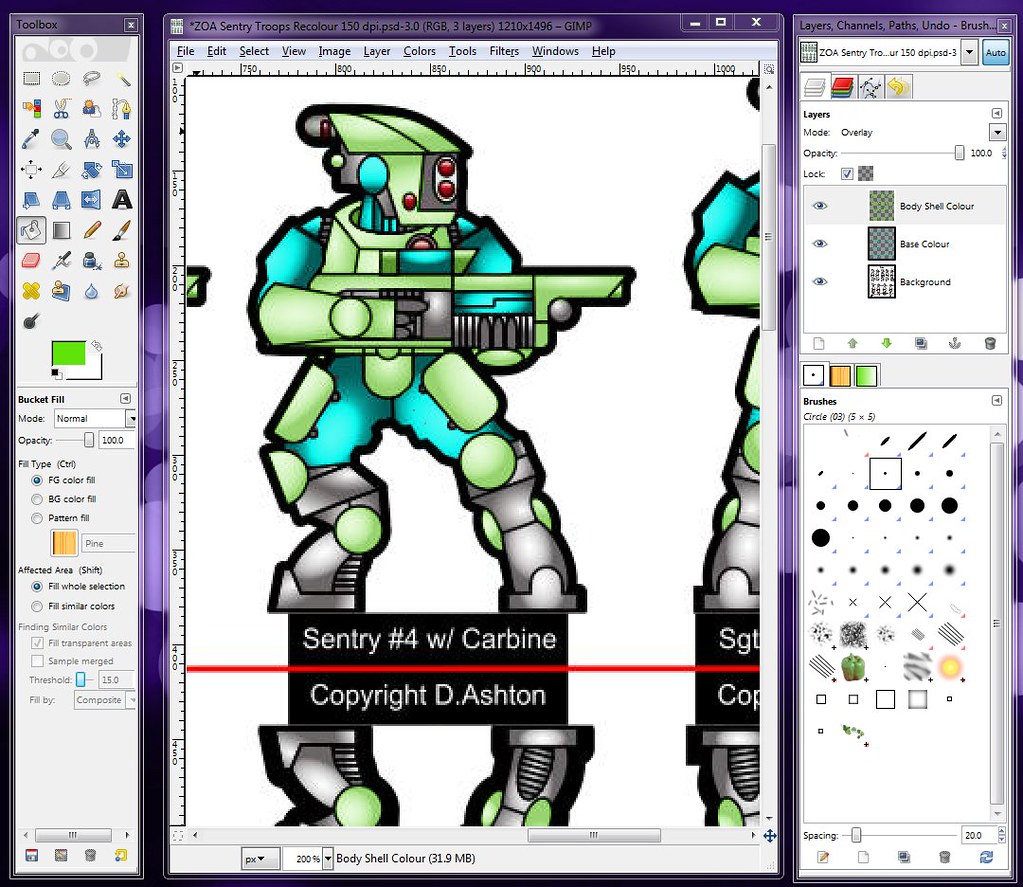
Once you’ve got the file backed up - open up the original. You should see something like this (I zoomed in by the way):
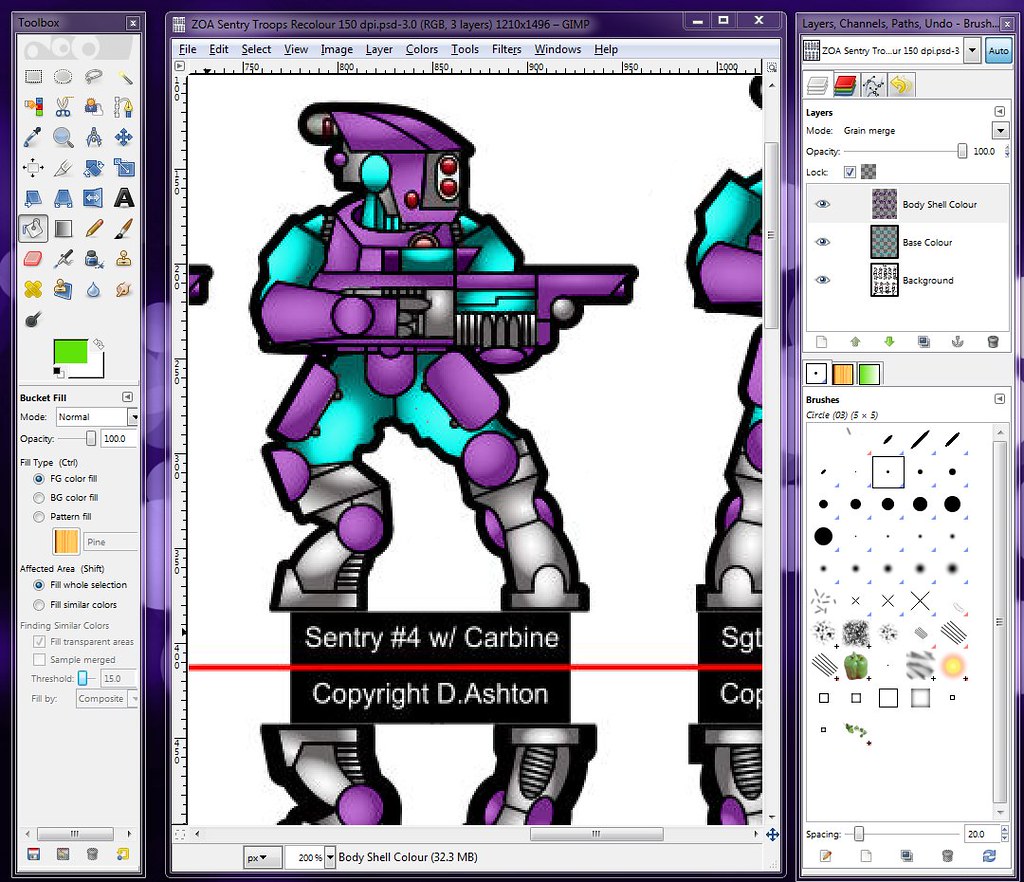
Right away, you will note a couple of things:
(Note: The Photoshop file will look slightly different to this because the Photoshop export in GIMP doesn’t support ‘Grain merge’ - so I set the mode to ‘Overlay’ instead)
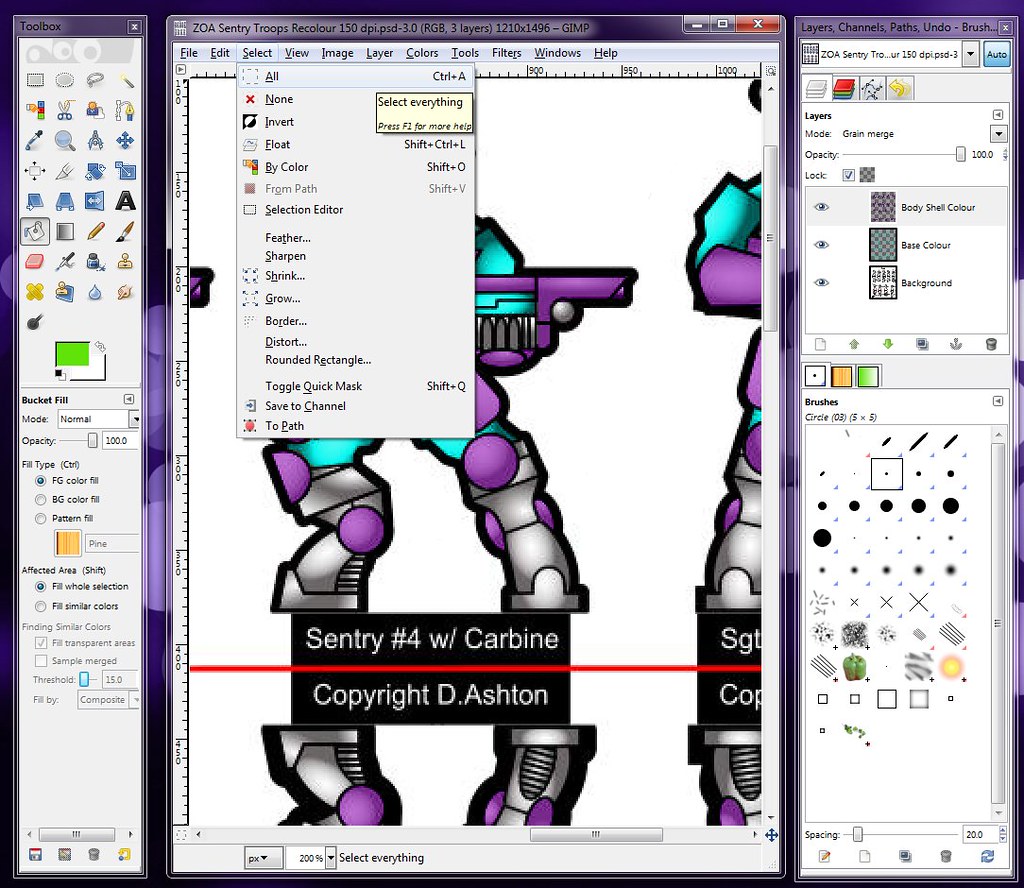
We are going to re-colour the Body Shell layer. From the Select menu, we are going to select the entire layer:
I’ve already selected a new colour (Lime Green), so we now select the ‘bucket fill’ tool (The one that looks like a bucket) and click on the image:
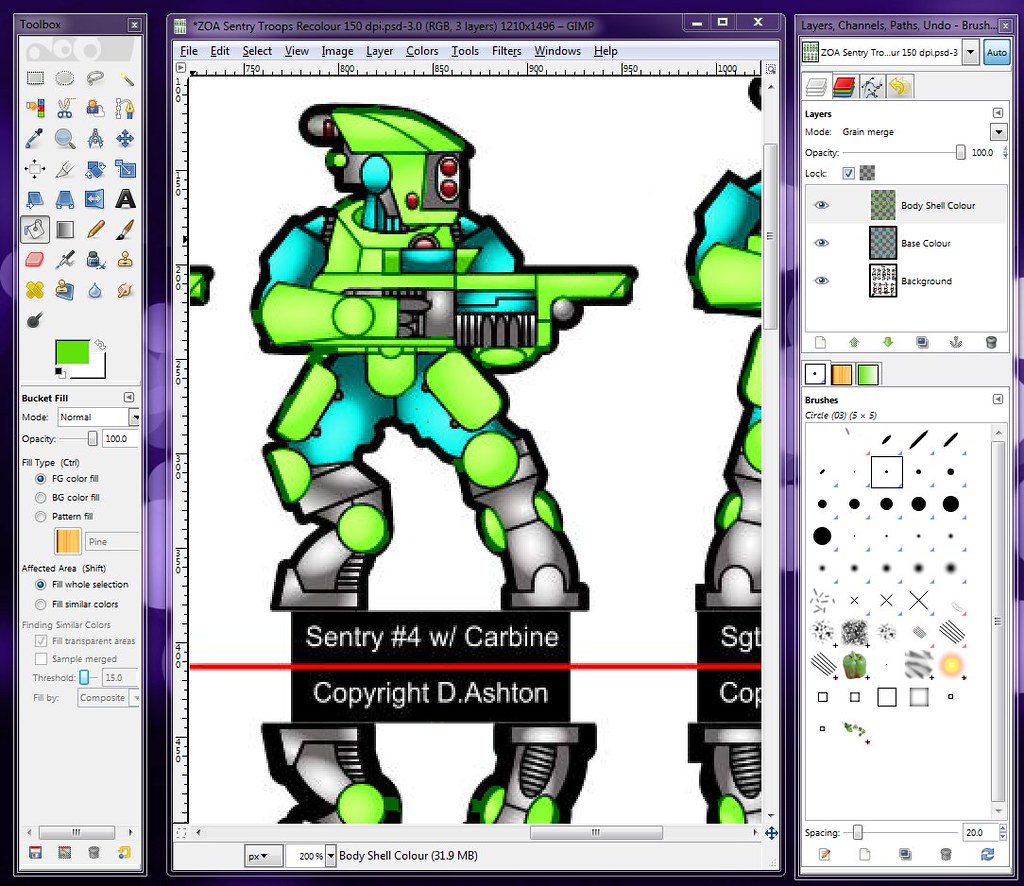
You can see that the body shells on all the figures have turned green!
But it doesn’t look so good. I’ll adjust the mode on the layer to see if I can get a better effect:
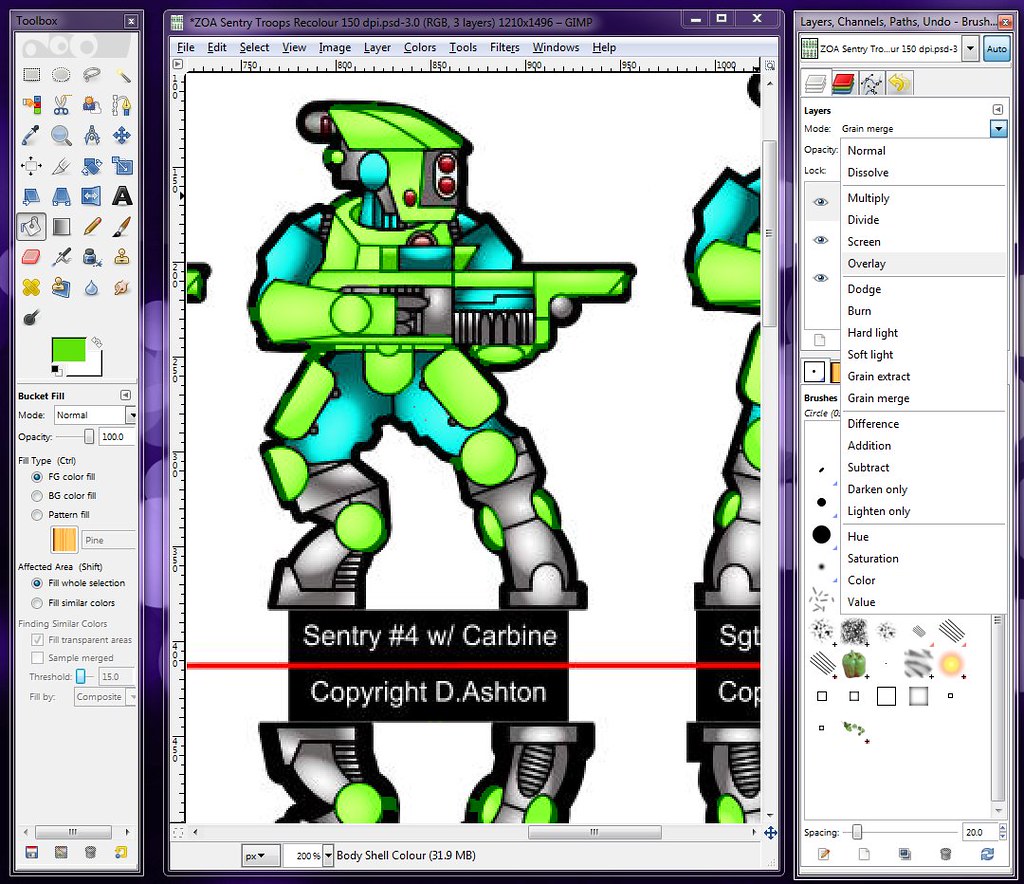
You can see that there are a number of options available. Depending on whether you are using GIMP or Photoshop, you may want to try them all. They can have subtlety different effects on the image depending on which image app you are using.
I’m going to try ‘Overlay’:
Well, it’s not as bright as it was, but the shading is better and there isn’t any colour bleed on the black outline. I’ll stick with that.
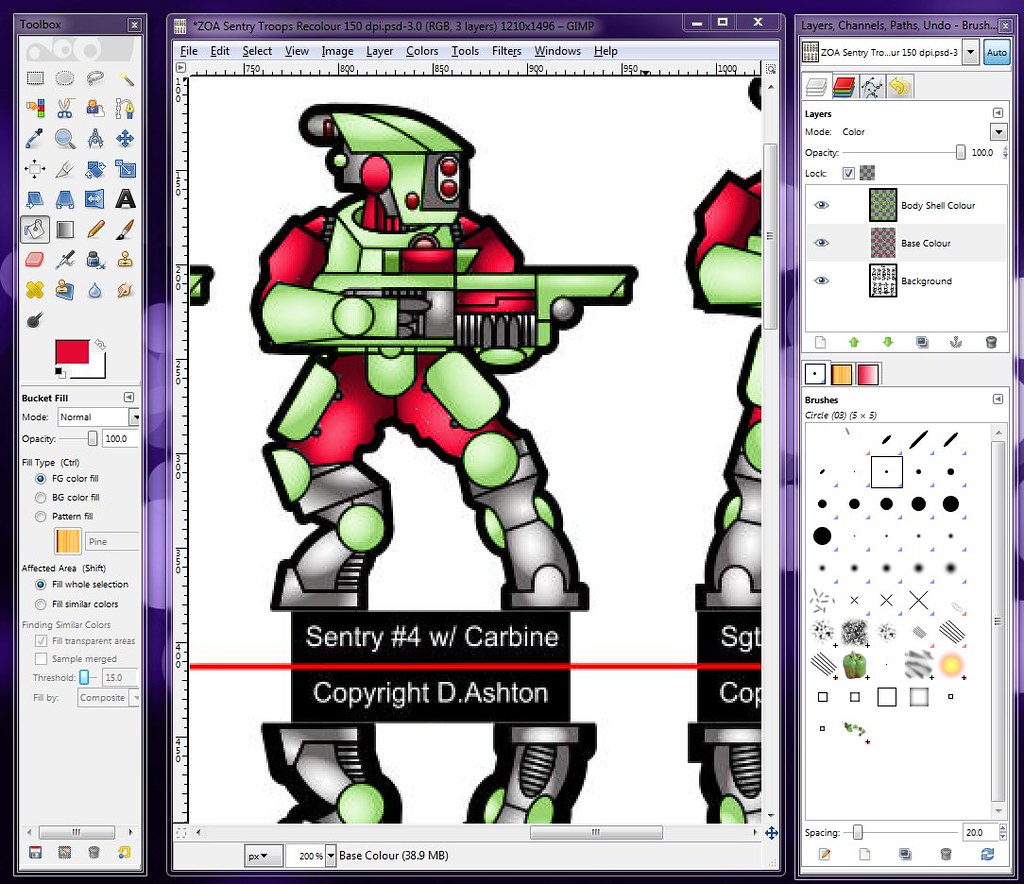
We can do the same thing on the Base Colour layer. Here’s how:
And we end up with:
Strawberry-Mint! Cool!
Now all we need to do is save the image as a Jpeg, and you’ve got a customised ZOA force.
You can then re-colour the layers again and make ANOTHER customised force.
And then DO IT AGAIN!!!
THE POSSIBILITIIES ARE ENDLESS!!!!
(OK. I’ll calm down now...)
As a final note: The actual colour layers are pretty crude. Here’s what the image looks like if I set the mode to ‘Normal’ on the colour layers:
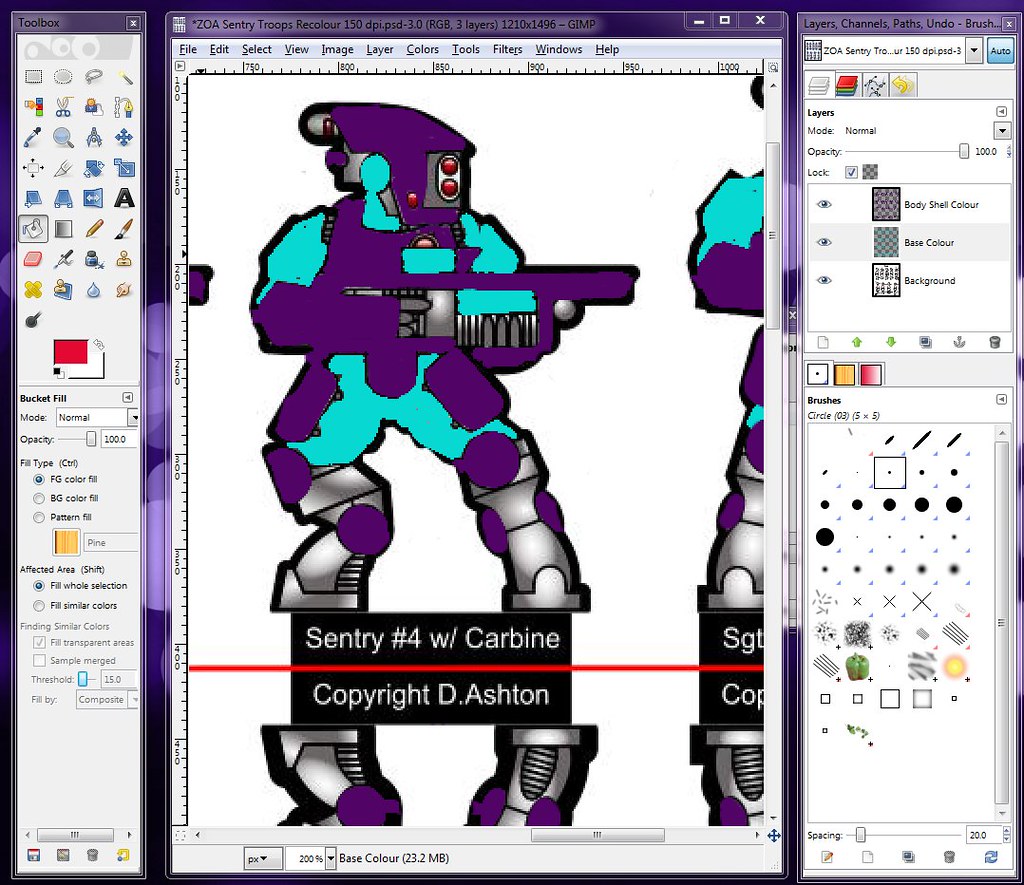
See what I mean about crude?
Starting from a greyscale base image, I simply created 2 blank transparent layers, and then painted the colours onto the transparent layers using the GIMP paint brushes. All the magic is done by the layer modes.
TA-DAAAAH!!
This example uses the ZOA Sentries, but I intend it to still work for any future armies as well.
I will be using the GIMP file (.xcf) in GIMP for this tutorial. The same instructions should be the same for the photoshop file (.psd) with a couple of minor adjustments.
To start with - take a backup of the original file! If you do make any mistakes, you can always start again.
Once you’ve got the file backed up - open up the original. You should see something like this (I zoomed in by the way):
Right away, you will note a couple of things:
- There are three layers: Background, Base Colour (cyan blue) and Body Shell Colour (Purple).
- The Body Shell Colour is currently selected and the mode is ‘Grain Merge’
- The Opacity is 100% on the Body Shell layer and has been ‘Locked’. This means that you cannot paint on the transparent areas of this layer. Incidentally, the Base Colour layer has also been locked.
(Note: The Photoshop file will look slightly different to this because the Photoshop export in GIMP doesn’t support ‘Grain merge’ - so I set the mode to ‘Overlay’ instead)
We are going to re-colour the Body Shell layer. From the Select menu, we are going to select the entire layer:
I’ve already selected a new colour (Lime Green), so we now select the ‘bucket fill’ tool (The one that looks like a bucket) and click on the image:
You can see that the body shells on all the figures have turned green!
But it doesn’t look so good. I’ll adjust the mode on the layer to see if I can get a better effect:
You can see that there are a number of options available. Depending on whether you are using GIMP or Photoshop, you may want to try them all. They can have subtlety different effects on the image depending on which image app you are using.
I’m going to try ‘Overlay’:
Well, it’s not as bright as it was, but the shading is better and there isn’t any colour bleed on the black outline. I’ll stick with that.
We can do the same thing on the Base Colour layer. Here’s how:
- Click on the Base Colour layer in the Layers dialog
- Select ‘All’ from the ‘Select’ menu
- Choose a different colour
- Use the Bucket Fill tool to colour the layer
- Play with the layer mode to get a nice effect
And we end up with:
Strawberry-Mint! Cool!
Now all we need to do is save the image as a Jpeg, and you’ve got a customised ZOA force.
You can then re-colour the layers again and make ANOTHER customised force.
And then DO IT AGAIN!!!
THE POSSIBILITIIES ARE ENDLESS!!!!
(OK. I’ll calm down now...)
As a final note: The actual colour layers are pretty crude. Here’s what the image looks like if I set the mode to ‘Normal’ on the colour layers:
See what I mean about crude?
Starting from a greyscale base image, I simply created 2 blank transparent layers, and then painted the colours onto the transparent layers using the GIMP paint brushes. All the magic is done by the layer modes.
TA-DAAAAH!!

