|
|
Post by oldschooldm on May 3, 2013 23:00:53 GMT -9
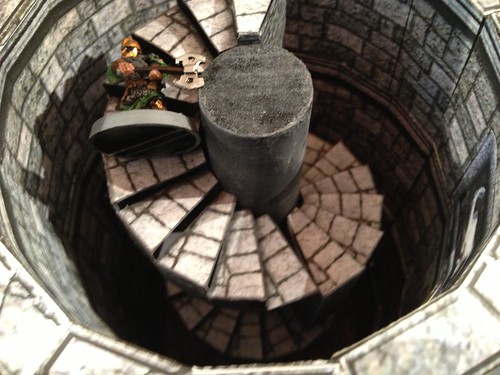
I've got a bug in my craw to build an 8" tall spiral staircase as a playable prop. I'm going to stack-up the tight spiral staircase in Kev's Luxurious Lair: Council Chamber. Here's some pix of the techniques I'm playing with... 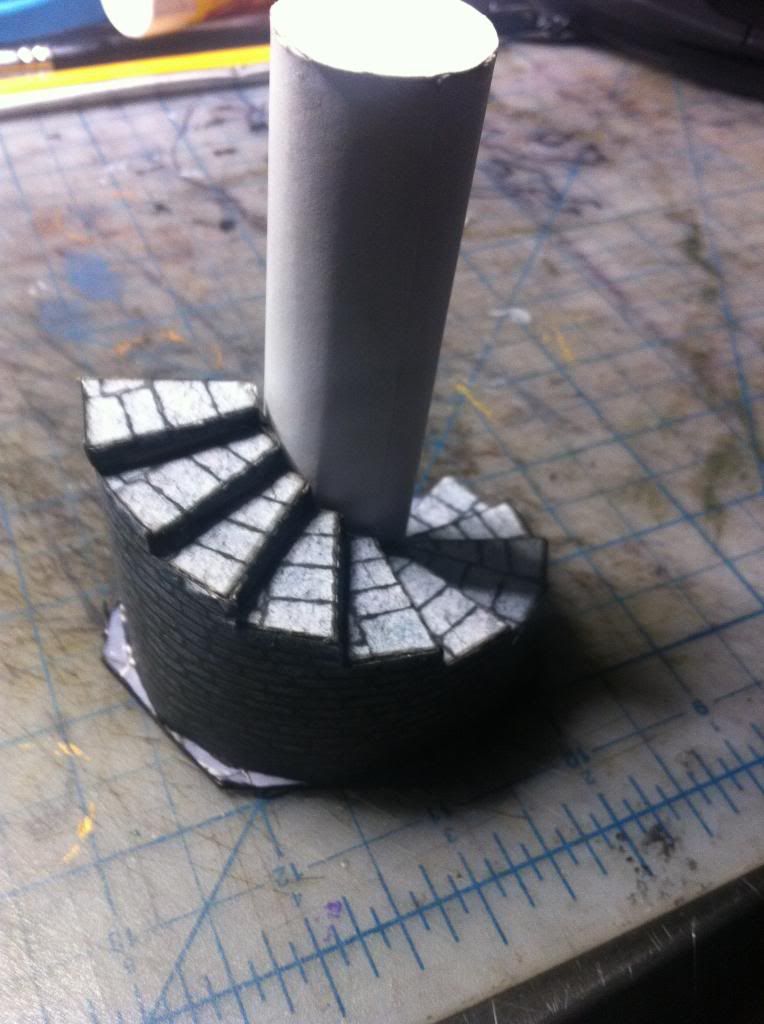 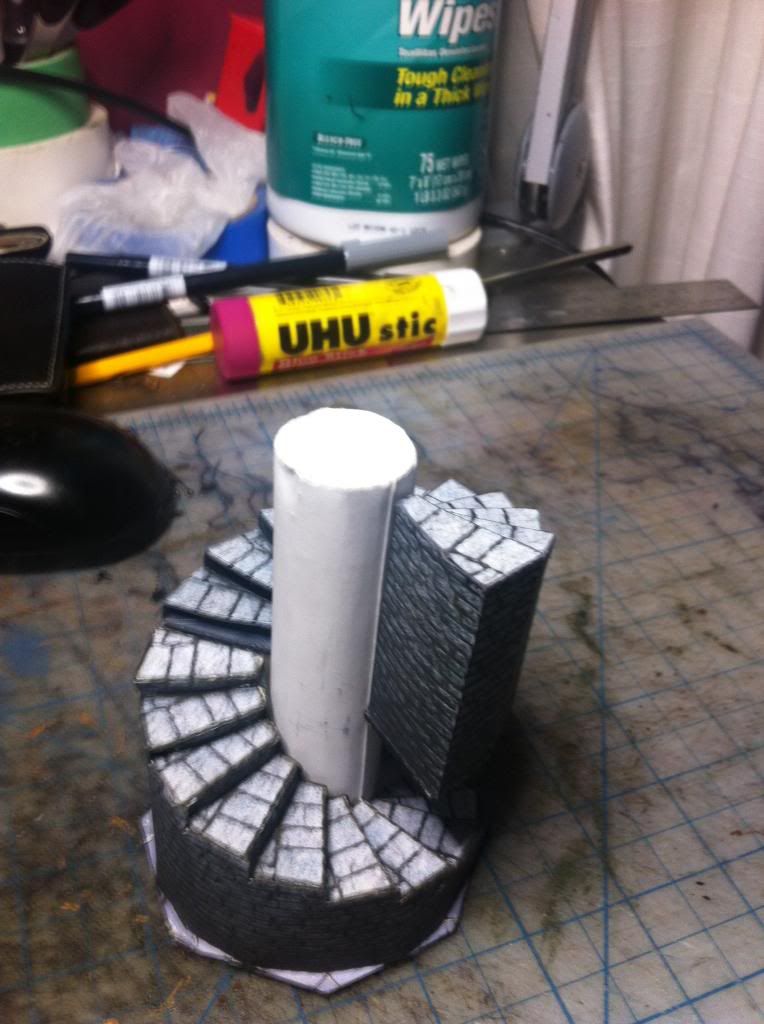 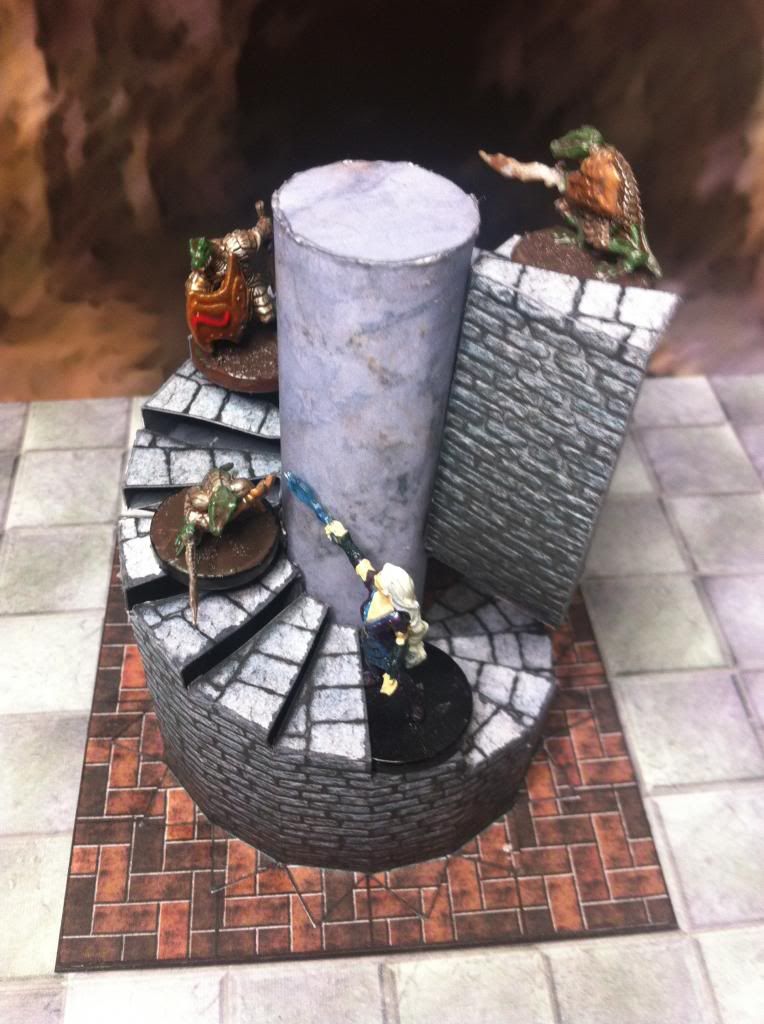 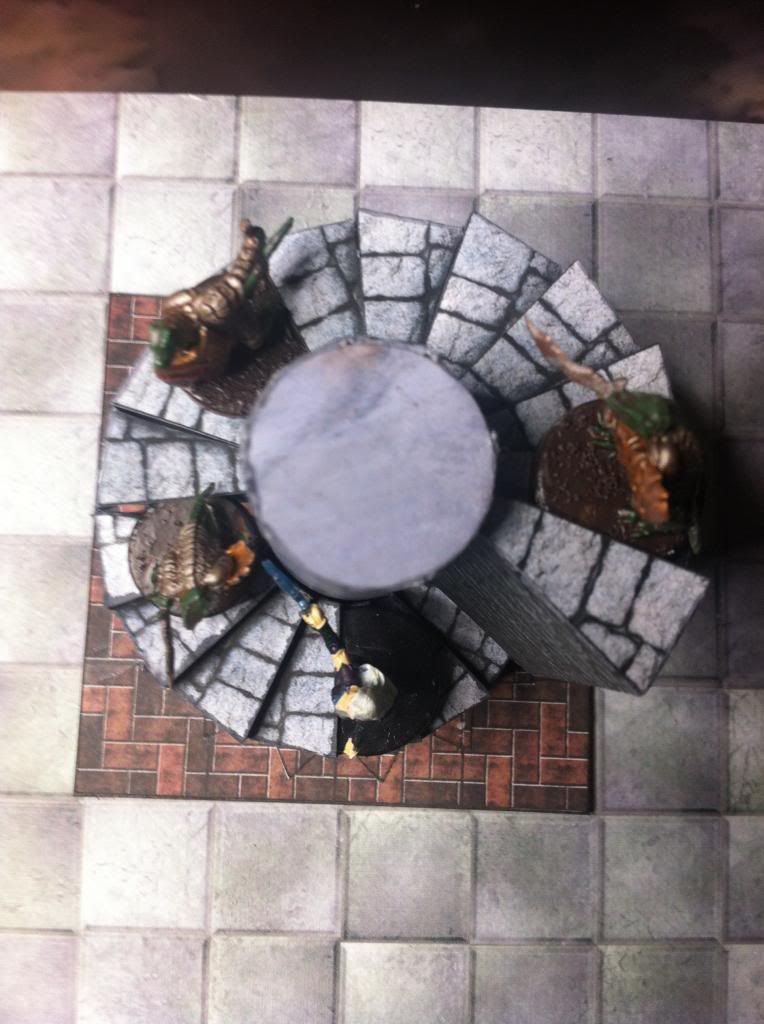 Paper is strong enough for a 4" high pillar and staircase - (the PDF is attached. Ask if you want the trivial cutfile (I hate cutting 1" circles... I want TALLER! I need something stronger and more substantial for support... so I went to OSH and got a 1" dowel and went to town with a chopsaw. 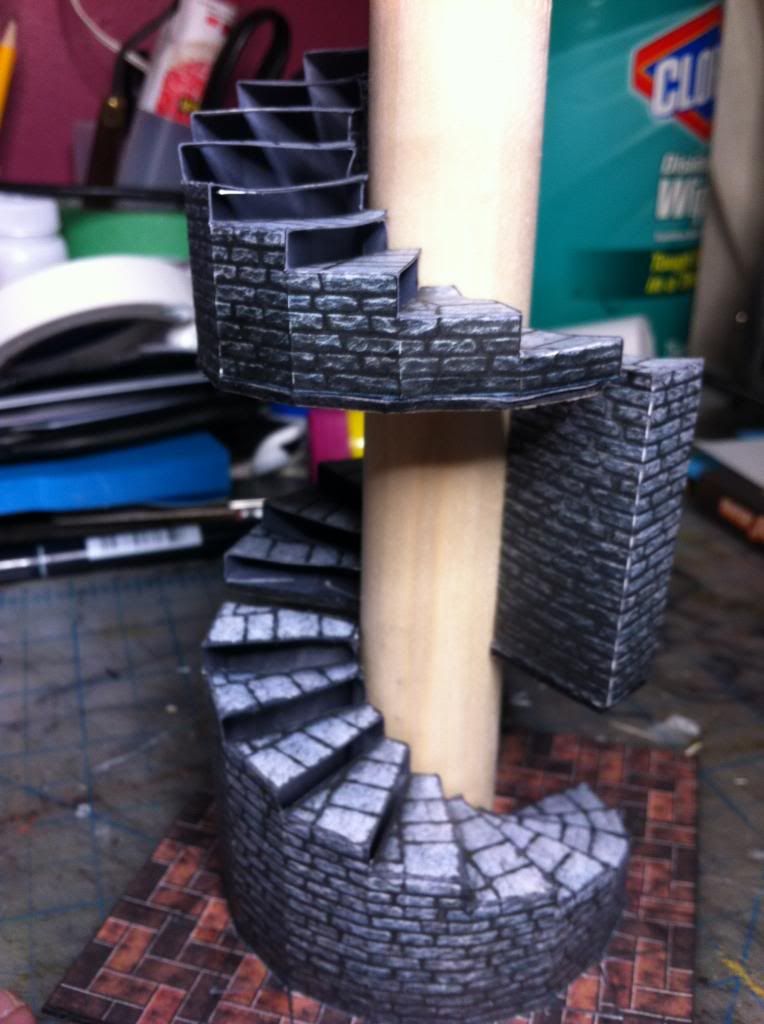 I had to mod the cutfile for the staircase to cut out exactly what the base should be, including the 1" three-quarter hole - so I'm hand cutting round anyway after mounting on matte board. 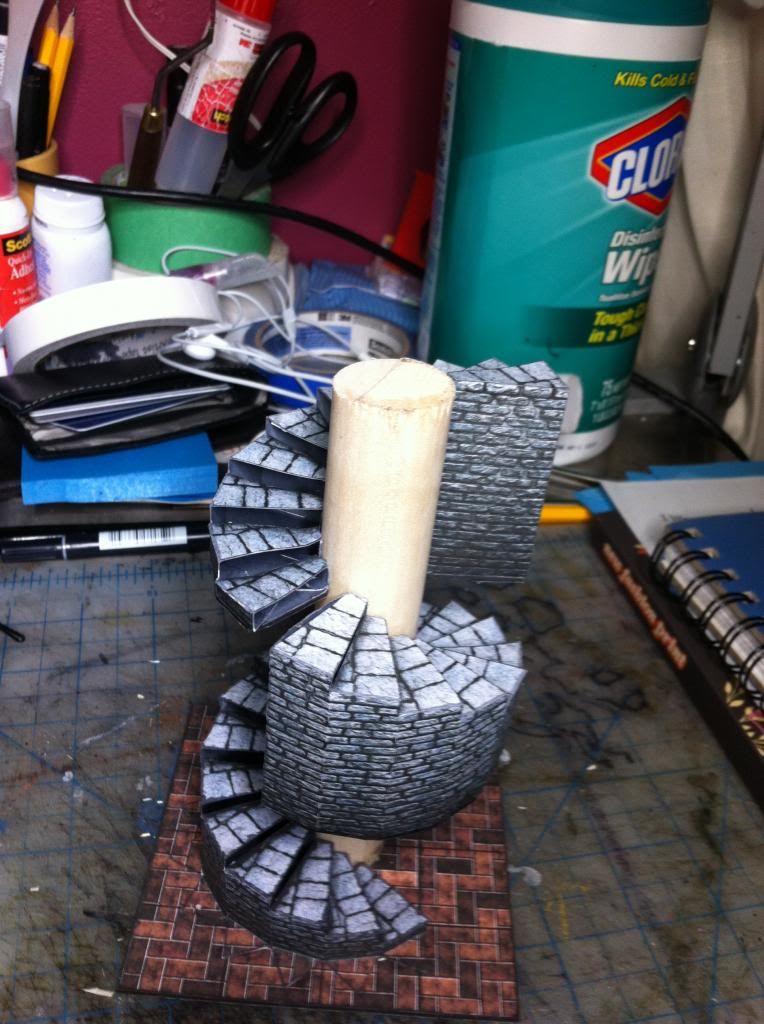 I've got 2", 4", 6" and 8" tall wood pillars primed with grey. Tomorrow I'll try painting them up to look all marble or something. I've got some texture-paint meant for basing that I might apply, highlight, then wash... Thoughts? Attachments:
|
|
|
|
Post by oldschooldm on May 4, 2013 9:19:57 GMT -9
Found a bunch of instructions for marbling paint, but I'm too lazy for layers and layers... 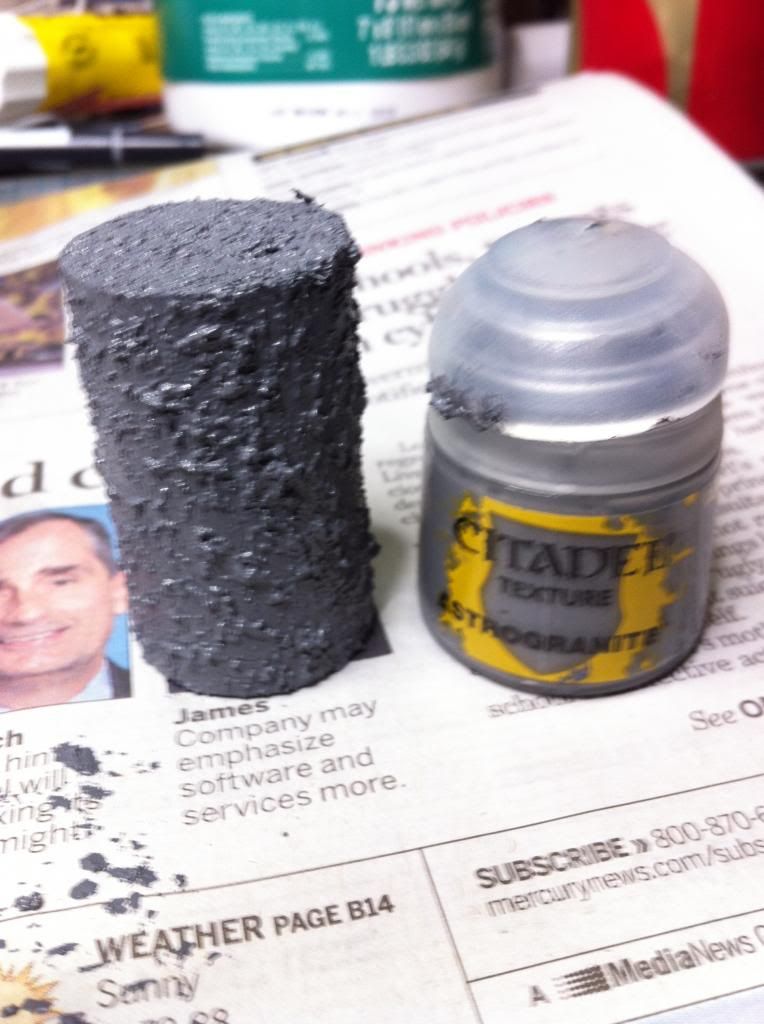 I'm trying this texture-paint + drybrush + wash. Waiting for the first step to dry while I go see Iron Man 3. |
|
|
|
Post by oldschooldm on May 5, 2013 17:18:37 GMT -9
The texture didn't work out so well. Instead I ended up just sponging on a bunch of grays.... 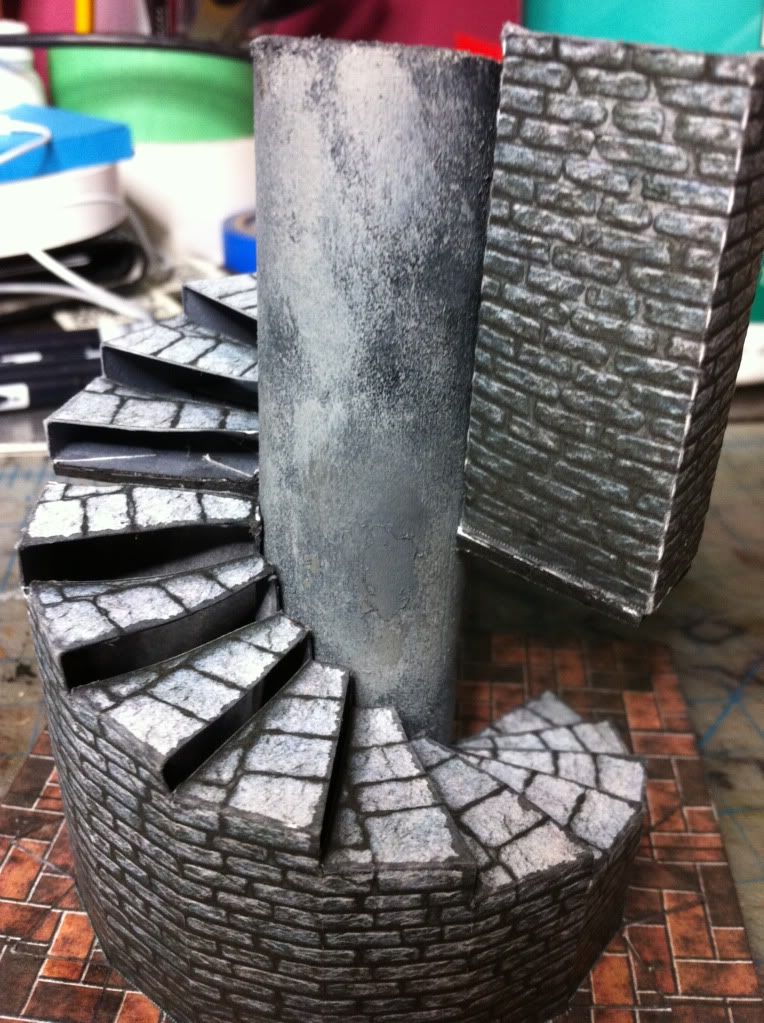 |
|
|
|
Post by okumarts on May 5, 2013 17:22:58 GMT -9
Wow! Love it! I've often wanted to build something similar.
|
|
|
|
Post by oldschooldm on May 6, 2013 9:23:15 GMT -9
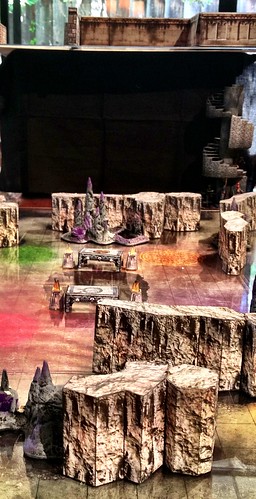
OK. 1.0 is complete. First - it can be completely disassembled and the 4 staircases can be used as originally designed separately... 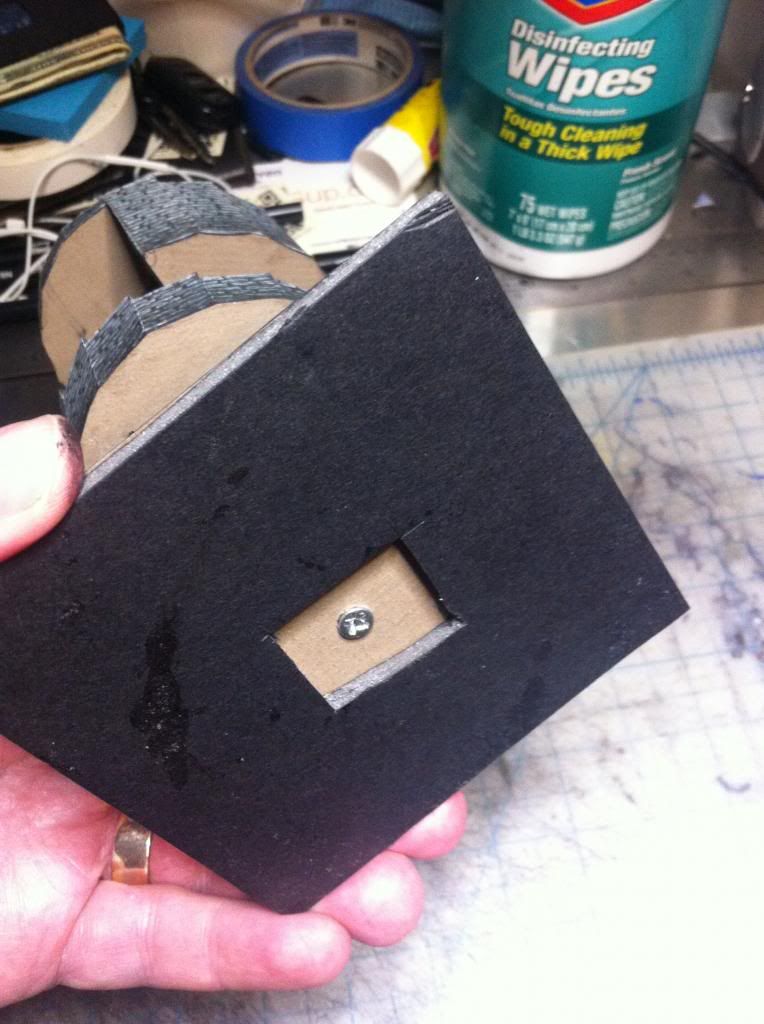 Removable/replaceable Toothpics support the upper levels:  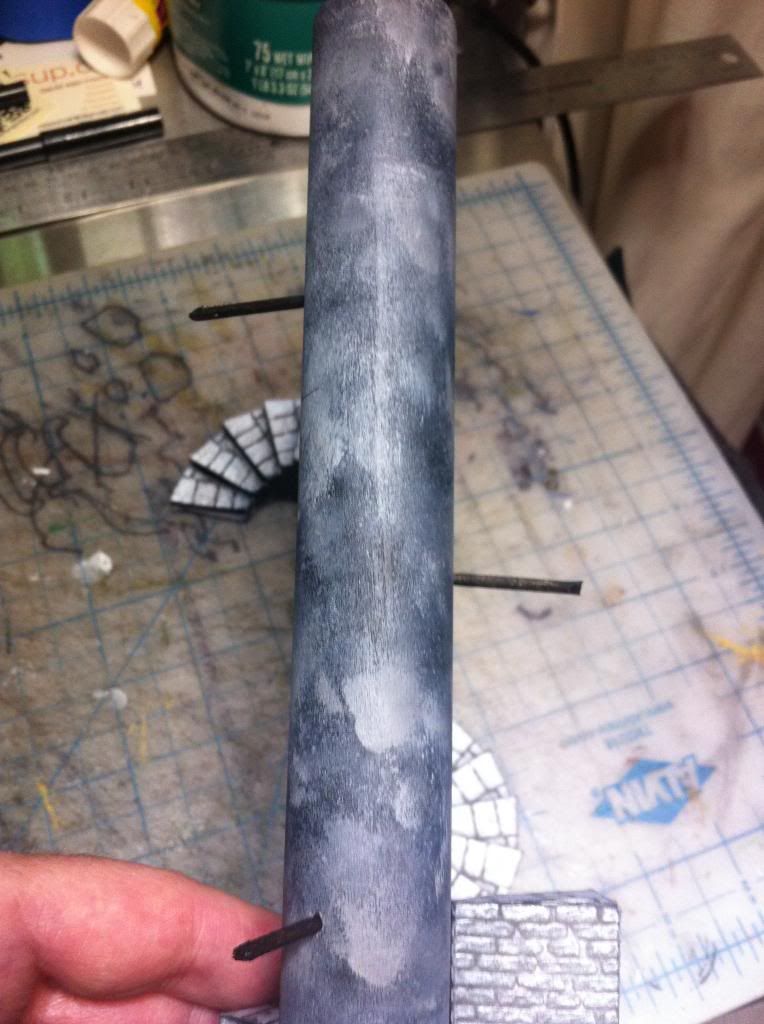 -- and now the beauty shots --- 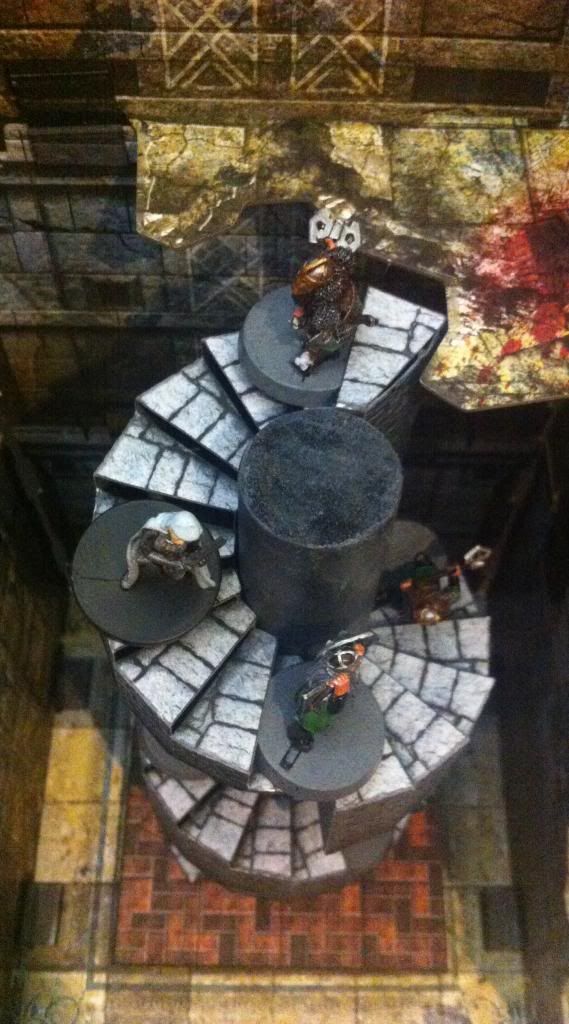 Snow White and her dwarves find a spiral staircase into darkness! 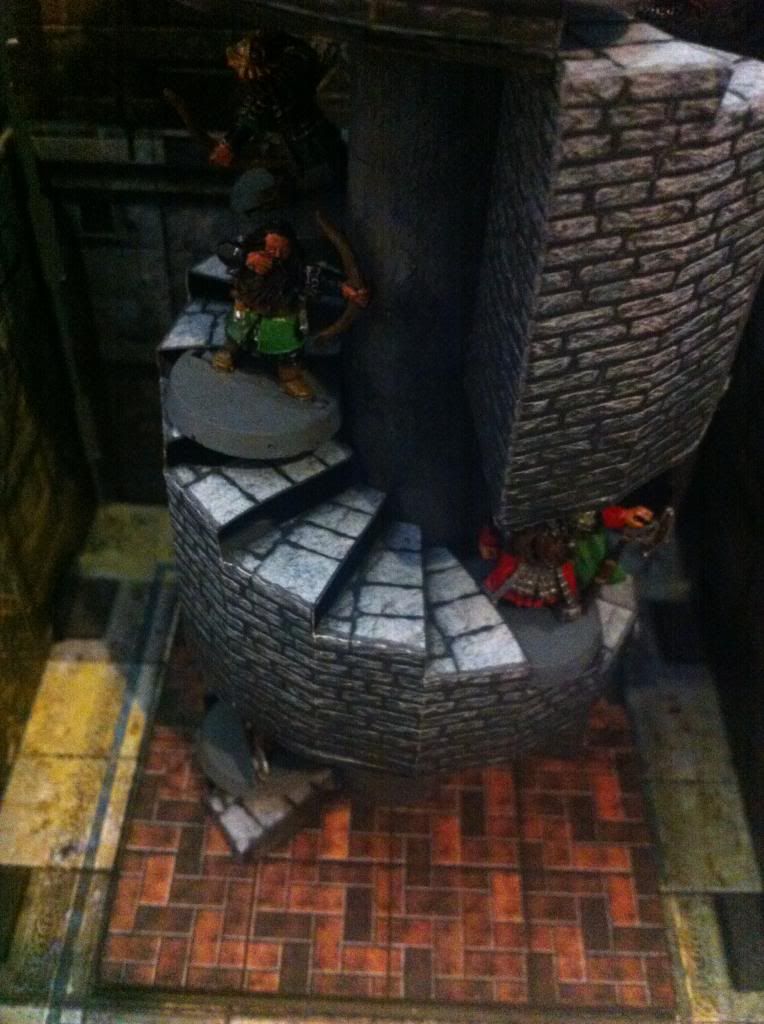 Finally! Bottom! 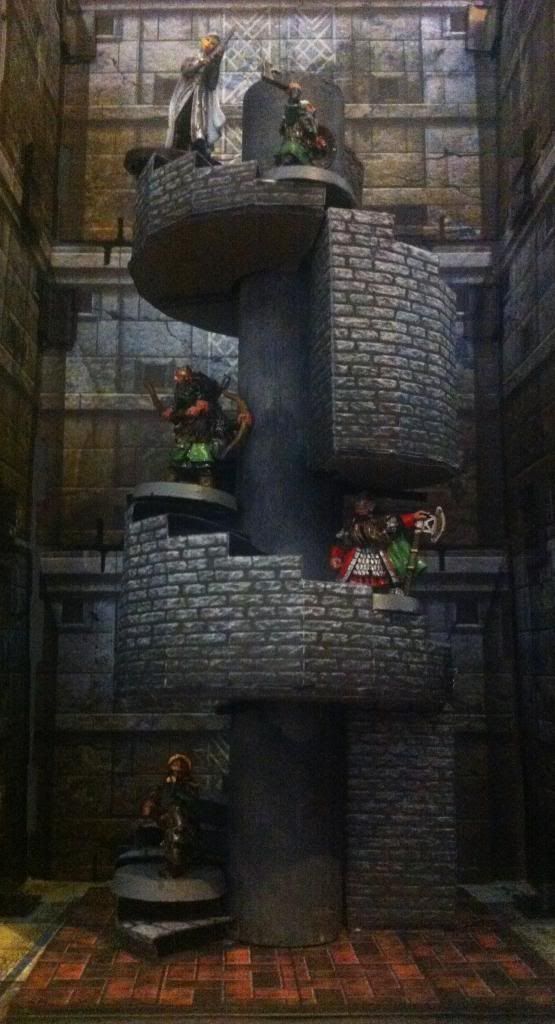 |
|
|
|
Post by mproteau (Paper Realms) on May 6, 2013 10:04:43 GMT -9
@oldschool - what happens if you take the spiral stairs and flip em upside-down - could you do that to join them together and make the spiraling stairs blend more smoothly as a structure? If that is too tight a fit, it looks like maybe removing the top-most step from the upside-down stairs would help with the clearance for the minis.
Just a thought. These are sweet stairs!
|
|
|
|
Post by oldschooldm on May 6, 2013 11:54:40 GMT -9
I'm fiddling with a kitbash to do the stairs without the big blocky support underneath. So far, I have the math wrong somewhere... The first test build had the bottom-support too small... 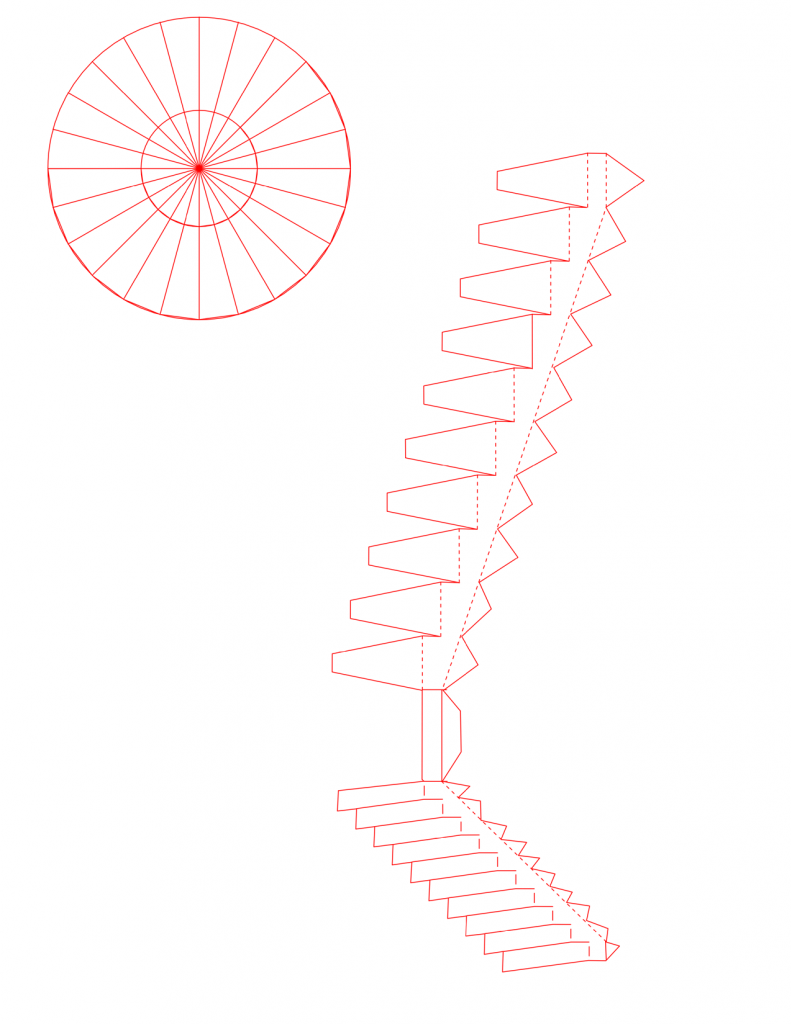 |
|
|
|
Post by oldschooldm on May 6, 2013 15:04:59 GMT -9
I tried again to build that "skinny stairs" and failed. Clearly the base needs to be conical (not circular), but I don't know how to do the conic slice or get the outline.
That's why I'm a kitbasher, not a model designer.
|
|
|
|
Post by oldschooldm on May 8, 2013 22:13:04 GMT -9
With some circular walls I kitbashed together from Fat Dragon originals (see their site for more details...) 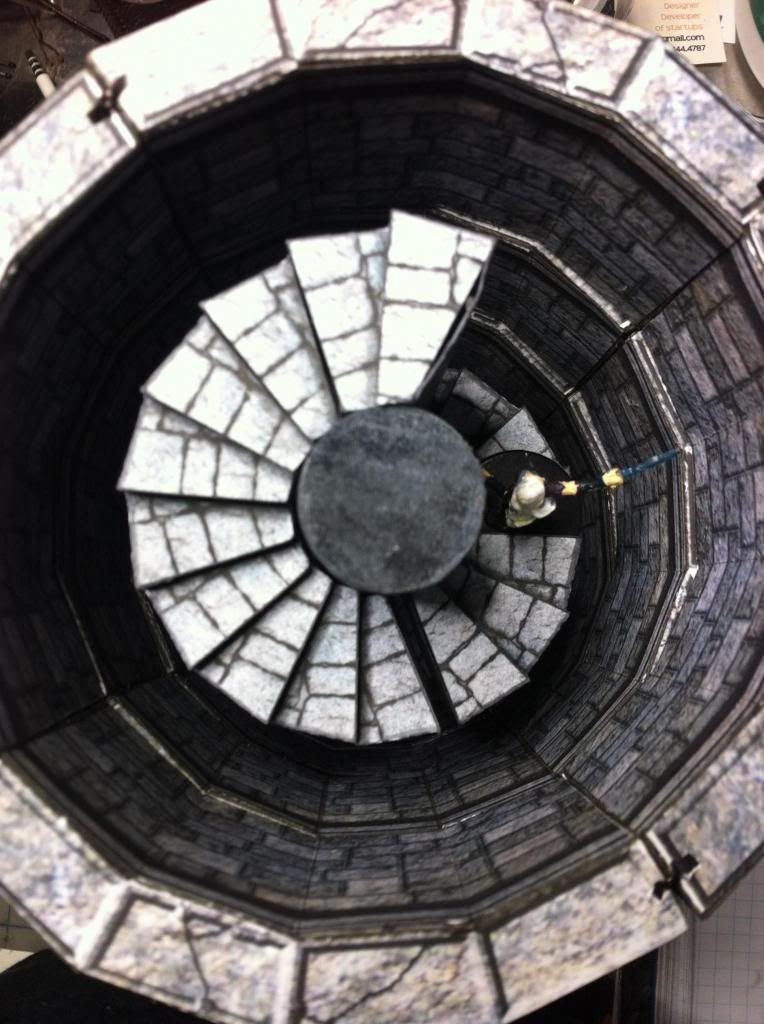 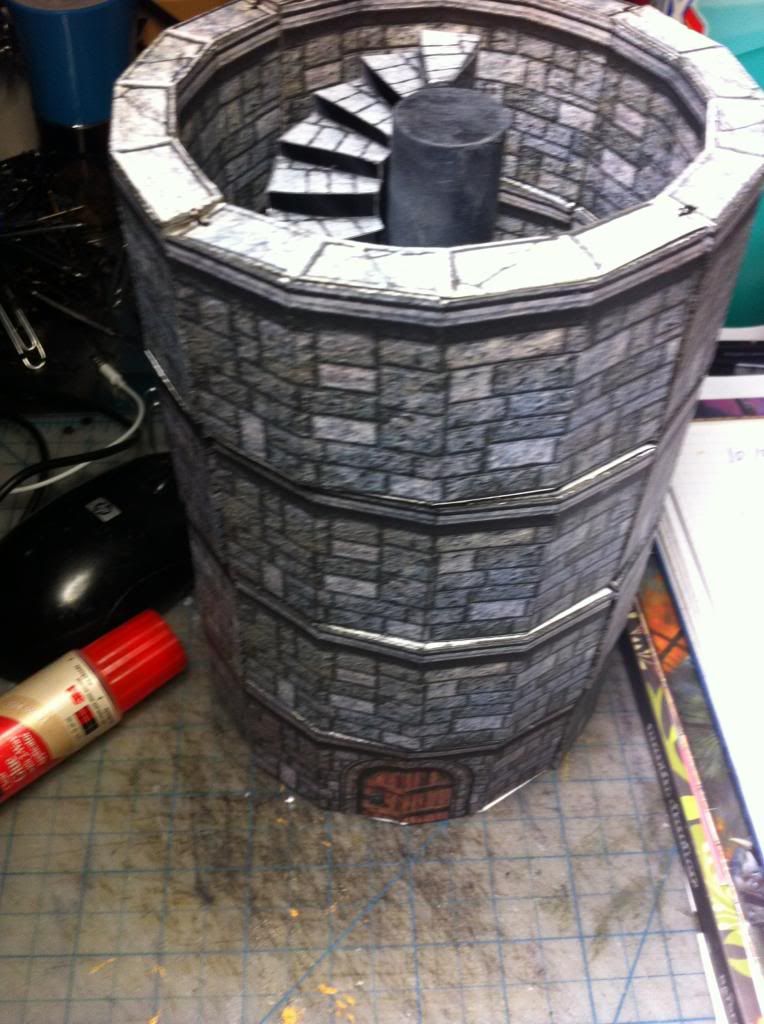 |
|
|
|
Post by oldschooldm on May 8, 2013 22:19:16 GMT -9
The levels are held together with magnets held in with bobby pins, so I can remove them one at a time as they descend the stairs...
|
|
|
|
Post by cowboyleland on May 9, 2013 3:26:35 GMT -9
Genius. I hope your players stay on those stairs for a long time.  |
|
|
|
Post by afet on May 9, 2013 4:51:50 GMT -9
Here's an idea:
You could do something similar with the spiral stairs from FDG's Winterhawk Tower Ruins set.
You could print and cut just the steps/treads part of the stairs. Then, rather than using the vertical walls to support the steps, you could put a cardboard or foamcore bracket under each step, which attaches to the pillar. The pillar piece would need to be modded to have have texture all the way around, as it's currently blank under the stairs. Or you could just use a wooden dowel, as you've done here.
Actually, if you were to glue the steps piece onto another layer of scrap cardstock, the stairs might be strong enough without a cardboard or foamcore support. A small, cardstock bracket at the rear of each step would suffice.
The benefit of this method would be to eliminate the blocky stair support walls and give the minis more room. To accommodate the mini bases, just cut a flap that folds down into each riser.
|
|
|
|
Post by oldschooldm on May 9, 2013 6:22:28 GMT -9
Afet: Me == Lazy. Separate Treads were never going to happen.  |
|
|
|
Post by Parduz on May 9, 2013 6:40:50 GMT -9
I tried again to build that "skinny stairs" and failed. Clearly the base needs to be conical (not circular), but I don't know how to do the conic slice or get the outline. That's why I'm a kitbasher, not a model designer. If you can tell me the measures of the various parts (or send me how it's built right now) i think i could sort it out. |
|
|
|
Post by afet on May 10, 2013 11:44:22 GMT -9
Afet: Me == Lazy. Separate Treads were never going to happen. I hear you. But what I'm suggesting is that you would leave the spiral of treads and risers l together as a single piece and just place a simple bracket under each step. I think it might actually be less work than cutting and gluing the side walls and bottom piece. I'm tempted to try this myself now |
|
|
|
Post by oldschooldm on May 10, 2013 11:52:18 GMT -9
I'm tempted to try this myself now I'd love to see what you mean. :-) |
|
|
|
Post by afet on May 12, 2013 11:12:26 GMT -9
Okay here's my first attempt at eliminating the wall pieces from the spiral staircase in Fat Dragon's Winterhawk Tower Ruins and making it a set of stand alone steps. 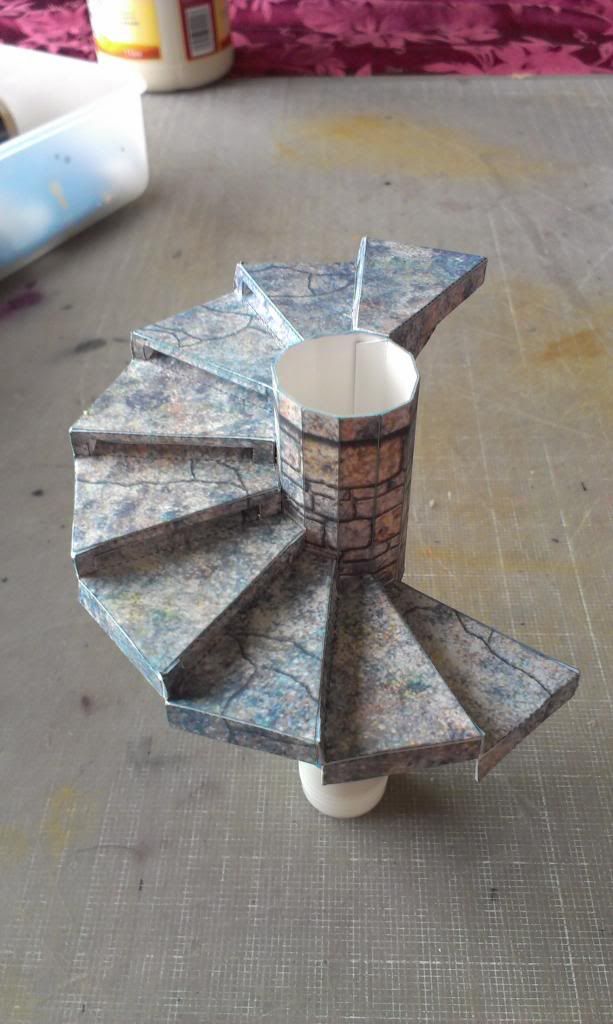 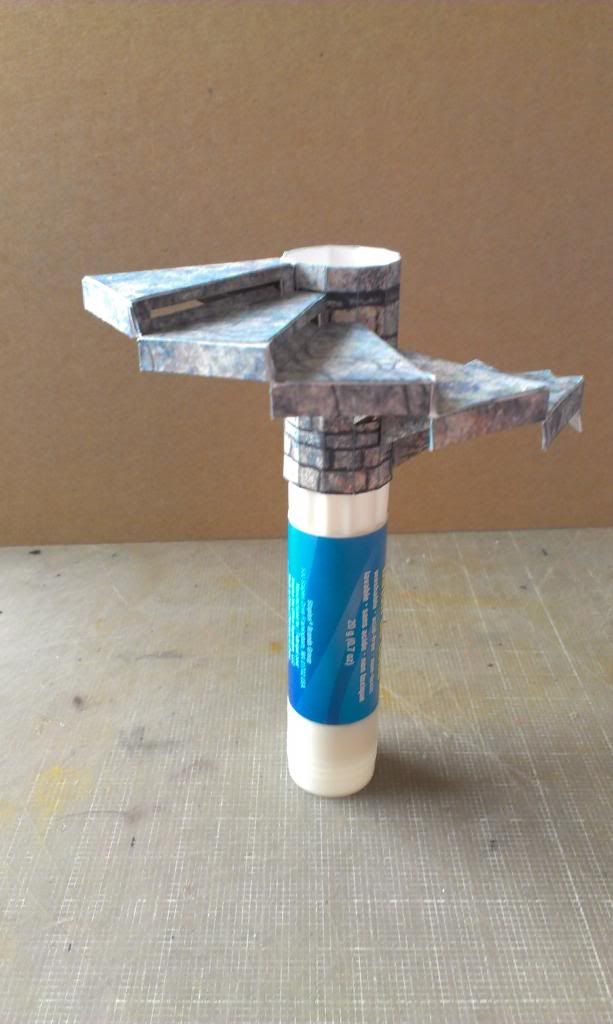 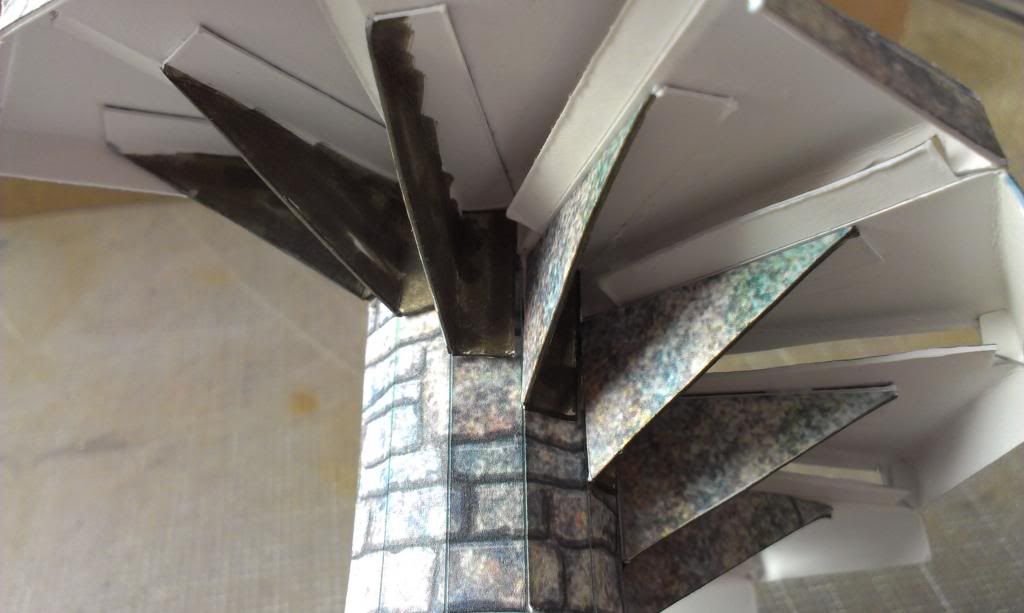 As you can see, I've added braces under the back of each step, and cut fold down slots in the back of each step to allow mini bases to fit better. Here's the file: www.dropbox.com/s/ckk089agt9394su/SpirlStairs1altered.pdfI printed the file and glued it onto a second sheet of cardstock to make the whole thing stronger. |
|
|
|
Post by oldschooldm on May 12, 2013 11:42:52 GMT -9
Looks great! (if not a bit complicated for my case...)
How did you keep everything aligned properly? How long does each tread take to place?
What happens when you place a metal mini on a tread - is there enough support? The bottom brace in the other design provides a surplus of support - but I don't yet have the correct dimensions/shape of the ellipse I need...
|
|
|
|
Post by afet on May 12, 2013 15:59:04 GMT -9
How did you keep everything aligned properly? I first glued up the front, outside box ends of the treads. Then, starting from the top tread, I glued each tread in place using the blank on each facet of the pillar as a guide. Then after all the treads were in place, I glued all of the braces in place. I would say that held each tread tightly in place for about 20 seconds before moving to the next one. So, roughly 30 seconds each. Yes, with the braces and the double layered cardstock, it's plenty strong. The piece is 2" high and has a diameter of about 4 1/4". I've included top and bottom rounds in the file, but I would suggest running a dowel or a paper tube down the middle if you're going to stack multiple pieces. The inside of the pillar is about 7/8". |
|
|
|
Post by markem on Jun 16, 2013 14:00:21 GMT -9
Have you thought about using lamination to make everything stronger? I have been playing around with a Scotch TL901 laminator (about $25.00 at Amazon.com) and 3mil laminating pockets (Royal Brite has these at 200 for $20.00 and I am sure that Oregonlam.com would have them even cheaper). The 3mil plastic lamination film gives even cheap paper a toughness equal to 110lb cardstock. Best of all - I think the Silhouette printer will cut it for you. (I don't own a Silhouette printer - but the specs seem to indicate it will cut 3mil plastic). The nice thing about laminating stuff is that you can buy the Crayola water based magic markers and write onto the lamination. So spilt blood can be drawn onto the lamination and then wiped off later. Or if a body is reduced to ash - you can draw a dark outline of it. Characters who's boots are muddy can leave muddy boot prints, and bodies or skeletons you don't want to have to take out and re-set up later on can be drawn onto the laminated surface and then removed - piece by piece as rats and things eat away at the bodies. It really does make it so you can do a lot more (like draw temporary items such as rocks/boulders, fog, fire, water, etc...) onto the surfaces and, as I've said, then just wipe them back off again.
Great stairway though! Both of them! :-)
|
|
|
|
Post by oldschooldm on Jun 19, 2013 12:45:46 GMT -9
|
|