kjev
Initiate

Posts: 17
|
Post by kjev on Jan 19, 2016 16:56:18 GMT -9
I'm sure it's been asked before, so I'll be brief.
Are there any tutorials, tips or tricks for making wheels? If I had to drive on the wheels I make, I'd be beaten to death after half a mile.
|
|
|
|
Post by Vermin King on Jan 19, 2016 17:40:07 GMT -9
Sometimes you are limited to what was designed, unless you get creative. Is there a particular model you are referring to?
If I have that model, I can probably do a wheel tutorial for that model's wheels.
Oh, crud is this the Prowler recolor? Not the easiest wheels to do
|
|
|
|
Post by alloydog on Jan 19, 2016 21:12:38 GMT -9
A few years back, I knocked up a few tanks from Paper Tiger Armaments. Cliff makes his wheels "hollow" and looking at the photos, they're pretty neat. Ol' sausage fingers here can't handle such fiddliness, so I made mine solid: even to the point of sourcing the 1/4" hole punch (not easy in metric country, and ordering over the internet the postage comesto twice the cost of the item...) Wheels, hate 'em  |
|
|
|
Post by bravesirkevin on Jan 20, 2016 2:57:02 GMT -9
|
|
|
|
Post by lightning on Jan 20, 2016 4:51:07 GMT -9
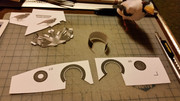
I have been working on simple wheels the last weeks. As in flat circle shapes that i made sturdy by Basically gluing together a couple of circles to get the thickness I want. 4 layers of 120g/cm2 sheets result in 1mm thickness. I guess you could extend that process to even make car tyres etc. You would probably want to cover the circle with a textured ring to make it nice or at least edge it with a marker. It's the poor mans version of a 3D printer  If you vary the diameter of the slices you could even get curved surface on the tyre. |
|
|
|
Post by Vermin King on Jan 20, 2016 5:10:45 GMT -9
There are easy designs of tires/wheels and there are more difficult versions. I like the way that they are done on minimodels, www.minimodel.cz/ , but outside the Czech Republic, I don't see that method used much. Kjev mentioned the Prowler repaint that he is working on. If that is correct, most of my standard methods of doing tires goes out the window. I keep getting 'Connection Error' trying to post a pic of it, so here's the link, www.genetmodels.com/ebbles-miniatures-2010-2011/To get those beautiful shapes, you would need to get those rings looking good. It's not the simplest design, but not impossible either. I remember trying to get my modified wheels for JBowen's Warthog to look right. I think I made eight wheels to get four good ones |
|
kjev
Initiate
Posts: 17
|
Post by kjev on Jan 20, 2016 6:05:53 GMT -9
You're right. The Prowler is the current project.I got 3 wheels done. One looks decent. The other two may be hidden in the middle. I've also built the 4x4 GPV and the 6x6 APV. Even though the wheels were simpler, Round and I don't get along that well. I think I made eight wheels to get four good ones That reminds me of the Starcraft Siege Tank I'm working on. I decided to redesign the tracks (since I was running a bulldozer at the time). I think I built the front tracks and rear tracks 4 times each. It took me all summer, and by the time I was done, I was so sick of making tracks I shelved the whole thing for a few years. The repetition part of them is...well, it's a good reason there's Netflix. But the repetition part also seems to help me improve. |
|
|
|
Post by alloydog on Jan 20, 2016 7:01:45 GMT -9
I have plenty of tweezers, 'tis patience I lack!  |
|
|
|
Post by Vermin King on Jan 20, 2016 8:10:26 GMT -9
I've not done the Prowler, but maybe it is time. Some time in the next week, I'll at least do some of the wheels, with photos on how I do it. I have to knock out these four birds by Saturday, though, so I'll be doing these in between
|
|
|
|
Post by Vermin King on Jan 20, 2016 15:13:19 GMT -9
Printed one page of wheels. Would you post a photo of the worst wheel assembly? That way I can better figure out where the problem lies.
One thing I would probably do is use glue strips instead of the tabs on the tread. A scrap piece of card glued behind the tread and used to join the two ends helps to maintain roundness, without the lip at the join.
|
|
|
|
Post by Vermin King on Jan 20, 2016 17:40:11 GMT -9
|
|
kjev
Initiate
Posts: 17
|
Post by kjev on Jan 20, 2016 19:47:55 GMT -9
Don't have any pictures as yet, but I do preshape the parts, and I started using the strip behind the tread. I just always seem to end up with a flat spot, and my rims/hubs always seem to big for some reason.
|
|
|
|
Post by Vermin King on Jan 20, 2016 20:08:11 GMT -9
My hubs were big, too. I used my hobby knife and scraped the backside edges to thin them out a little so they could bend around the seam a little. On flat spots, those usually come from slight extra bending. After I shape the tread around a pen or dowel, I place the edge of the tread against the end of a glue stick to bend over the tabs, just to keep any extra bend out of things. Once the strip is glued, I handle it with extreme care.
|
|
|
|
Post by lightning on Jan 24, 2016 0:28:19 GMT -9
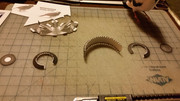
this topic did not let me go tried a wheel concept that should be easier to build (no tweezers required) but a little more to cut without auto-cutter. the under structure is made out of - in this case - 12 triangle shapes (as seen in the top row) and then it's covered with a texture layer (bottom row). could of course be made easier (6 or 8 sides) or more round (16 sides?). due to the layers and glue, once dried, it's extremely solid/hard/durable. it's a quick, sloppy build, but what do you think?  |
|
|
|
Post by Vermin King on Jan 24, 2016 16:17:09 GMT -9
It looks interesting. How many parts are there to the wheel structure?
|
|
kjev
Initiate
Posts: 17
|
Post by kjev on Jan 24, 2016 18:17:46 GMT -9
It looks good to me! What does it look like unfolded? I could trace a vector copy in Illustrator and size it as needed.
|
|
|
|
Post by lightning on Jan 24, 2016 22:42:34 GMT -9
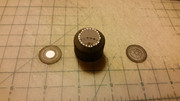
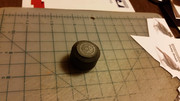
One could adjust the parts to leave space for some axis if this is needed. kjev : I could send you the Illustrator-PDF and Silhouette file :-) Download from here: wheel_concept.zipThe PDF is out of AI so you can open and edit it there. The dxf is the lines only export which I use for Silhouette Studio. And the studio3 file ... is the cut file  If you need a certain size, let me know and I can adjust my original mesh in Blender and make the parts for you. Or if you have blender I can send you that too. Vermin King : for the 12 sided wheel, there are 12 understructure parts and then the enveloping one (which I have split up in 3) You have to hold it in your hand to feel how strong it is. After drying the glue overnight it feels rock solid I made a test. Each of these books weighs 1.7kg. I was not able to make a photo with the wheel in "standing up" normal wheel position but it held one book for a while until the book fell off. Maybe when I have four wheels it would stay in position long enough so that I can make a photo :-) 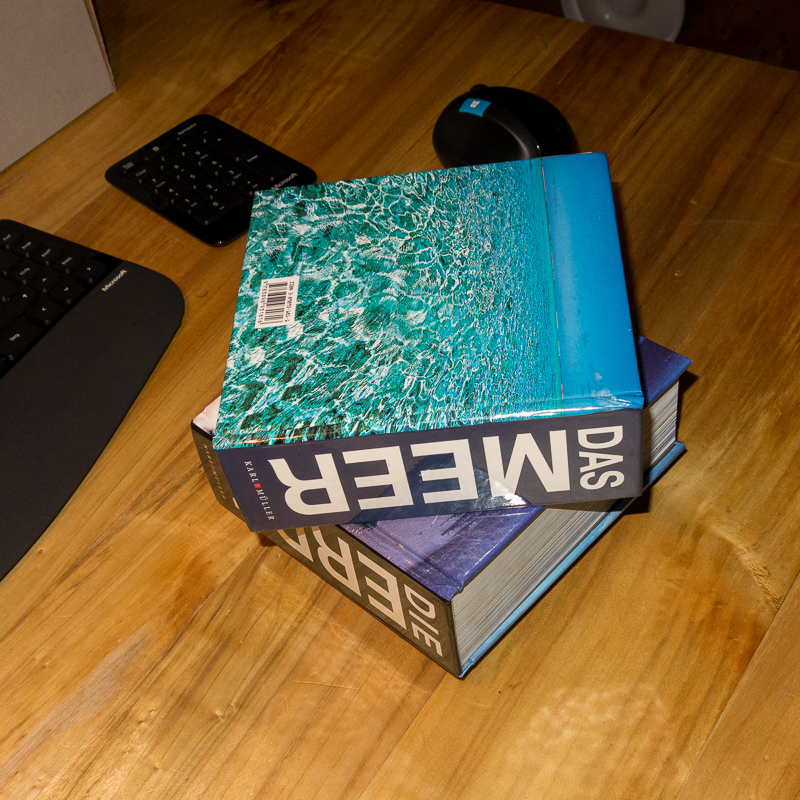 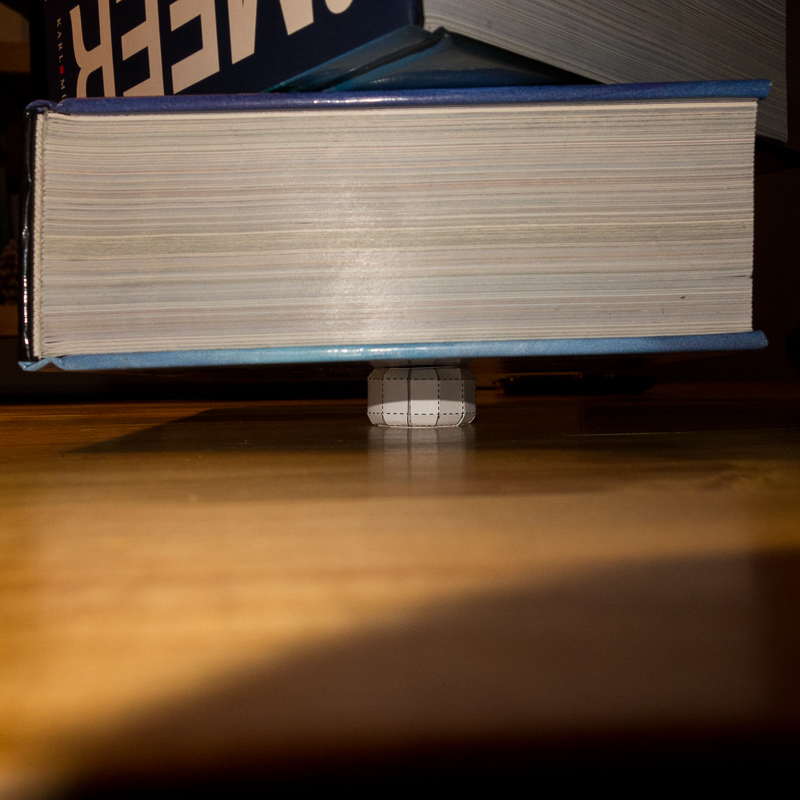 |
|
kjev
Initiate
Posts: 17
|
Post by kjev on Jan 25, 2016 1:35:47 GMT -9
Thank for the zip file. I'll take a look at it later on today.
I like the picture with the book. Stout wheel!
|
|
|
|
Post by Vermin King on Jan 25, 2016 6:02:04 GMT -9
That is one sturdy wheel!
|
|
|
|
Post by greypilgrim on Apr 30, 2016 2:10:02 GMT -9
@ lightning: I finally had some time to investigate and try out your wheel, but now I only get a 404 error. Could you re-list that zip file - or did you just move it elsewhere?
|
|


 If you vary the diameter of the slices you could even get curved surface on the tyre.