|
|
Post by Vermin King on Sept 8, 2020 11:53:54 GMT -9
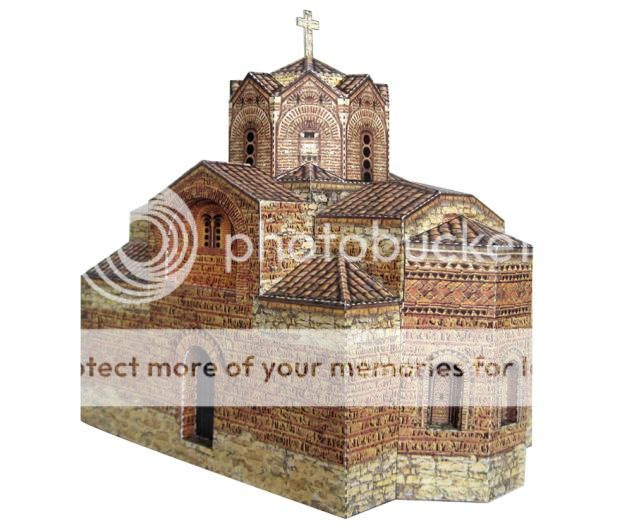  I've always liked this little model and even back when it was being offered by the designer, you had to back into finding it ( the link to the model was actually the link to the instructions, and the link to the instructions was also the link to the instructions ). I'll give Papermau's post, and maybe you can get to the model, papermau.blogspot.com/2014/03/macedonian-church-stjovan-kaneo-paper.htmlYes, it is Macedonian, not Venetian, but I could see that it was built around the time of some of the oldest churches in Venice.   So, it could look like one of the old Venice churches before they were razed and rebuilt. I still want to try San Giacomo di Rialto and the much simpler San Zandegolà, but I am picking off some of the models I have had in my to-do list for too long. One of the first things I have to do with this one is enlarge it. It is a three-page model as is, but it needs to be 50% larger. I could make it a more substantial building, enlarging to 200%, but I see this as being one of those small, local, out-of-the way chiesas that you have to follow the correct alleys to get to. Currently the main doors are 1.2 inches tall and the other doors are 0.9 inches. Enlarging by 50% puts them at 1.8 inches and 1.35. I think that would be fine for a little hole-in-the-wall church |
|
|
|
Post by Vermin King on Sept 8, 2020 19:15:24 GMT -9
Well, arbitrarily I came up with the 50% enlargement. Funny thing is that the largest piece, number 3, would not accept even a 55% enlargement without being broken up. If it had been broken up into two parts, parts 1 and 2 would be the next parts to hit the wall on enlargement. This could go up to 75% enlargement without further breaking things up. The more I look at this, if it had Venetian brick instead of the stone, it would really look Venetian. As it is, this works out to 22 parts on a total of six pages
|
|
|
|
Post by Vermin King on Sept 9, 2020 5:25:05 GMT -9
I wish I had gone through the effort of turning all those dashed lines into solid lines. Time to break out a new Sharpie or use my gray marker
EDIT --
Got it all cut out tonight. I wish I had adjusted the hue, too. Seems a bit light, probably from enlarging, maybe. Tomorrow night I will edge and go over all the dashed lines. I wrote the part numbers on the back of each part to avoid confusion. As this model has lots of insets, you start building all the little pieces first, followed by installing them in the big parts, and then putting the big parts together.
|
|
|
|
Post by Vermin King on Sept 10, 2020 8:53:19 GMT -9
 As you can see, the colors washed out a little with the enlargement, but not too horrible. Everything scored, edged and pre-folded. Should be able to start building during the game tonight |
|
|
|
Post by Punkrabbitt on Sept 10, 2020 12:36:15 GMT -9
As you can see, the colors washed out a little with the enlargement, but not too horrible. Everything scored, edged and pre-folded. Should be able to start building during the game tonight I find that increasing Constrast and Saturation in GIMP overcomes the washed-out effect. |
|
|
|
Post by Vermin King on Sept 10, 2020 12:46:11 GMT -9
This one is going to have to be done 'as-is' Yes, I should have upped the contrast and saturation, but then again, I should have converted it to Venetian brick ... EDIT --  All the little bits are done. Now the instructions say to build #9, then #3 and then put #5 and #6 together. I guess that gives time for the glue to dry before installing the inset parts |
|
|
|
Post by Vermin King on Sept 10, 2020 18:34:56 GMT -9
|
|
|
|
Post by Vermin King on Sept 11, 2020 5:10:49 GMT -9
Next step in the instructions is to put parts 18 and the two 19's in part 9, which I did not get to last night. But after that is the cupola part. Part 11, the cupola roof, fits into part 3 the circle. Then part 3 fits onto the parts 5 and 6 construction. Only when I test fit part 11 into 3, it seems way too small. This morning I checked files to see if I messed up the enlargement. I didn't mess up, so after I install the window insets into the wall, I will have to see about how to get that roof to work. Part 3 fits to 5 & 6 well, so the problem isn't there. I may have to print a new part enlarged a bit more
|
|
|
|
Post by Vermin King on Sept 11, 2020 17:23:44 GMT -9
I didn't have a whole lot of time at lunch to figure out how much that roof piece needed to be enlarged, so I did three of them. One is enlarged by 5%, the second enlarges it by 5% and the third is a 5% enlargement of the second. Hopefully one will fit. But since there was space left over and I wanted to have some clergy in a city with that many churches, I took time for a search of some old figures that I thought wouldn't look too out of place. I found three that I thought would fit in, and cleaned them up and adjusted them so that they could be turned into minis. I then tried the advice from cardboard-warriors.proboards.com/thread/10428/outlines-photo-minis to do the outlines, which I probably made too wide. I was going to also try to do backs, using cowboyleland's method in cardboard-warriors.proboards.com/thread/10416/cowboyleland-back , but it is getting late, so I just printed with mirror backs  Thanks for the help guys Also did some reading up on Byzantine churches.   |
|
|
|
Post by Vermin King on Sept 12, 2020 17:03:47 GMT -9
A bit of progress   |
|
|
|
Post by Vermin King on Sept 13, 2020 6:00:05 GMT -9
|
|
|
|
Post by Gentleman Ranker on Sept 19, 2020 1:28:09 GMT -9
That's a nice looking building!
Any plans for a base? I think it'd look even better in a context.
GR
|
|
|
|
Post by Vermin King on Sept 19, 2020 4:34:38 GMT -9
I am still working on tiles based on the Campo San Zandegola
I was working on that last night again and realized I was introducing errors. Tried fixing them and realized I need to be starting over. Each attempt is a lesson, though. I think that my solution I came up with last night will make this a fairly quick rework, I think. Unfortunately, the work I did last night botched my original squared, aligned and resized texture I was building from. Oops.
|
|
|
|
Post by Vermin King on Sept 19, 2020 14:50:57 GMT -9
Went a totally different route. With Google Street, you can look at your feet which will be blurry, but outside the blur you can grab pavement textures. These are the pavers from Campo San Zandegola  EDIT -- Upped the brightness and contrast  |
|
|
|
Post by cowboyleland on Sept 19, 2020 20:29:51 GMT -9
Cool trick!
|
|
|
|
Post by Vermin King on Sept 19, 2020 21:23:31 GMT -9
I replaced some of the pavers that had artifacts, but I am going to grab some off another set to replace some of the repetitive pavers before I print it out. I just made it big for my own use, but it would be relatively easy to cut it down to 6X6 or 6X8 or whatever the individual user would want  |
|
|
|
Post by Vermin King on Sept 21, 2020 9:03:22 GMT -9
That's a nice looking building! Any plans for a base? I think it'd look even better in a context. GR Fifth or sixth time is a charm.     |
|
|
|
Post by Antohammer on Sept 21, 2020 23:42:11 GMT -9
that church is great boss!!!! ^^
|
|
|
|
Post by Vermin King on Oct 1, 2020 6:09:54 GMT -9
Not much time last night, so did a quick project -- Kev's Lounge bases textured to match the trachyte pavers. Only PostImage isn't loading. Hmmm EDIT -- Finally!  |
|


