|
|
Post by Vermin King on Jun 12, 2017 18:26:34 GMT -9
The front steps are correct. Normally this wouldn't be the first step. 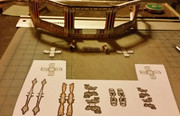 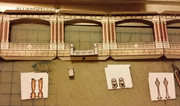 I didn't glue the front pedestals to the balustrade or the balustrade to the porch rail, but it fits. The porch supports come in much later in the build order, so the step parts are going in a box for now. Maybe I can get started on the actual build tomorrow or Wednesday |
|
|
|
Post by jeffgeorge on Jun 13, 2017 21:21:43 GMT -9
The level of detail on this project continues to amaze me. Very impressive!
|
|
|
|
Post by Vermin King on Jun 14, 2017 4:48:51 GMT -9
Last night I thought I was going to start building, but I realized that I hadn't numbered all of the new sections. So I did some re-arrangement of parts, and worked on the numbering. It will be built in four sections. First step is the Downstairs, then the Porch, followed by the Roof, and lastly the Cupola and Dormers.
Those steps really impressed me as to how easy they are to build, yet still have different options. I'm going to put the pedestals in front, but it looks good with just the balustrades, or you can do the simple handrails.
I think it will be a nice building when done.
|
|
|
|
Post by Vermin King on Jun 16, 2017 17:49:16 GMT -9
I got lazy. For the layered effect, I needed the inset doors and windows. Instead of making two optional pages, I just stuck the parts into some of the empty spots.
But ... I should have everything for the layered version now. Gotta get a new can of Krylon Clear, and it will be all set to go.
|
|
|
|
Post by Vermin King on Jun 18, 2017 16:21:58 GMT -9
I'm not best pleased with Walmart. Bought the last can of Krylon Crystal Clear Satin, but I didn't take the cap off. Got home tonight to find there is no spray nozzle. Razzum frazzum
|
|
|
|
Post by jeffgeorge on Jun 19, 2017 17:28:36 GMT -9
I'm not best pleased with Walmart. Bought the last can of Krylon Crystal Clear Satin, but I didn't take the cap off. Got home tonight to find there is no spray nozzle. Razzum frazzum Of all the many, many reasons to dislike WalMart, missing spray nozzles on paint cans is very low on the list. I mean, I totally feel your frustration, but WalMart is so much more evil than just that... |
|
|
|
Post by Vermin King on Jun 19, 2017 17:50:41 GMT -9
I doubt Sam would be very pleased with what Walmart has become. Back in his day, if a product was available from a U.S. manufacturer, that is the one that they stocked. Walmart would always have the lowest price on that item. He didn't have the best health insurance for employees, but if you were an employee, Walmart would pick up a good part of your college tuition based on the number of hours you work and your years of service. My next-door-neighbor was going to a great engineering school on Sam's dime. 'No one should stand in line at the check-out for more than three minutes.'
Definitely not the Walmart of today
|
|
|
|
Post by greypilgrim on Jun 20, 2017 8:31:37 GMT -9
I always check my paint spray cans before purchase - the same reason I always check my Taco Bell order (and those of any other take-out joint). I don't want to have to drive back across town if it's not right.
Sorry you had a bad experience.
|
|
|
|
Post by Vermin King on Jun 20, 2017 9:01:21 GMT -9
The new can has the nozzle and appears to work.
Also learned that there are no returns until after 7AM, well, 7:10 by the time they get the cash drawers, etc.
|
|
|
|
Post by Vermin King on Jun 20, 2017 17:09:21 GMT -9
 To get the parts to allow me to have the structural detail laminated on top, I printed out two copies of DS1 and DS2. DS2 almost had enough room to get the parts to have inset windows. By printing two copies of DS2, I get eight upstairs windows and eight downstairs. I also got four upstairs doors. So I added the three downstairs doors to P2 Porch Floor 2. Everything is Krylon Clear Satin coated and drying. The files printed thus far  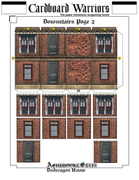 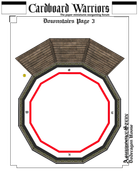 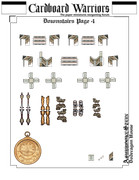 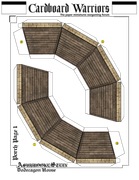 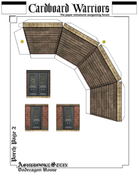 When I tested the steps, I'd previously printed out the DS4 Steps page. I will also use the P5 Porch Support page 1 from that test. Back to the 1966 Batmobile |
|
|
|
Post by Vermin King on Jun 26, 2017 11:10:20 GMT -9
Finally got a little time to start building 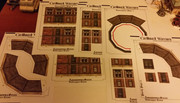 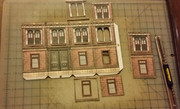 |
|
|
|
Post by Vermin King on Jun 28, 2017 14:29:16 GMT -9
Continuing on as I've started.
It's now more of a rhythm. After work tonight I started on Downstairs Wall 2. Have to edge the frames and apply, but that won't take long. I may even get the third wall done tonight. Must be up early in the morning, so I might not. I do need my beauty sleep.
If anyone else were to do the layered approach to this, you will want to make the upright wall section frames wider a bit. It would make things a lot easier.
But as I said ... continuing on as I've started
|
|
|
|
Post by Vermin King on Jun 28, 2017 17:14:06 GMT -9
Usually I have an extra pack of Sharpie's around, but not tonight. Razzum frazzum
|
|
|
|
Post by greypilgrim on Jun 29, 2017 1:10:07 GMT -9
Um, Vermin King, I'm slightly confused... Are you cutting out the window panes of the wall and placing an entire second window piece beneath/behind the original - or are your cutting out the trim sans windows and fastening them on the outside/front of the wall piece?
|
|
|
|
Post by Vermin King on Jun 29, 2017 4:20:23 GMT -9
Actually doing both. Like the Automobil Garage from a few years back. Those last files I posted have the inside pieces in the bottom space of the third wall and in the space of the third porch floor section. By printing two sets of the walls, I can get all the frames for layering on top and the proper number of window and door inserts.
I haven't gotten very far, but it looks good. And it should be fairly solid, with three layers of 110# card
I had another top section of my walnut tree fall during the 45 mph wind gusts last night about 10:30, so I was up late getting it cut up enough to get out of the street. I'll have to get it finished up tonight, so I am unsure about finishing up the third wall tonight. The plan is to finish the third wall, attach them and get the cap piece on there. Then I can get the porch floors surrounding it. I may be reworking the balcony parts. As it sits now, there is a railing that will attach to the roof base, the tabs sandwiched between the roof base and the downstairs walls cap. I think I will be adding another set of supports under the front edge of the balcony. We'll see.
|
|
|
|
Post by Vermin King on Jun 30, 2017 16:42:56 GMT -9
Ever have one of those nights?
Even with a straight edge, I can't cut on a line. I'll try again later ... maybe
|
|
|
|
Post by Vermin King on Jul 1, 2017 7:41:38 GMT -9
|
|
|
|
Post by Vermin King on Jul 1, 2017 10:04:46 GMT -9
Ah, the importance of test builds. When I was working on the steps I printed out two of the three sections of porch supports. I decided to check the height against the porch roof slots. And it's good. I also checked how it approximately sits under the balcony. Balcony supports are definitely in order, and I really think that it will give the New Orleans vibe. 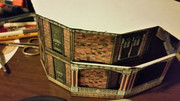 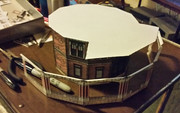 Now for the bad news. I didn't bump the inside width on the porch floor enough. But the outside edge fits inside the porch supports perfectly, so enlarging the three parts isn't the answer. I have to expand the inner tabs into the floor area, I think. Until I build all three floor sections and the third section of porch supports, I won't know for sure. I'll probably have to adjust the Porch Roof, too |
|
|
|
Post by Vermin King on Jul 1, 2017 12:55:51 GMT -9
Porch floor adjusted, and the two sections of the porch supports fit 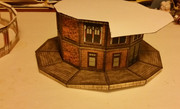 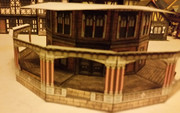 It's obvious that I'm going to have a bit of a twist in the porch floor when I glue it, unless I mount it on foam core. I'll work on that when I return from the holiday weekend. It's also obvious that the balcony support isn't going to be just optional, but necessary to keep things square. I did a lot of planning on those pieces today and have a good handle on how to do them. Good progress today in spite of the concussion I received this AM. Or maybe because of it, since I'd have left town this morning otherwise. The first floor detail work probably wasn't necessary. When the supports and roof are on, it's going to be a bit dark on the porch. |
|
|
|
Post by cowboyleland on Jul 2, 2017 6:46:21 GMT -9
This is really coming along. Take that concussion seriously, they can come back to haunt you if you rush your "recovery."
|
|
|
|
Post by Vermin King on Jul 4, 2017 8:24:16 GMT -9
Trust me, I have more knowledge on concussions than I really want. Back in 2000, I had a concussion and suffered from Post-Concussal Hypo-Tension for years, I still have to keep well hydrated or occasionally my blood pressure drops precipitously for no apparent reason. But over the weekend I was able to fix the porch floor and porch roof files to allow a snug, but not binding, fit. As I was working on the balcony supports, I did some additional cleaning on the porch support columns. When I was fixing the height of the balcony supports, I thought this might be a good time to fix the widths of the wall frames to be more uniform and clean up the window and door frames. I'll post those later. I still hope to get the porch floor mounted to foam core today and the porch built.
Even though I have one page of supports done already, I'm going to do them again with the new columns. There's no sense having the front supports with okay supports and the back with the better supports
|
|
|
|
Post by Vermin King on Jul 4, 2017 11:31:59 GMT -9
|
|
|
|
Post by Vermin King on Jul 4, 2017 16:00:20 GMT -9
And can't get my computers and printer to work and play well together. They aren't talking. Did all kinds of network resets and still no luck
|
|
|
|
Post by Vermin King on Jul 4, 2017 17:05:02 GMT -9
And an hour to find a cord and get the printer recognized, but ... Success!
Since I have Krylon now, I should have these clear-coated, and probably scored tonight
|
|
|
|
Post by Vermin King on Jul 5, 2017 9:31:41 GMT -9
Luckily, my inconsiderate neighbors were shooting off fireworks until 1:30 in the morning last night, so I made some progress. 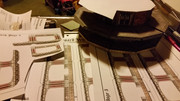 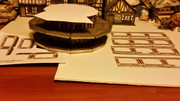  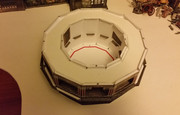 I knew that things should work, but I trimmed the insert tabs for the porch roof and that made insertion much easier. Insert all three sections and then glue them together. I used the needle nosed pliers to make sure the glue was secure. Then proceed to the supports. There are four of these and I originally thought to do one section, then proceed to the next, but I soon realized that it is better to do all the sections at once, glued together and along the porch foundation. This came out slightly long when I got to the last two sections, so I had to do some surgery. While fresh in my mind, I shortened each section slightly (99.71% of original length). Should do the trick. Then you glue the top support tabs to the roof with the tabs flush against the eaves fold. Finally, glue the eaves down over the tabs. Pretty darned sturdy I'll finish gluing down the eaves tonight and install the balcony supports. Comparing files, they should be the correct height, but we will see. Then I'll print off the roof dome and prep the pages |
|
|
|
Post by Vermin King on Jul 5, 2017 14:53:16 GMT -9
Glued down the eaves and installed the balcony supports. It looks pretty okay to me 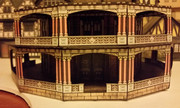 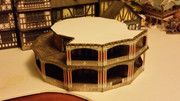  Even though it is going have lots of doo-hickeys on the roof, they are all kinda dark, as is. I think I need to add some color in the roof/cupola/dormer parts. What's the point of having an impressive building that emanates 'dull brown'. I'm going to have to try some things out tonight before I print anything else out |
|
|
|
Post by Vermin King on Jul 5, 2017 16:25:52 GMT -9
 As the dome roof is based on Chris's Habdome, I want to pay homage to the design. I started playing with the tile pattern from the Coaching Inn, converting some of the tiles to slate blue and others to harvest gold, some to very light grey and some to darker slate blue. No, I'm not replicating the pattern, but doing something similar. It would be a pain in the neck, but do-able, but that makes the dome look much less like Chris's dome. But a recolor of the dome pieces would still maintain the look. Keeping roughly the same brightness, give them a slight bluish tint. And from the image above, I could give each section a very light blue-grey trim. I considered replacing the trim with copper or bronze foil, but it doesn't really fit with the rest of the building. A rather doubtful future project would be to do the metal trim treatment on the whole thing. I think the correct answer is the blue tint and light trim. I think I will keep the brown roof on the dormer pieces, but we'll just have to see |
|
|
|
Post by Vermin King on Jul 5, 2017 17:40:56 GMT -9
Gonna think on this overnight, but I think this is close to how I see it 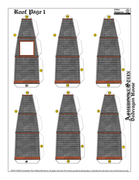 |
|
|
|
Post by oldschooldm on Jul 6, 2017 6:00:50 GMT -9
This is looking wonderful! I do have one question - why the partial second floor balcony? It looks heavy and a bit excessive to me. Is it a part of the reference?
Thanks for attacking this model!
|
|
|
|
Post by Vermin King on Jul 6, 2017 7:07:38 GMT -9
I forget who suggested the additional balcony on the third floor, but since I am going to mod Tommygun's zeppelin mast on the back (started work on it last night), I thought it could keep the whole thing from looking 'back heavy'. To keep the balcony solid, I added the supports. At first I thought I would aim for a French Quarter look, but now I think it has more of a feel of a West Texas cattle baron's residence. I'm not sure what 'feel' it will have once I get the overly busy roof put on. The dome itself is going to have two floors, and then the cupola on top. The first roof level will have the large dormers all around. Two of those will have doors to the balcony, and two will be chimney bases. The second level will have the smaller round-window dormers. I'm still on the fence about doing dormers on each face. One of the nice things of having dry-fitting as part of my normal way of doing things, is that I can make half of them to start. I'll set them all on the front half and see how it looks, then I'll spread them out and see how that looks. I think I'll end up doing all of them. Steampunkish buildings tend to look busy, and I'm sure this one will |
|