|
|
Post by cowboycentaur on Jul 26, 2017 19:08:40 GMT -9
beautiful!!! Down to the lanterns 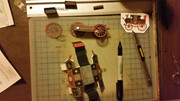 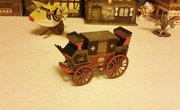 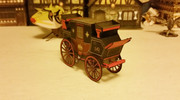 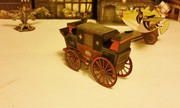 I'll have to do them tomorrow. I'm glad I added some width to it. Otherwise it would really look narrow. I might widen it a touch more, and then it is on the steampunk version |
|
|
|
Post by nullpointer on Jul 28, 2017 15:20:39 GMT -9
This is amazing and beautiful!! Are you going to put the mods into a PDF when you finish?
|
|
|
|
Post by Vermin King on Jul 28, 2017 15:22:39 GMT -9
Too colorful? 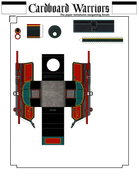 It's odd that a couple changes on the sides, and widening the coach, with the modifications for steam, created a situation that it's easier to create all new panels than to resize the old panels. Resizing was creating a whole lot of artifacts, too. Better to go the long route ... shorter in the long run Oh, yeah, I was going to have a cylindrical boiler inside the rear box, pretty much filling the space, with the back end having an opening to access. I am still going to have an opening, but the boiler wall is going to be flat. I need to add some gauges, valves and pipes. |
|
|
|
Post by Vermin King on Jul 28, 2017 20:09:23 GMT -9
Babysitting the farm this weekend, so wanted to have a preliminary version printed to work on and see what changes might be necessary. As the page is rather full, I'll probably move some of this to page two. I should probably have a handrail on the back, too. Also need to decide on a steering mechanism.  I might accidentally finish this on time |
|
|
|
Post by nullpointer on Jul 29, 2017 7:52:44 GMT -9
Also need to decide on a steering mechanism. How about an actual functional steering mechanism? The eyelets on the purple piece would be attached to "reins" that could be pulled back and fourth to actuate it. 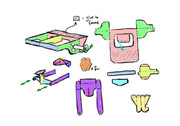 |
|
|
|
Post by Vermin King on Jul 30, 2017 15:48:27 GMT -9
I would use the flat axle for a steerable front end, like I used on the Vardo and the Tudor Coach. I was thinking that few found it as nice an add-on as I did, so I decided to not use it here, to speed up the process. Unfortunately, my 'babysitting the farm' weekend didn't go as planned. I got no building done. I also was hoping my grandson (my first) would be born this weekend. Didn't happen, but Warren Jameson is going to be induced tomorrow morning. So, I'll be doing another two-hour trip tomorrow to hopefully be there when he arrives. I hope to get the body built tonight, but I'm being dragged in a few directions.
When I said 'steering mechanism', I was trying to decide on whether to do a wheel, or a handle-bar, or just four spokes at the top of a shaft going through the floorboard to the undercarriage extension. My main goal is to get this done, but I don't see how I can finish before Tuesday morning. Not sure I'll be back by then.
If it isn't done on time, it will still get done soon. I need it for the Ashbrooke-Stein project.
|
|
|
|
Post by nullpointer on Jul 31, 2017 6:55:34 GMT -9
I also was hoping my grandson (my first) would be born this weekend. When I said 'steering mechanism', <snip> Babies are known to be terrible with scheduling. For steering control, how about just some levers popping up right next to where the driver is sitting, to make something of an old-timey version of this? |
|
|
|
Post by Vermin King on Aug 1, 2017 5:06:20 GMT -9
Gonna be a rough day. Warren Jameson was born at 9:07 last night by emergency C-section. Wasn't able to get in to see him and his parents until 11:55. Talk about a long trip home ... 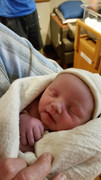 Of course, this means there will have to be a Jameson version of the steam coach |
|
|
|
Post by Vermin King on Aug 2, 2017 4:12:10 GMT -9
And making it lower profile, I have to adjust the size of the wheels, now. As I mentioned earlier, I have been adding doo-dads, governors, gauges, valves, flanges, to add to the steampunkishness. The Ashbrooke-Stein version is a tad bit on the colorful side. So after working out the steering handlebars, I did a blue version, a maroon version, and the Jameson version in honor of my new grandson. Also, since many of the paintings of the actual steam carriages had 'Royal Patent' painted along the rear box, I had to get that worked up. I don't like doing tedious stuff like that, but when I get into it, I really try to do it well, and sometimes get carried away.
|
|
|
|
Post by marzman on Aug 2, 2017 13:22:16 GMT -9
Congrats on the G-Son
|
|
|
|
Post by Vermin King on Aug 2, 2017 13:50:40 GMT -9
Thanks. I did get a little building on this done at lunch today, and I have a couple panels that would be easier to handle if they were stretched a bit, so I'm going to adjust the files tonight before I forget which ones need adjusting
|
|
|
|
Post by Vermin King on Aug 2, 2017 19:48:54 GMT -9
|
|
|
|
Post by Vermin King on Aug 3, 2017 17:31:33 GMT -9
Instead of printing things at lunch, I had work to get done. Tonight, I got the new boiler box done on the blue version and the steering mechanism. I think I have things laid out for what should be the final layout. Printing and clear coating tonight. Maybe even scoring. Maybe 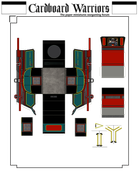 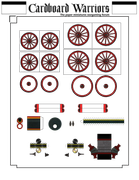 steam_coach_blue.pdf steam_coach_blue.pdf (1.13 MB) steam_coach_p2.pdf (2.09 MB) Dangit! I forgot to do the back railings... remembered when I sat down to score. So I will work that out, print and clear coat, but I will be in bed before it is completely dry I will take photos of the build and create a walk-through file. |
|
|
|
Post by Vermin King on Aug 4, 2017 5:16:52 GMT -9
Took longer to do the railing than anticipated, then forgot to send it to the pdf. So, I got up early to fix the pdf and print   steam_coach_blue.pdf steam_coach_blue.pdf (1.08 MB) steam_coach_p2.pdf (2.09 MB) The railing is a fold-over that glues onto the back. It's a wide railing tube with a panel in between the uprights. This makes it a bit more solid, but there is still space under the panel to allow for bases. Hope to get the scoring done at lunch and start the build. Order is a bit different since I moved the undercarriage tabs off the side panels. On my test build, it was difficult to keep the undercarriage extensions from getting creases while working. Now the two end pieces get glued in first, and the upper center pieces just fold over and glued over the lower assembly. Easier build and cleaner. I really like the new firebox and controls |
|
|
|
Post by Vermin King on Aug 4, 2017 13:45:27 GMT -9
I've got the 'press flat' parts drying. I have a goal of getting this built in one night, but I do have to mow and grab dinner. There is still one tab that needs moved, but I'm making a list so that when this is built, I can just go in and do the changes all at one time
And real life got in the way again. And I may be doing a road trip tomorrow (hopefully Sunday, though). And good old gas prices jumped $.30 over the last two days
|
|
|
|
Post by greypilgrim on Aug 4, 2017 22:12:06 GMT -9
The Work on the coach is looking good.
Understand about the gas prices - ours went up .30 last week, but have since crept back down a nickle.
|
|
|
|
Post by Vermin King on Aug 5, 2017 6:12:32 GMT -9
Edged and built the main body this AM 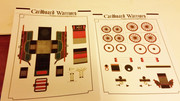 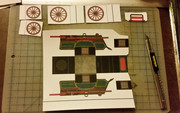 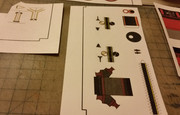 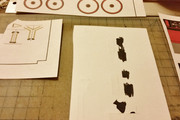 The backs of the top and bottom parts of the lamps need to be blackened. 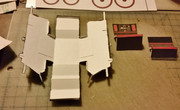 The bracket for the footplate also needs blackened on the back 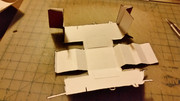 It is important to pre-shape the end pieces before gluing. Attach to one side, then the other. 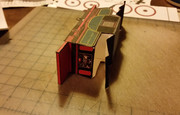 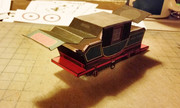 Then the upper center pieces get glued down 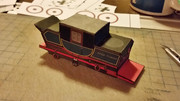 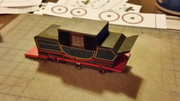 Gotta do some running around done, and I'm waiting to hear whether today or tomorrow works best to visit my grandson On the engineer's platform, I still ended up having a crease on one side so I am going to add front and back additional metal plates to strengthen those areas. These should be glued on before you start building, in order to prevent creases |
|
|
|
Post by Vermin King on Aug 6, 2017 5:16:26 GMT -9
Got it built and most of the files tweaked 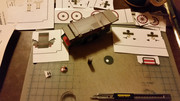 Glued the axles in, and started on the boiler. I shouldn't have glued all four attachment points. It would be better to glue the wheels onto the axles before the axles are fixed, to make it easier to get all four wheels touching the ground 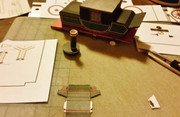 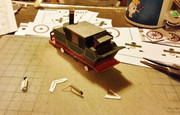 And PostImage stopped uploading... |
|
|
|
Post by Vermin King on Aug 6, 2017 5:32:44 GMT -9
|
|
|
|
Post by marzman on Aug 6, 2017 10:55:15 GMT -9
That looks just awesome! I can see the FAT merchant chuffing along while everyone else is horse-drawn. . .
Maybe with a little signage if its in a fantasy setting. . .
|
|
|
|
Post by Vermin King on Aug 6, 2017 16:50:16 GMT -9
A considerable amount of this is from Gurney's London/Bath steam carriage, but I didn't add that, because it is substantially different, and I didn't want too many comparisons to his carriage. Also because cleaning up lettering takes forever
|
|
|
|
Post by Vermin King on Aug 7, 2017 17:07:43 GMT -9
Okay, got the instruction files done!
|
|
|
|
Post by Vermin King on Aug 8, 2017 13:11:29 GMT -9
That looks just awesome! I can see the FAT merchant chuffing along while everyone else is horse-drawn. . . Maybe with a little signage if its in a fantasy setting. . . These wouldn't have much space for wares, but I've seen illustrations of them pulling a traditional coach behind (the first tandem buses). I suppose it could be pulling a salesman's wagon. I want to get these out of the way so I can get back to the Dodecagon House tonight. Here are the four versions along with the undercarriage file. 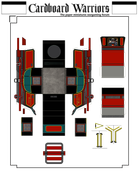 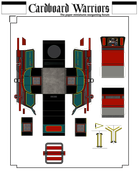 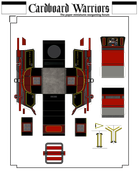 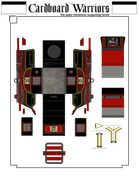  I still have to go back and do the simpler version of the mail coach. It probably should be reduced to about 92%, too, but that must wait. I still want to do the kitbash of Tommygun's zeppelin and Eric's air ship, but today I had a stroke of madness or genius regarding the landing mast. My big issue on the merger of the two airships is the connection of the two. I don't want to do rusty square girders forming a rectangular frame. I think it should be more 'organic', and I have a new idea on that as well |
|
|
|
Post by Vermin King on Aug 8, 2017 17:36:14 GMT -9
There is a problem with taking a break from a project. I had a new template for the dormers and I can't find it on either computer. I should have given up earlier and built it again. Only I can't find the panel I was going to put under the windows. It was a pain to make, but I have to do it again. Razzum frazzum. old squirmydad, to size the zeppelin envelope to be appropriately sized to use the steam launch as a gondola, I need to build the steam launch first, with a few changes, but I can take photos of the build to put together instructions, if you'd like. |
|
|
|
Post by Vermin King on Aug 9, 2017 5:59:41 GMT -9
Wanted to show the graphic work I did last night. New versus Old. 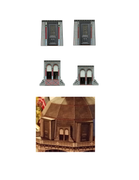 As seen in the crop of my photo of the old dormers, the colors were too washed out. The window dormers needed to be taller, but lengthening them made them too spindly, so I took the wall panels of the Armor-Stiner House to be a wall under the windows. Why I was so ticked off was that it took me almost an hour to create the panel the first time. Last night it only took about half that -- experience. I've got the sides done for the door dormers so that they will abut the roof closer, rather than jutting out. I hope to get the window geometry done at lunch today. Trying to decide whether to add a tab at the bottom front of the dormers. I think it may be easier to edge-glue the front and back together without the tab, but that might freak some builders out a bit, so I'll probably add the tabs ... and then cut them off on my build |
|
|
|
Post by squirmydad on Aug 9, 2017 8:43:29 GMT -9
There is a problem with taking a break from a project. I had a new template for the dormers and I can't find it on either computer. I should have given up earlier and built it again. Only I can't find the panel I was going to put under the windows. It was a pain to make, but I have to do it again. Razzum frazzum. old squirmydad, to size the zeppelin envelope to be appropriately sized to use the steam launch as a gondola, I need to build the steam launch first, with a few changes, but I can take photos of the build to put together instructions, if you'd like. This might help; Steamlaunch build picsThey are sort of in order, LMK if you can't view them this way. |
|
|
|
Post by Vermin King on Aug 9, 2017 9:11:12 GMT -9
They show just fine, sir
Thanks
|
|
|
|
Post by Vermin King on Aug 9, 2017 17:02:19 GMT -9
Only did the first page of dormers, because I wanted to double check dimensions, and I need to adjust (instead of slicing off the extraneous) 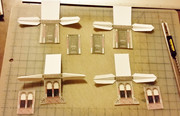 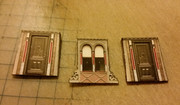 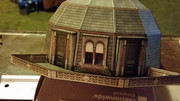 The backs are 3-5 pixels too long, and the sides about 8. Easy enough fix. Aesthetically much better than my first dormers. I think I will need to take a little more time with the round dormers, now. I think it will be time well spent |
|
|
|
Post by Vermin King on Aug 10, 2017 5:02:05 GMT -9
I've printed off the remaining dormers from this level and I'm letting the clear coat dry. On the round window dormers on the next level, I've tried a couple different repaints, but I'm not happy with them, yet. I thought I'd try carrying over the pink from the little panel under the window dormers, the cupola and the porch detail, but it seems too much. On the actual house there is a red ring around the round windows. I want to carry that over. On Chris's dormers, the windows are surrounded by a ring that I thought I'd try making a goldish brass. Red, pink and yellow is too much. I'm going to play with shading.
Or I might just totally re-do the thing. Keep the geometry, but bigger windows, different trim, then reduce the whole dormer piece to 90%. I'm thinking of making the roof look more like brass or copper sheeting.
|
|
|
|
Post by Vermin King on Aug 10, 2017 13:08:01 GMT -9
Chimney base checks out dimensionally. So the three types of dormers for this level are all good. 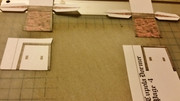 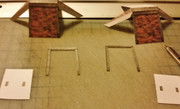 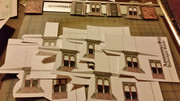 Now it's time to finish up the rest of the dormers ... |
|