|
|
Post by Vermin King on Aug 11, 2017 5:16:54 GMT -9
I'm going to adjust the files to have shading around the decorative base of the window units. Tedious cutting and edging. I thought I'd have these on the building last night, but spent too much time on the phone and got engrossed in the Secrets of the Dead: Richard III episode. 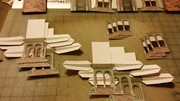 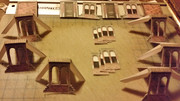 Current plan is to get these glued up at lunch and applied to the building after work. I think for most folks, having the detail-work surrounded by shadow is a better solution. If you want to be more precise, you can cut it closer. |
|
|
|
Post by Vermin King on Aug 11, 2017 7:42:38 GMT -9
I probably should have eaten at lunch ...  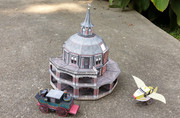 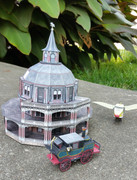 This will not be the final tileset, nor is the feline available in paper EDIT-- fixed the three Dormer files, and have created a new window for the upper round window dormers. The new window really captures the feel of Armor-Stiner round windows, but I'm having an issue deciding on the actual glass in the window frame. I also have to figure out the roof texture. I really thought that rough bronze would be the correct one, but it just doesn't look right. Here are the balcony-level dormers: 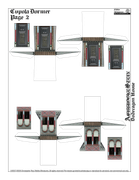 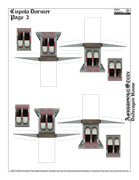 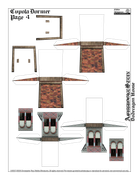 |
|
|
|
Post by Vermin King on Aug 11, 2017 18:00:41 GMT -9
I haven't printed yet ... I think the round window dormers are close, but I'm just not quite sure. 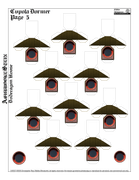 I'm actually tempted to use my roof texture on the cupola roof, but the month is almost half done. Anyone working on stuff for Papercuts? |
|
|
|
Post by Vermin King on Aug 13, 2017 17:22:36 GMT -9
Ouch. I'd hoped to hear some feedback on that roof. I'm still undecided. Between funerals, avoiding the Missouri State Fair, and watching the new grandson so Michael and Darlene could get some work done, I didn't have much time to work on this. I did finalize the chimneys with slight changes to the geometry and cleaner textures. I didn't try other roof textures on the round window dormers, hoping for some suggestions.
I did start my modifications of Squirmydad's Steamlaunch for the gondola of the airship. To get this totally fixed up, I need to 1) make sure I can maximize the effect of the launch, 2) determine the size I need for Tommygun's zeppelin envelope, and 3) get the geometry right (and textures) for combining the two.
The landing mast/boiler house is not going to connect to the rear of the house now. One of the rear steps from the porch is now going to lead to a covered walkway to the boiler house. The main access for airship passengers is from the porch roof, going across the roof of the covered walkway. I don't know if you have ever visited an inclined railway. The rail cars on parallel tracks are connected by a cable at the top of the incline. Each car is the counter-weight for the other car. I envision elevators using this type of system, when one is at the top, the other is at the bottom. The upper entry will be on the landing platform, the lower will be at the porch roof level, all powered from the attached boiler house.
|
|
|
|
Post by Vermin King on Aug 14, 2017 16:33:23 GMT -9
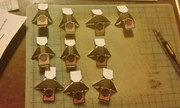 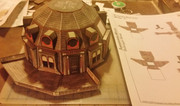 Before re-design, I had these at 85% instead of 100%. 85% would have been better. On to the chimneys EDIT -- So I wouldn't forget, I went back and reduced the round window dormers. 85% makes the tabs fiddly, so I reduced to 90% |
|
|
|
Post by Vermin King on Aug 15, 2017 7:30:00 GMT -9
As nice wheels make car models nicer, nice chimneys improve the look of a building. Since multiple folks have told me that my chimneys are unbuildable, I decided to build one over lunch and do a tutorial. The large box that connects to the roof is simple enough, except that it does need one word of explanation. The front 'tab' just gets folded into the box before gluing it up. By having a crease along the bottom edge, it helps to keep the chimney face square. Now for the actual chimney. Cut out the cross-shaped piece, and fold tabs and develop the shape. Pre-shaping is important. Needle nose pliers are beneficial for the long tabs along the chimney 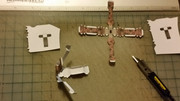 After edging, gradually work from top to bottom for one side. 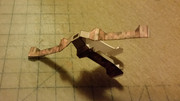 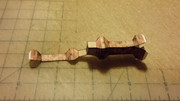 Then work your way down the other side 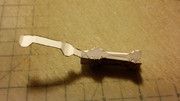 This then gets glued onto the box. You can leave it as is or you can add Chris's chimney cap 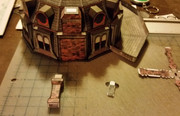 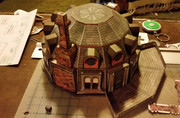 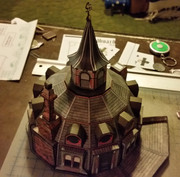 Repeat for the chimney on the other side of the roof. Not as easy as a square tube, but not all that difficult, and it definitely looks better than a plain square tube |
|
|
|
Post by kgstanley81 on Aug 15, 2017 8:16:42 GMT -9
Everything is coming along so nicely
|
|
|
|
Post by Vermin King on Aug 15, 2017 8:33:33 GMT -9
I do have a little problem. Remember when I was struggling with the steps, until I got something that I thought was workable? I put the parts in a box so that I wouldn't lose them. Which box and where is it? Aargh
In the photos, you will notice that I take the roof off to install the dormers and chimneys. I don't know why I started off with the idea of building units that get glued together at the end, but it works. I had no choice but to glue the porches to the main building, but being able to take the cupola off the roof and the roof off the rest of the building has greatly simplified construction
|
|
|
|
Post by Vermin King on Aug 15, 2017 13:10:05 GMT -9
|
|
|
|
Post by Vermin King on Aug 15, 2017 17:31:19 GMT -9
Lost momentum early this evening. I know better than to try to do any serious building when my eyes are tired. On the other hand, I can enlarge the view in Gimp to be working on the Steam Launch. As I originally saw this as a gondola for a zeppelin, I don't think this is going to happen. I knew this was going to be big, but it is still big after I played with it. Earlier, I'd reduced most of the body parts to 85%. The upper housings remain at 100%. Less walking room between the walls, but that's okay. The deck itself is 10.25 inches long now, not counting the propeller on the back. The house is right around 11 inches tall. To get the zeppelin proportioned right to the gondola, it would need to be around 19 inches long, which would put it at 6.5 inches in diameter. Then connection framework. Zeppelin is getting very doubtful. Now that I'm seeing dimensions, my rough concept of the landing platform/boiler house is totally not going to work. Parts may work, but until this is built, I don't know how much of it can be kept for the new platform. Monica's old warehouse was going to be the basis for this, edificiosdepapel.blogspot.com.br/2014/09/maqueta-de-papel-1493-antiguo-almacen.html, with an extra wing, giving it a 'T' footprint. The center of the 'T' extending towards one of the ends was going to be the location of the mast/elevators. I found views of Victorian greenhouses that gave me the metalwork to support the platform. But that was before I realized how large the platform needed to be. I still plan on using the old warehouse as the base of the landing platform, but it isn't going to be as tall as originally planned. We'll just have to see how it plays out |
|
|
|
Post by squirmydad on Aug 15, 2017 18:26:34 GMT -9
Yes, just sent a reply, hope it helps. That house looks magnificent.  |
|
|
|
Post by Vermin King on Aug 16, 2017 3:27:41 GMT -9
Thank you. And I had a very interesting idea as I was going to sleep last night for getting this all worked together. I just need to get to the design work tonight before I forget what I dreamed up
|
|
|
|
Post by Vermin King on Aug 16, 2017 11:30:15 GMT -9
Well, my lunch appointment cancelled, so I decided I wanted the Dodecagon House done. So, stairs at all three porch openings. 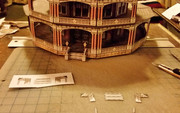 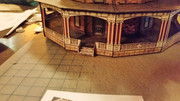 Biggest decision was which fixture to put on the front steps. Decided to just go with the lamps from the Armor-Stiner House. On to the Steam Launch! |
|
|
|
Post by missileer on Aug 16, 2017 12:08:36 GMT -9
VK,
This is mind numbing! I can't read as fast as you design and build. Fantastic project!
|
|
|
|
Post by Vermin King on Aug 16, 2017 13:05:56 GMT -9
Thanks
And then there's the other projects that never get done.
This was one that I really wanted to do. A lot of it went together quickly. There was some adjusting that had to take place along the way. But I'm happy with it.
And since Taylor has disappeared, it isn't going in her office any more, but will have a place of honor in my office.
|
|
|
|
Post by Vermin King on Aug 16, 2017 18:21:59 GMT -9
Got started on the Steam Launch tonight. Part of the revisions was even more laminated details, so there isn't a whole lot to show just yet. My current plan is to build the top, then the bottom, and then sandwich a layer of fedex envelope in between. I don't really think it will be necessary, but it should make it more sturdy. I had originally planned on going ahead and gluing it to the base on page 11 to start, but then questioned whether I might end up causing other problems down the road. The mailer soaked up Sharpie ink like crazy, so I just went ahead and used black enamel paint for edging it
I'm not sure of the geometry. I'm hoping the housing underneath will take all the weight, instead of it partially resting on those rudders
|
|
|
|
Post by Vermin King on Aug 17, 2017 16:43:04 GMT -9
|
|
|
|
Post by missileer on Aug 17, 2017 18:26:09 GMT -9
The way this project is shaping up, you're gonna need a bigger office!
|
|
|
|
Post by Vermin King on Aug 17, 2017 18:59:46 GMT -9
Back when my office was my son's bedroom, we added storage by putting shelves all the way around, 15 inches down from the ceiling.
Now that it is my office, I moved my office furniture in, with the hutches above the desks. I have models on the shelves and on top of the hutches.
My cats learned to get up there a few months back and I lost some models, so I gave a bunch away. It's two or three months without them getting up there, so maybe they will be safe.
I got a bit more done on the steamlaunch. The outer walls are printed off and clear-coated, with the lamination details added. I'd hoped to get them glued tonight, but the clear coat needs to dry a bit longer before scoring.
At this point, I don't think I will be making any more changes to the files. Eric mentioned that he originally planned on putting a cross-piece on the mast for signal flag rigging. I doubt I will do the rigging, but I did add a cross-piece. I also lengthened the mast so that it extends through a hole in the boiler roof and glues to the inner floor of the boiler. Just to make it a tad sturdier.
I might make a new heavy card layer with extensions to be wrapped by the rudder supports. That is really my only structural concern. Of course, I could always do a support under the main body to raise the model enough to keep the rudders from touching. I'll figure it out. Since they would be sandwiched between the large hull piece and the heavy card layer, I could just add some upper tabs. So many solutions, so little time
|
|
|
|
Post by squirmydad on Aug 17, 2017 19:19:32 GMT -9
Nice to see another one being built.  |
|
|
|
Post by Vermin King on Aug 18, 2017 4:03:06 GMT -9
Nice to see another one being built.  I know the feeling. I thought the Coaching Inn would be useful, even as separate pieces. I've had a couple questions about its construction, but... The Tudor Coach, I thought would be useful. Nada. I have seen the Vardo, several of them. Makes me smile. Woke up last night and couldn't get back to sleep, so I scored the walls and rough cut the pieces. I also realized the shelves are about 2 feet down from the ceiling. 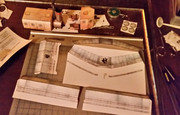 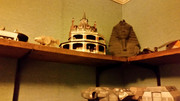 |
|
|
|
Post by nullpointer on Aug 18, 2017 6:44:21 GMT -9
Got started gluing the units together. Didn't get as far as I'd hoped tonight, but there is still night left. Only I still want to do some extra laminated pieces for a slight change I made in the sides, but the sides need to get glued tonight and pressed. There are elements of this model that are subtle that you don't notice until you build it. Thanks for the Steamlaunch, Eric. I think the mansion should have a boarding ramp or mooring for which to dock the Steamlaunch! |
|
|
|
Post by Vermin King on Aug 18, 2017 8:50:03 GMT -9
I'm still planning on doing that, but time is starting to run a bit tight. Got some more done before work today, during my morning break and at lunch. Eric, has this nice metal trim that turns into tabs that get hidden when this goes together, so I put an additional strip of it at the bottom of the walls, and then made trim pieces to give it a little depth (and cover any gaps and errors). I'm glad I chose to do this. I had a bit of a struggle getting the walls on securely, even though I had tried to pre-shape everything. The deck had more curvature than I'd liked, so I went ahead and glued the heavy cardstock onto the bottom of the deck, completely covering that metal trim/tab, and all the original rivets. Discovered some gaps as I put the additional trim pieces on, and that the tops of the walls were showing a little wear, so I went back and used black acrylic paint to clean up the heavy card join. Used Sharpie to hit the tops of the walls. With everything sitting flat, I glued on the upper housings.  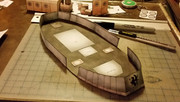 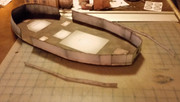 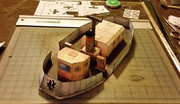 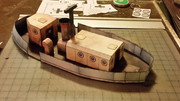 |
|
|
|
Post by missileer on Aug 18, 2017 10:06:11 GMT -9
This is going a lot faster than anything I have built. That craft is looking very good! Incidentally, I am building the Tudor slanted body with some added details and plan to build the straight body and the Fodor.
|
|
|
|
Post by Vermin King on Aug 18, 2017 10:11:52 GMT -9
This is going a lot faster than anything I have built. That craft is looking very good! Incidentally, I am building the Tudor slanted body with some added details and plan to build the straight body and the Fodor. I'm anxious to see them. |
|
|
|
Post by Vermin King on Aug 18, 2017 13:46:21 GMT -9
Well, after work I printed off the remaining three pages, pages 8, 9, and 10, the lower housing. I'm still concerned about the rudder supports, so I am cutting out another piece of heavy mailer envelope. I traced out the hull template (page 11) and the rudder supports (page 4) and made little wings on this one. I'll wrap the supports around it before attaching the rudders. Probably not necessary, but I'd rather not 'wish I'd done it.' We've all been there. More than likely, it's overkill, but better safe than sorry. With everything clear coated, it is possible that I could finish this tonight, but probably not until tomorrow, then it's back to the boiler house/landing platform. Just less than two weeks left. Have to finish the launch, work up and build the boiler house/ landing platform, figure out tiles, work on some more steampunkish people, and landscape. As far as the landscape, I wanted a few of the MadunTwoSwords larger trees, maduntwoswords.deviantart.com/gallery/56076291/Inglemere, and then I was going to have elegant rows of ornamental trees from web.archive.org/web/20130611210702/http://www.facet.jp/extra01.html. Under a time crunch, those little things always bite you |
|
|
|
Post by Vermin King on Aug 18, 2017 18:42:24 GMT -9
With the 'winged' heavy card layer, I decided it would be easier and cleaner to split the supports, top and bottom. I've got everything cut out now, but not edged or glued. 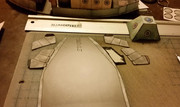 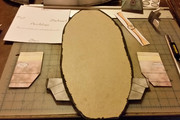 Shouldn't take too long to wrap this up tomorrow. Then it is on to the boiler house/landing platform (no sweat, just have to design and build it) |
|
|
|
Post by Vermin King on Aug 19, 2017 3:54:38 GMT -9
|
|
|
|
Post by Vermin King on Aug 19, 2017 8:54:38 GMT -9
After lunch, I will finish this up. Glue the deck to the hull (which means I'll have to keep applying pressure due to the odd shapes), and then the rudders and propeller. I like how my boiler house is shaping up. Changing some of the textures to the same brick that I used in the chimney. The landing platform was originally intended to be the roof of a workshop/warehouse, but now I am leaning towards just having it as a raised earthwork area surrounded by retaining walls similar to this 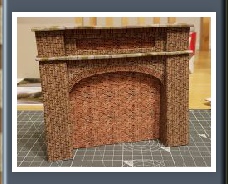 , with ramps to reach the top. If I get time to do all those trees that I picture, having the landing platform raised would be a good thing. |
|
|
|
Post by Vermin King on Aug 19, 2017 11:16:02 GMT -9
|
|